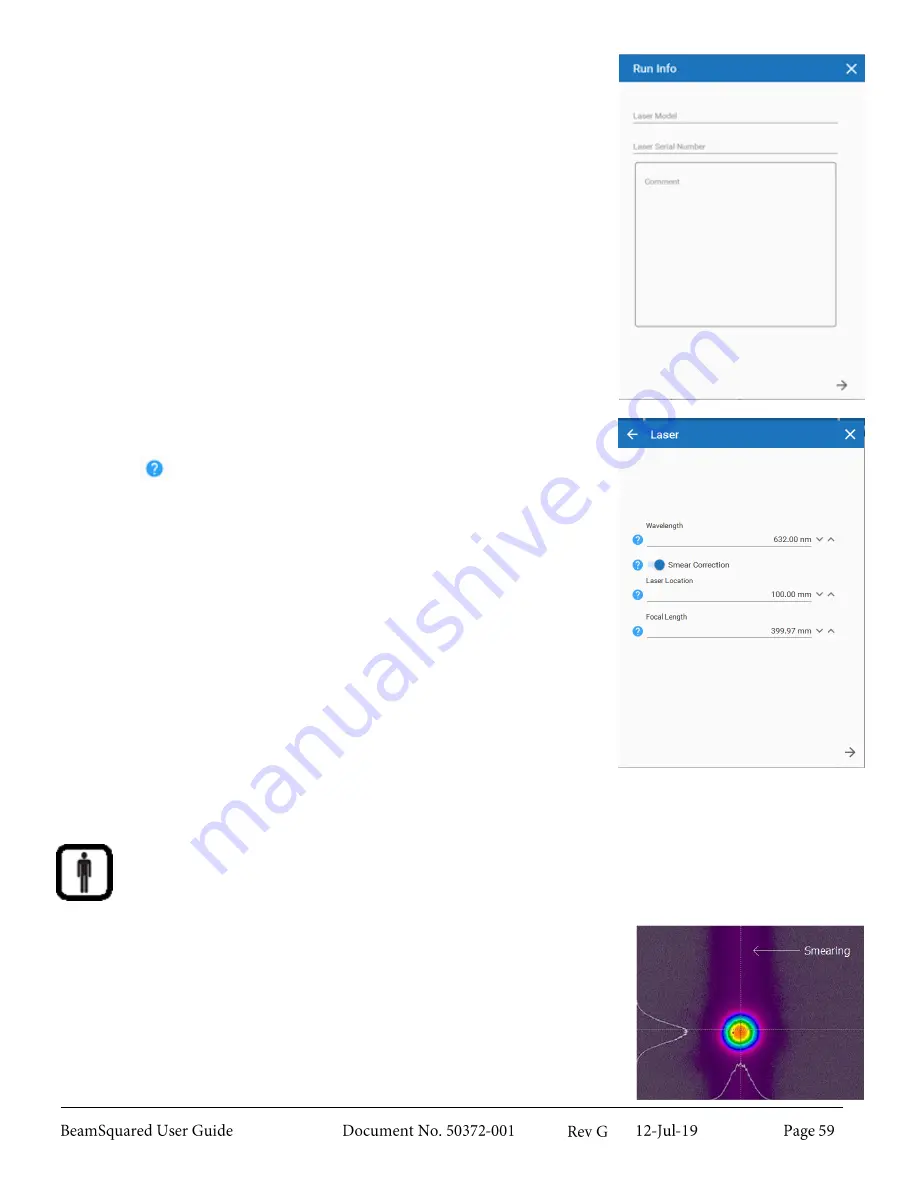
4.
The
Run Info
screen that appears is optional. Values entered are
included on the report. Select the arrow at the bottom of the
window to continue.
5.
The
Laser
screen prompts you to enter information on the laser.
These values must be correct to obtain accurate results. Hover over
the
to get a description about each entry. This information
must be entered for each laser under analysis. Once entered select
the arrow to continue.
a.
Enter the
Wavelength
to get accurate measurements.
b.
If you encounter smearing* in the image turn on
Smear
Correction
.
c.
Enter a value of zero for the
Laser Location
to locate the
waist relative to the BeamSquared reference datum (the
input aperture on the red BeamSquared case for automatic
mode or the lens for manual mode). To locate the waist
relative to the laser, enter the distance from the
BeamSquared reference datum to the laser faceplate.
d.
The Automated BeamSquared system collects the Focal
Length from the lens cassette RFID feature and
automatically corrects the value based on the entered
wavelength.
Enter the
Focal Length
of the lens used to create the artificial beam waist in millimeters.
* Smearing manifests as a streak along the vertical axis of the camera. It is
caused by an excessive amount of incident power on the sensor, typically as
a result of a poor match between the laser wavelength and the camera
sensor’s quantum efficiency. Silicon-based sensors have high quantum
efficiency at visible wavelengths, and InGaAs sensors are most efficient in the
NIR and IR range. Therefore, silicon sensors tend to experience smearing in
the NIR and IR ranges while InGaAs sensors experience it in the visible.
Содержание BeamSquared
Страница 10: ......
Страница 15: ...BeamSquared Optical Train Dimensions 1 4 ...
Страница 75: ...400mm Focal Length Lens M2 1 500mm Focal Length Lens M2 1 ...
Страница 87: ......


