VIDEO BACKUP
NETWORK BACKUP
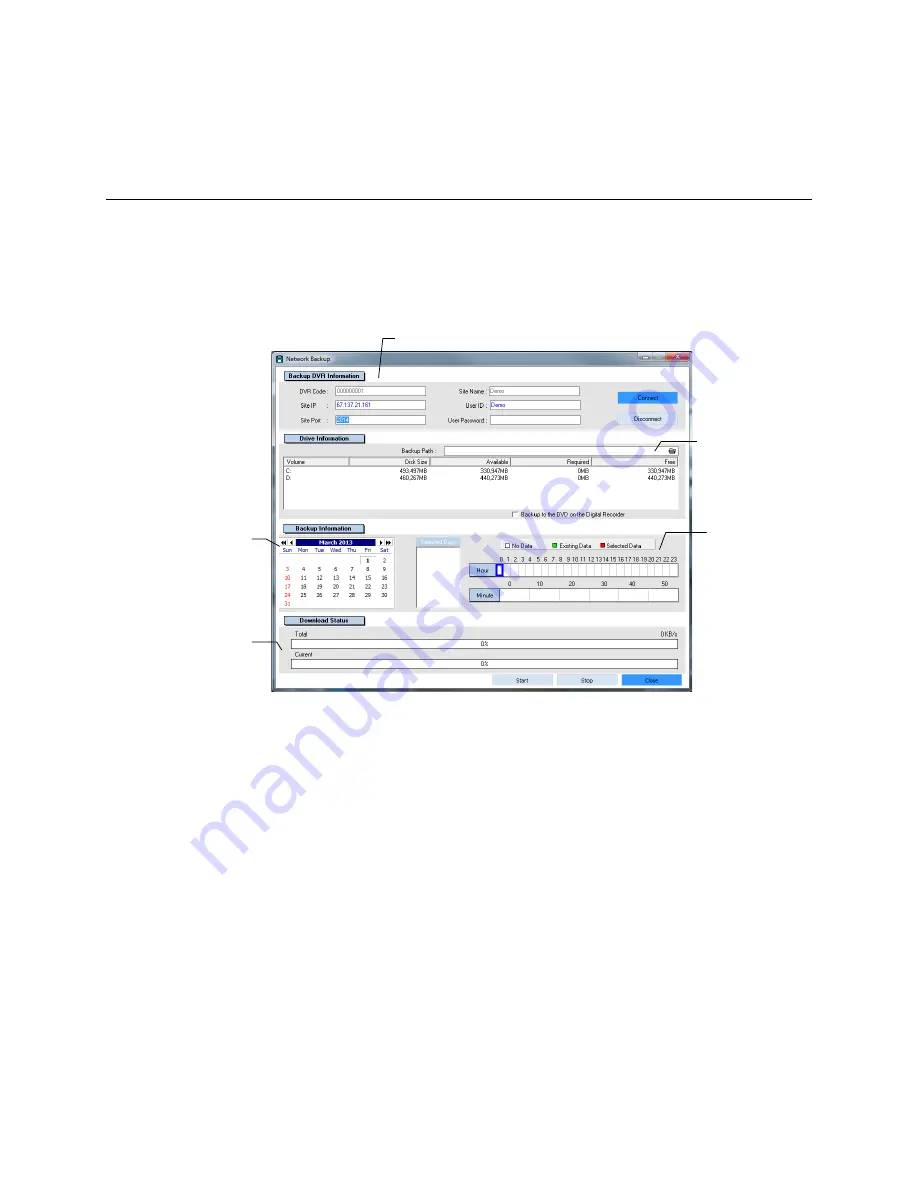
The Network Backup window allows you to backup all cameras on the selected recorder to a local or
network drive.
Professional Recorders (X, Xr, H, N-Series)
Backing up All Cameras
1. Open the
Network Backup
window. Right-click your desired recorder on the
Server List
and then
click
Network Backup
.
2. If necessary, select the desired recorder on the
Site Name
list and type a
User ID
and
Password
.
3. Click
Connect
.
4. Click a date on the calendar. Browse to preceding months/years using the arrows.
5. Click the
Hour
you want to backup, and then select the
Minute
(shown in ten-minute blocks).
Selected blocks of time will turn red. To clear a block of time, click it again.
6. Click the
Backup Path
folder icon to browse to the network storage location.
7. Click
Start
. The
Download Status
section will display backup progress
8. To stop a backup already in progress, click
Stop
.
Note
If the amount of video exceeds the storage capacity of the selected media, an error message
will display. If this happens, reduce the amount of video in the backup or select a backup
media with a larger storage capacity.
Select Day
Select Backup
Storage Location
Indicates
Backup
Progress
Selected Site Information
Recorded Video
48
32541AB
Содержание OE-RWSR2
Страница 2: ...2 32541AB...
Страница 12: ...Tower Rear Panel III 12 32541AB...


