HOBO Single Channel Thermocouple Data Logger (UX100-014M) Manual
2.
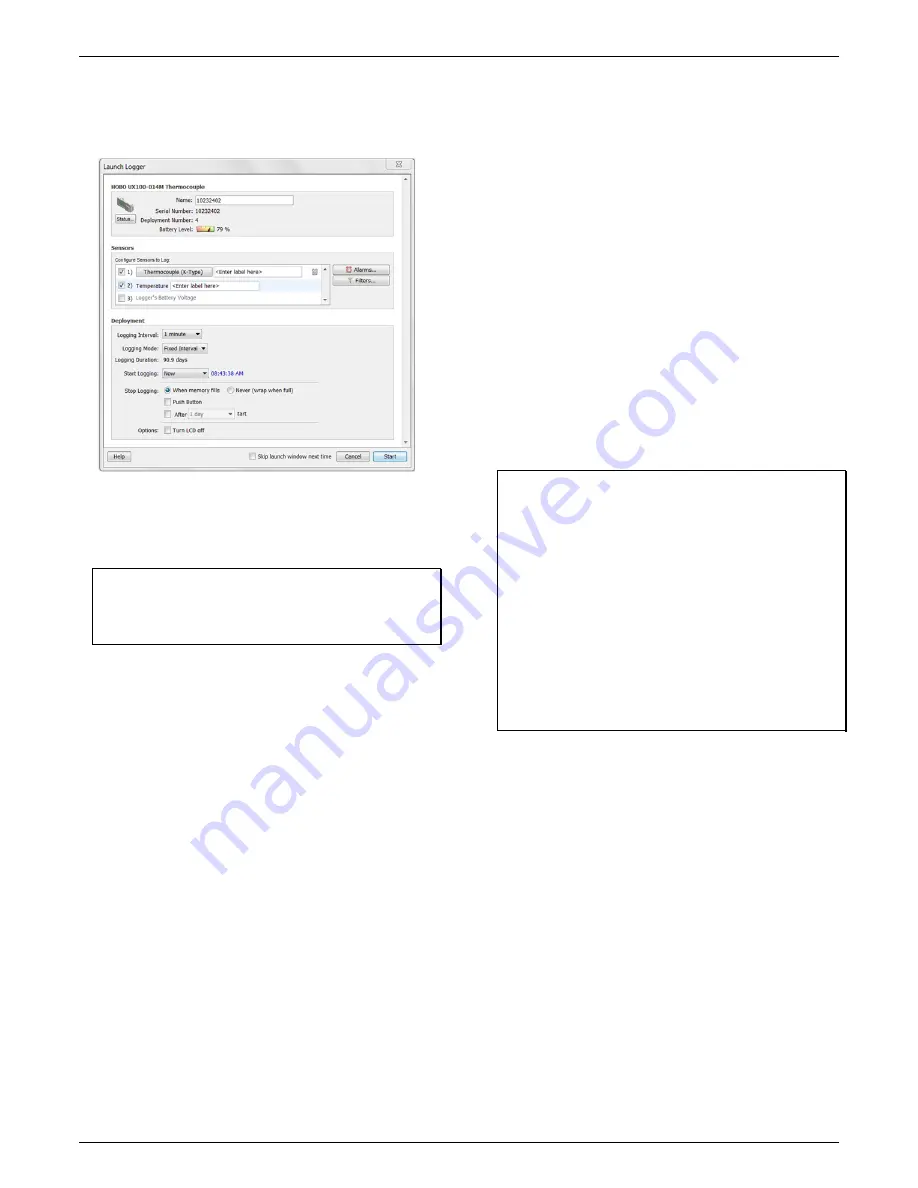
Select the thermocouple type.
Under Configure Sensors,
select the correct type of thermocouple from the list as
shown in this example. Type a label for the thermocouple if
desired.
3.
Select the internal 10k thermistor (temperature) channel
to log (optional) and type a label if desired.
This internal
10K thermistor measures ambient temperature and is used
for cold-junction compensation of the thermocouple
output.
Important:
Cold-junction compensation is always
performed on the thermocouple measurements even if the
internal 10k thermistor (temperature) channel is not
selected for logging.
4.
Set up alarms (optional).
Click the Alarms button if you
want to configure an alarm to trip when the temperature is
above or below a value you specify. See
Setting up Alarms
for details.
5.
Configure filters (optional).
Click the Filters button to
create additional filtered data series. Any filtered series will
be available automatically upon reading out the logger.
6.
Select the Logging Interval.
Select a logging interval from 1
second to a maximum of 18 hours, 12 minutes, and 15
seconds.
7.
Select the Logging Mode
:
•
Fixed Interval.
In Fixed Interval mode, data will always be
recorded at the regular logging interval set in the
previous step. This is the default setting.
•
Burst.
In Burst mode, logging will occur at a different
interval when a specified condition is met. See
Burst
Logging
for more information.
•
Statistics.
In Statistics mode, maximum, minimum,
average, and standard deviation statistics are calculated
for the temperature during logging, sampling at an
interval you specify. See
Statistics
for more information.
8.
Choose when to start logging:
•
Now.
Logging begins immediately.
•
At Interval.
Logging will begin at the next even interval as
determined by the selected logging interval.
•
On Date/Time.
Logging will begin at a date and time you
specify.
•
Push Button.
Logging will begin once you press the
Start/Stop logging button for 3 seconds.
9.
Choose when to stop logging:
•
When Memory Fills.
Logging will end once the logger
memory is full.
•
Never (Wrap When Full).
The logger will continue
recording data indefinitely, with newest data overwriting
the oldest. This option is not available if Burst is selected
for the Logging Mode.
•
Push Button.
Logging will end once you press the
Start/Stop logging button for 3 seconds. Note that if you
also choose Push Button to start logging, then you will
not be able to stop logging until 30 seconds after logging
begins.
If you select the Push Button setting, then you also have
the option to select “Allow button restart.” This allows
you to stop and then restart logging during the
deployment by pushing the Start/Stop button on the
logger for 3 seconds.
Important:
When “Allow button restart” is selected and you
use the Start/Stop button to stop and restart logging,
logging will restart on the next even logging interval, not at
the time the button was pushed. For example, a logger
started logging at 7:00 AM with a logging interval set to 1
hour. If you press the Start/Stop button to stop the logger
at 8:45 AM and then press the button again at 10:15 AM,
logging will not begin immediately at 10:15. Instead, logging
will begin again at 11:00 AM, which is the next even interval
time based on your 1-hour logging interval. Therefore,
depending on the logging interval, the gap between the
time you press the button to resume logging and the time
actual logging begins could be significant. The faster the
logging interval, the less time will elapse before logging
resumes.
•
Specific Stop Date.
Logging will end at a date and time
you specify. Note that if you also configure the logger for
a Push Button stop and to “Allow button restart,” then
the logger will stop logging at the date you select
regardless of how many times you stop and restart the
logger with the Start/Stop button.
10.
Choose whether to keep the LCD on or off.
By default, the
LCD will always remain on while logging. If you select the
“Turn LCD off” checkbox, the LCD will not show the current
readings, status, or other information while the logger is
logging. You will, however, be able to temporarily turn the
LCD screen on by pressing the Start/Stop button for 1
second if you select this option.
11.
Click the Start button to launch the logger.
Disconnect the
logger from the computer and deploy it using the mounting
materials (see
Mounting the Logger
). After logging begins,
you can read out the logger at any time (see
Reading Out
the Logger
for details).
www.
GlobalTestSupply
.com
Find Quality Products Online at:


