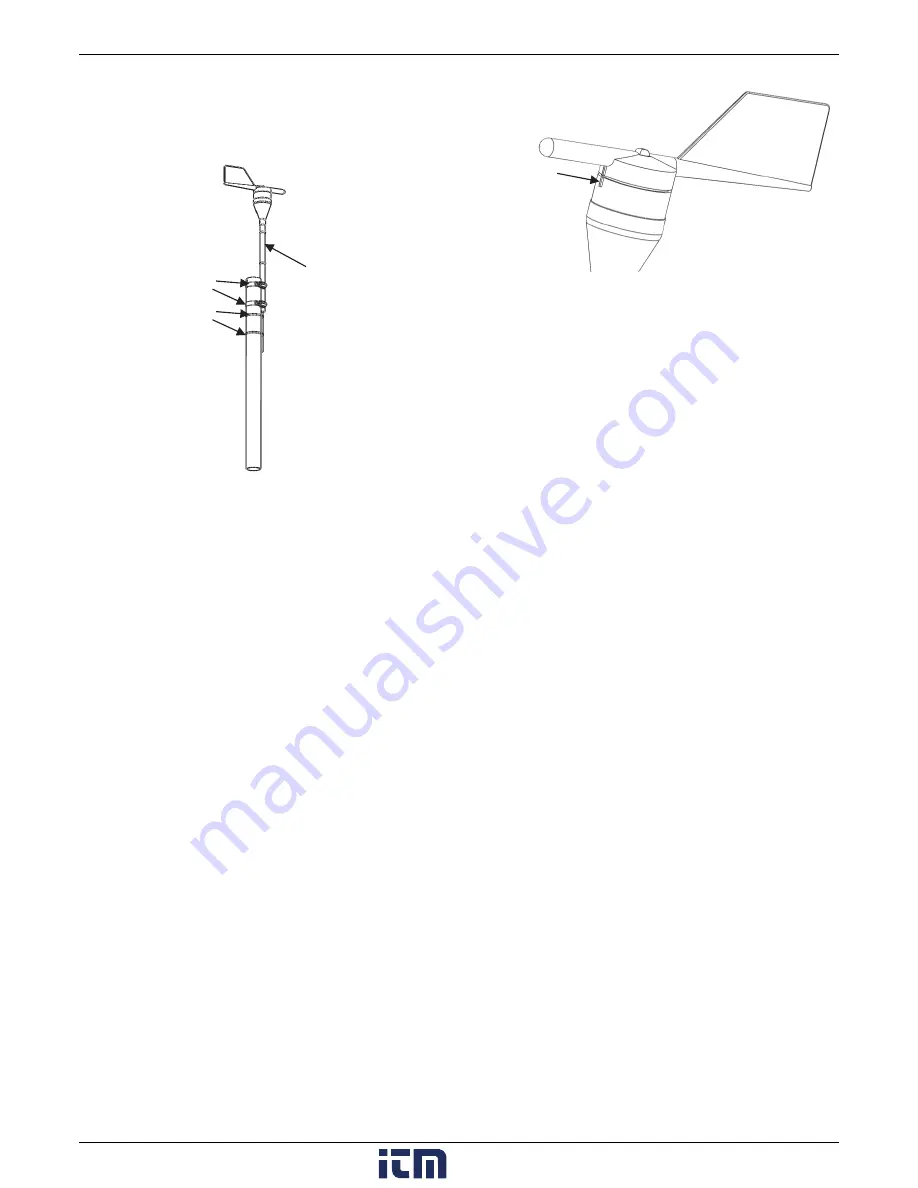
Wind Direction Smart Sensor (S-WDA-M003) Manual
2.
Secure the sensor cable with cable ties. Make sure there are
drip loops on both sides of the smart sensor housing, which
must also be mounted horizontally, as described under
Placement and Mounting Considerations
.
3.
Tighten the hose clamps making sure the mounting rod
remains vertical.
4.
Follow the steps in the
North Alignment
section.
North Alignment
The wind direction sensor must be oriented properly to obtain
meaningful data. This involves aligning the north markings on
the base of the sensor with true north. There are two methods
to align the sensor:
•
Compass Alignment
•
Global Positioning Satellite (GPS) alignment.
Note:
The magnetic declination must be known to align the
direction sensor to true north using a magnetic compass.
Worldwide declination information is available from the
National Space Science Data Center at:
Compass Alignment
Tools required:
•
Compass
•
Binoculars
•
Tape (such as electrical, packing, or duct tape)
Two people are required to complete this procedure.
1.
Align bronze tip of the wind vane with the north markings
on the base.
2.
Secure the base and vane shaft with a piece of tape so that
the vane cannot rotate.
3.
While standing 150 to 200 feet south of the sensor, use the
compass to determine magnetic north. If true north is the
same as magnetic north, align yourself so the compass
points north and directly at the sensor. If you are in area
with an east variation, align yourself so that the station is
that number of degrees to the east of magnetic north. If
you are in an area with a west variation, align yourself so
that the station is that number of degrees to the west of
magnetic north.
4.
While viewing the sensor through binoculars, instruct
another person to rotate the sensor mounting rod to point
the vane north. The vane should seem to disappear from
sight when properly aligned.
5.
Once you’ve obtained the correct position, secure the
mounting rod and remove the tape.
GPS Alignment
Tools required:
•
Handheld GPS with WAAS-enabled receiver or any
similar high accuracy GPS device
•
Flag, orange cone, or other temporary marker
•
Laptop computer with logger software installed
This procedure requires only one person, but is easier to
complete with two people. In this procedure, you will be using
the GPS receiver first to create an arbitrary waypoint and then
to determine the bearing from the sensor to that waypoint. You
will then align the sensor so that when the vane is pointed at
the waypoint, the direction reported by the logger software
matches the GPS receiver’s bearing to the waypoint.
1.
Connect the sensor to the logger (refer to the
Connecting
to
the Logger
section below).
2.
Connect the laptop to the logger with the PC interface cable.
3.
Pick a visible location that is at least 100 meters (110 yards)
away from the wind direction sensor and walk to it.
Establish a waypoint with the handheld GPS receiver. You
may want to use averaging to minimize the waypoint
position error if your GPS receiver is so equipped. (For best
results, the estimated position error of the waypoint should
be less than 10 feet if the distance to the sensor is 100
meters, and less than 20 feet for a distance of 200 meters.
Mark the waypoint with a flag, orange cone, or other
suitable marker.
North marking
Mounting rod
Hose clamps
Cable ties around
sensor cable
www.
.com
1.800.561.8187


