


The Rotate icon is displayed on the 3D shape data.
9
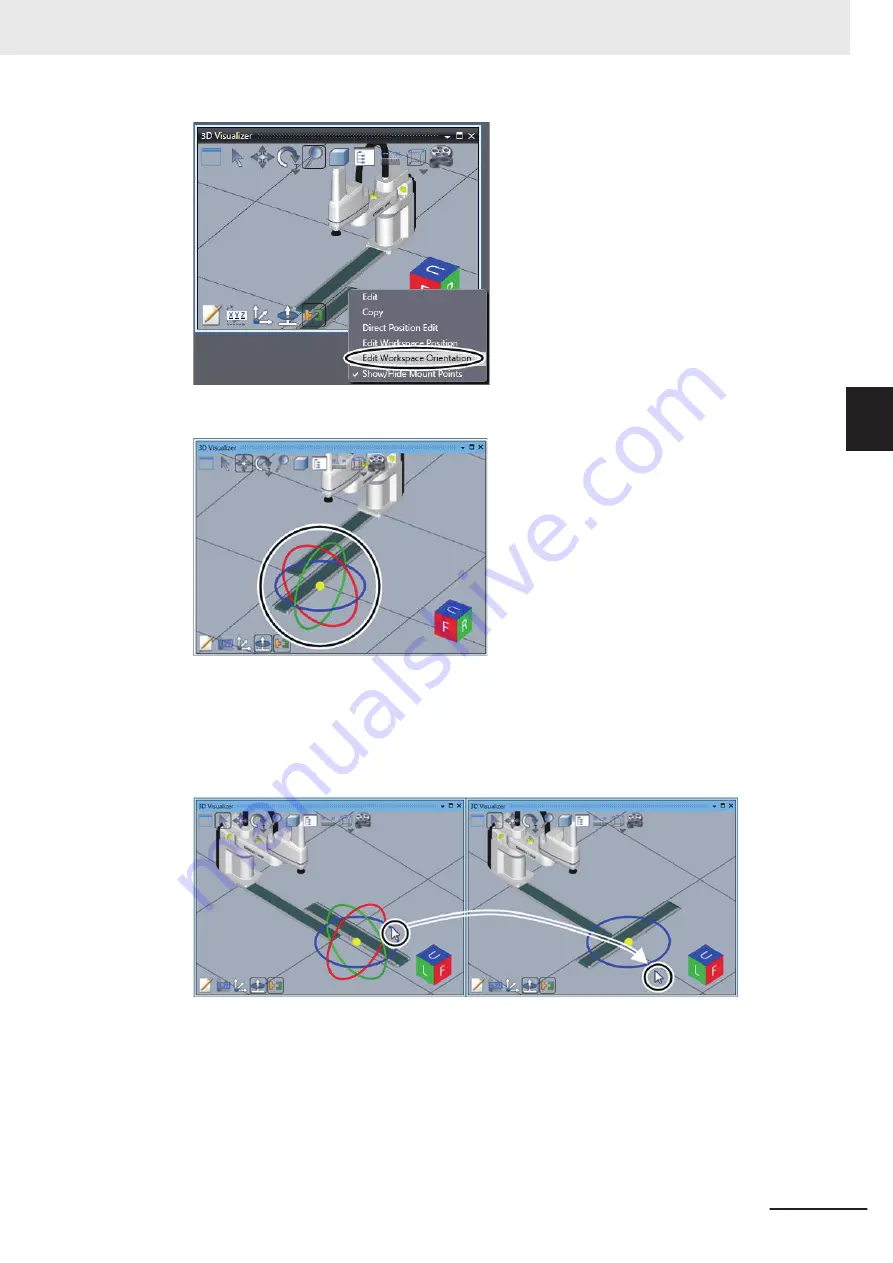
Drag and drop the handle of the Rotate icon to rotate the 3D shape data around the axis to an
appropriate orientation.
The icon has red, green, and blue handles, which represent rotation around the X-axis, Y-axis,
and Z-axis, respectively.
10
Right-click the 3D shape data to adjust the orientation in the 3D Visualizer.
The menu commands are displayed.
11
Select
Edit Workspace Orientation
from the menu to clear the selection.
3 Implementation Example of Static Pick-and-place Equipment
3-45
NJ-series Robot Integrated System Startup Guide (O049)
3-3 Programming and Simulation Procedures
3
3-3-5
Placing 3D Shape Data
Содержание RL4 Series
Страница 4: ...AC1 152000 Introduction 2 NJ series Robot Integrated System Startup Guide O049 ...
Страница 12: ...A 3 Using Troubleshooting Functions A 22 CONTENTS 10 NJ series Robot Integrated System Startup Guide O049 ...
Страница 23: ...Outline View Detailed View Versions 21 NJ series Robot Integrated System Startup Guide O049 ...
Страница 30: ...Revision History 28 NJ series Robot Integrated System Startup Guide O049 ...
Страница 42: ...1 Overview 1 12 NJ series Robot Integrated System Startup Guide O049 ...
Страница 50: ...2 Before You Begin 2 8 NJ series Robot Integrated System Startup Guide O049 ...
Страница 144: ...3 Implementation Example of Static Pick and place Equipment 3 94 NJ series Robot Integrated System Startup Guide O049 ...
Страница 162: ...Appendices A 18 NJ series Robot Integrated System Startup Guide O049 ...
Страница 164: ...Appendices A 20 NJ series Robot Integrated System Startup Guide O049 ...
Страница 167: ......


