7. Connection Procedure
1
Mount the EtherCAT
Communications Unit to the
Inverter.
*For details on how to mount the
EtherCAT Communications
Unit, 2-4 Mounting and Wiring
for the EtherCAT
Communication Unit in the
Inverter MX2/RX Series
EtherCAT Communications Unit
User's Manual (Cat.No. I574).
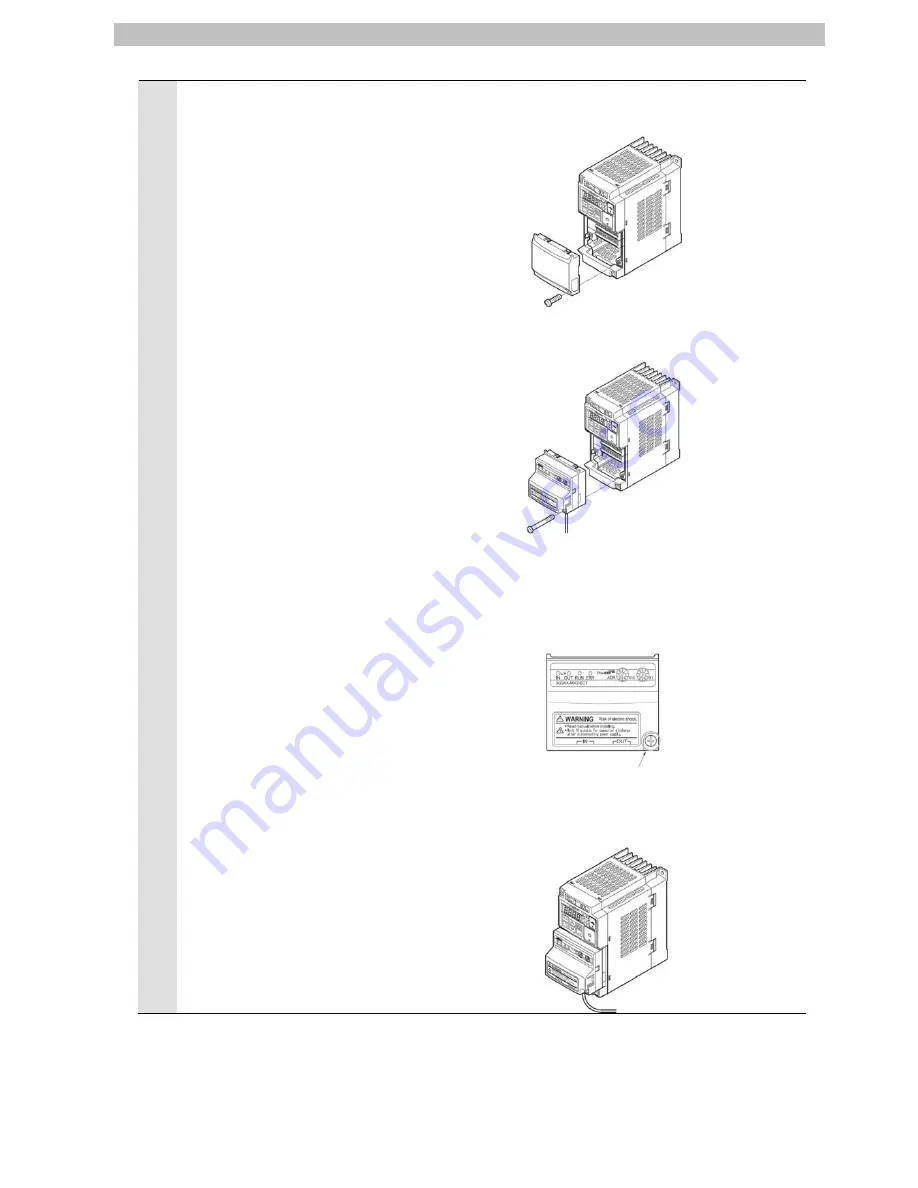
Removing the optional board cover from the Inverter front panel
1. Loosen the mounting screw (x 1) from the optional board cover of the
Inverter front panel.
2. Remove the optional board cover.
Mounting the EtherCAT Communication Unit onto the Inverter
1. Mount the EtherCAT Communication Unit onto the location where the
Inverter optional board cover that you removed was attached. Check
that the connector is firmly connected.
(Notes) When the EtherCAT Communication Unit is mounted, the main
circuit and control circuit terminals of the Inverter are hidden. For
this reason, be sure to wire the main circuit and control circuit
terminals before mounting the EtherCAT Communication Unit.
2. Tighten the mounting screw of the EtherCAT Communication Unit.
Tighten the bottom right screw of the EtherCAT Communication Unit
with the specified torque
(46 N•cm, 4.7 kgf•cm).
Connecting the ground cable of the EtherCAT Communication Unit
1. Ground the FG cable of the EtherCAT Communication Unit.
Cut the ground wire of the unit's FG cable to an appropriate length and
ground it to the closest possible ground location. Also refer to the
Inverter manual.
10
Содержание 3G3MX2 Series
Страница 34: ...2013 0911 P521 E1 01...


