105
File Transfer
The File Transfer menu allows you to save and load User Presets and I/O Configurations
to and from your
computer.
From the top menu in the Remote screen, click “File Transfer” or from the Main Menu, click the “User file transfer”
option.
Preset File Transfer
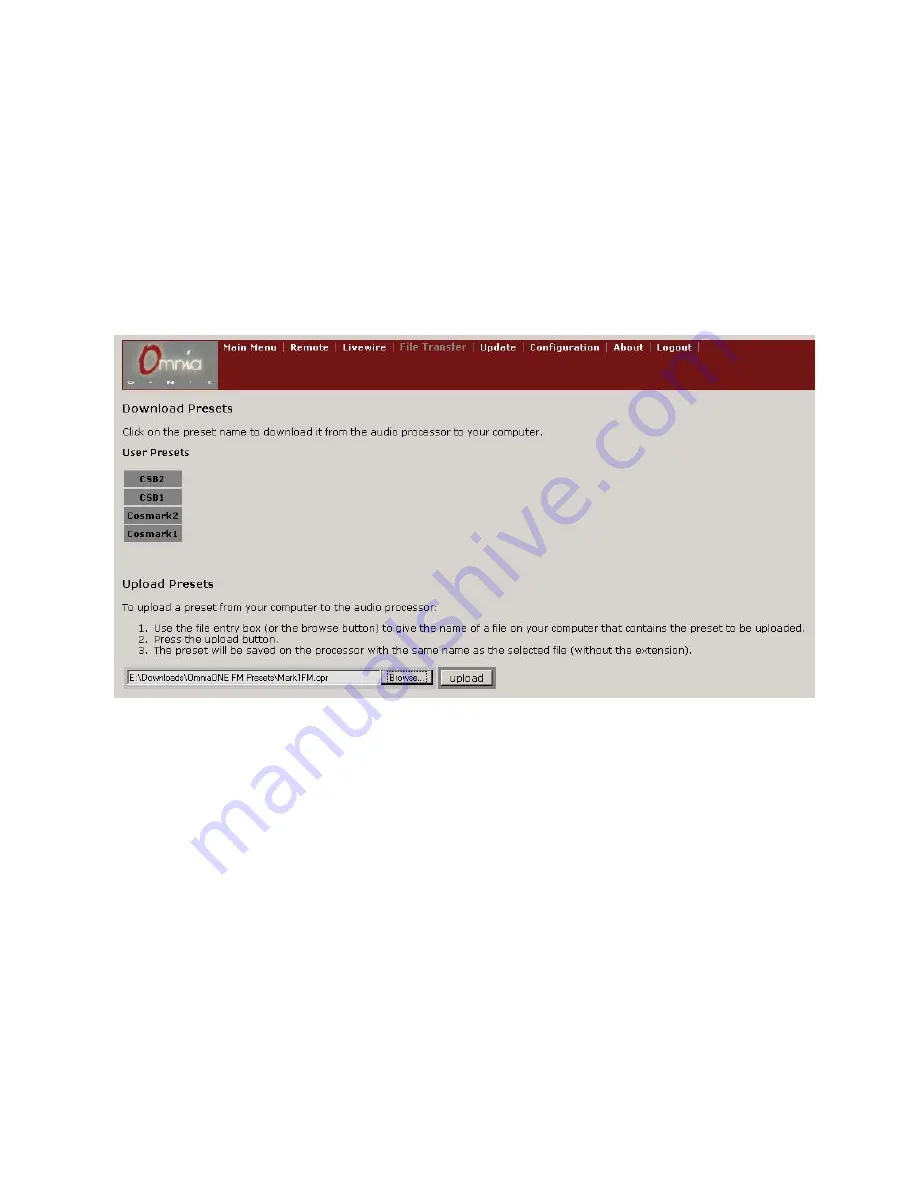
Shown below is the
top half of the File Transfer screen, which is used for savi
ng and loading user processing presets
to and from your computer.
Any user presets on the Omnia ONE will show up as buttons under
User Presets
in the
Download Presets
section.
4 user presets are shown in the example screenshot above.
NOTE:
The factory presets will not show up here and cannot be downloaded to your computer.
To download and save a user preset to your computer, click on a preset name button and your browser’s “File
Download” box should pop up.
Click the “
Save
” button, choose the desired f
older to save the preset in from the “
Save As
” dialog (this may vary
with the OS) and click “
Save
” to save the file or “
Cancel
” to abort.
Presets are saved as small, text
-
based files with the “.opr” extension.
To upload a previously saved user preset to the Omnia ONE
, use the file entry box (or the browse button) to enter
the path to the preset file name to be uploaded and press the “
Upload
” button.
The preset will be saved to the Omnia ONE with the same name as the selected file, minus the .opr extension.
NOTE:
In the current software, after uploading a preset with the remote, that preset’s name will not appear in the
preset list on the front panel of the Omnia ONE unit until a preset save, rename or delete operation is performed
from the front panel itself.


