background image

14

15

GETTING STARTED

GETTING STARTED

WARNING: Use caution when using your GoPro as part of your 

active lifestyle. Always be aware of your surroundings to avoid 

injury to yourself and others. 

Abide by all local laws when using your GoPro and related mounts 

and accessories, including all privacy laws, which may restrict 

recording in certain areas.

MOUNTING OMNI

1.  If you want to use the top 1/4-20 threaded insert, unscrew the  

corner cap.

2.  Use a 1/4”-20 screw with the threaded insert on the top or bottom of 

the rig (near the power connector) to attach Omni to a monopod or 
other suitable mounting solution.

NOTICE: 

When removing Omni from a monopod or other mounting 

solution, disconnect the power connector first to avoid damaging the 
connection.

POWERING ON + OFF


ALL CAMERAS IN THE ARRAY


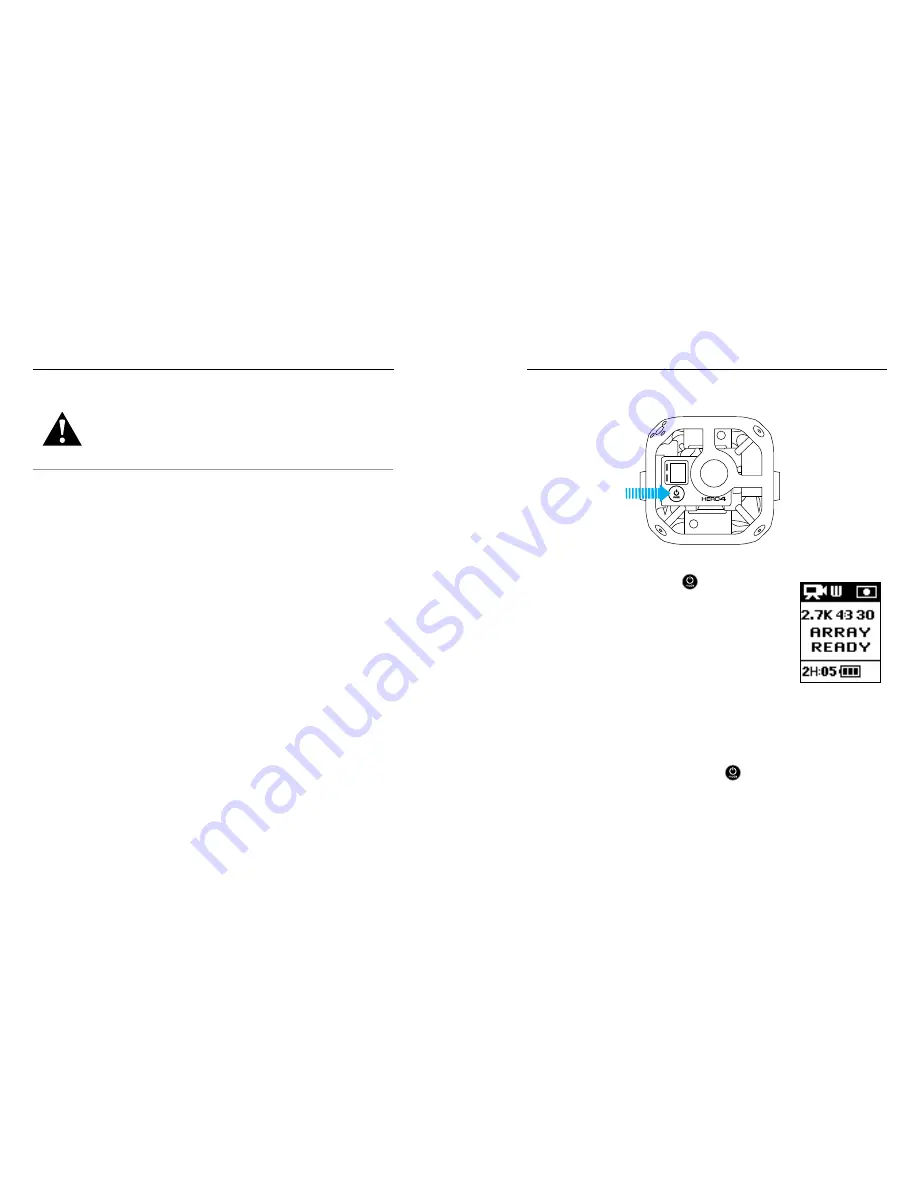
To Power On All Cameras:


Press the 

Power/Mode

 button [ 

 ] on the 

primary camera. The camera status lights flash three 
times and the sound indicator emits three beeps. 
The primary camera powers up, followed by the 
secondary cameras. When 

Array Ready

 disappears, 

you can begin capturing video or photos.

The array is properly configured if the camera mode 
icon and 

AR

 alternate in the upper left of the camera 

status screen. 

If 

Array Error

 appears on the primary camera’s status screen, see 

Array 

Error


(page 11).

To Power Off All Cameras:


Press and hold the 

Power/Mode

 button [ 

 ] on the primary camera for 

three seconds. The camera status lights flash several times and the sound 
indicator emits seven beeps.

Содержание HERO4

Страница 1: ...1 USER MANUAL...

Страница 2: ...tings Menus 21 Video Mode 22 Photo Mode 25 Multi Shot Mode 26 Setup Mode 31 Protune 34 Transferring Files to a Computer 38 Omni Files and GoPro Software 39 Smart Remote 40 Battery 41 Important Message...

Страница 3: ...Panels 3 Camera Position Indicator 1 6 4 Mounting Corner 1 4 20 Threaded Insert 1x Top under removable Corner Cap 1x Bottom 5 Power Connector 2 5mm x 5 5mm 6 HEROBus Connector 30 pin 7 Array Camera St...

Страница 4: ...tus Light blue 4 Camera Status Screen 5 Power Mode Button 6 Micro HDMI Port cable not included 7 microSD Card Slot 8 Mini USB Port supports composite A V cable 3 5mm stereo mic adapter not included 9...

Страница 5: ...ifestyle Always be aware of your surroundings to avoid injury to yourself and others Abide by all local laws when using your GoPro and related mounts and accessories including all privacy laws which m...

Страница 6: ...n of array firmware To obtain the latest array firmware for Omni visit gopro com help and log in to the Omni Support Hub If you need to create a support hub account follow these instructions https com...

Страница 7: ...e powered using a 12V to 5V step down converter such as the Core SWX Switronix XP DV 5GP The Omni power connector is a 2 5mm x 5 5mm polarity plug The step down converter has an 8A rating Powering the...

Страница 8: ...monopod or other mounting solution disconnect the power connector first to avoid damaging the connection POWERING ON OFF ALL CAMERAS IN THE array To Power On All Cameras Press the Power Mode button o...

Страница 9: ...ory Card 6 Wireless if on 7 Battery Life CAMERA STATUS SCREEN Beeps Burst Color Date Time Delete Exposure Value Compensation Field of View Frames Per Second Interval ISO Limit LEDs Megapixels Multi Sh...

Страница 10: ...18 19 CAMERA MENUS CAMERA MENUS...

Страница 11: ...t Remote to your HERO4 Black cameras see the Smart Remote User Guide at gopro com help TO NAVIGATE SETTINGS MENUS 1 Verify that the camera is in the desired camera mode To cycle between the modes pres...

Страница 12: ...a status lights flash while the camera is recording 4 To stop capturing press the Shutter Select button The camera status lights flash three times and the camera beeps three times If the memory card i...

Страница 13: ...rnal power source with the power connector on the rig PROTUNE For details about Protune settings see Protune page 34 Photo mode contains one capture mode Single photo CAPTURING PHOTOS 1 Verify that th...

Страница 14: ...ppears in the upper left on your camera status screen 2 Press the Shutter Select button The camera status lights flash and the camera beeps multiple times See Rate page 28 for options available for Bu...

Страница 15: ...ER Shutter applies only to Night Photo and Night Lapse and determines the amount of time that the shutter is open The options for this setting are auto up to 2 seconds 2 5 10 15 20 or 30 seconds The d...

Страница 16: ...s settings for wireless and settings to customize your camera For instructions on how to change the following settings see Navigating Settings Menus page 6 WIRELESS For Omni this setting applies only...

Страница 17: ...outside of North America DATE TIME This setting lets you set the date and time If the battery is removed from the camera for an extended period of time you must reset the date and time DELETE This set...

Страница 18: ...ce selection Be sure to choose the appropriate white balance for your scene Setting Description 3000K Warm light incandescent or sunrise sunset lighting 5500K default for Night Lapse Slightly cool lig...

Страница 19: ...NESS Sharpness controls the sharpness of your video footage Sharpness Setting Resulting Quality High default Ultra sharp video Medium Moderately sharp video Low Softer video EXPOSURE VALUE COMPENSATIO...

Страница 20: ...ith GoPro Omni Importer This application offers unique functionality for Omni files fast previewing color correction image stabilization file export and media management tools You can also use Omni fi...

Страница 21: ...temperatures can decrease battery life To maximize battery life in cold conditions keep the camera in a warm place prior to use CHARGING INFORMATION The battery charges to 100 in approximately two hou...

Страница 22: ...Do not drop disassemble open crush bend deform puncture shred microwave incinerate or paint the camera or the battery if it is removable Do not insert foreign objects into any opening on the camera D...

Страница 23: ...ht on the inner cube The camera has no battery installed or the battery needs charging The camera is not running array camera firmware or is running a different firmware version than the other cameras...

Страница 24: ...er to batteries you must first power off the camera Omni takes a moment to recognize the external voltage being supplied Without camera batteries installed Omni might not respond to a rapid attempt to...

Страница 25: ...com help GoPro HERO Protune SuperView and their respective logos are trademarks or registered trademarks of GoPro Inc in the United States and other countries All other trademarks are the property of...

Отзывы: