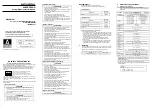
background image

31

Installation and Maintenance

8.5 Installation of Indoor Unit

Left

Rear left

Right

Rear right

Cut off

the hole

Left

Right

5-10

°

Φ70mm

Indoor

Outdoor

(1) Pay attention to dust prevention and take relevant safety 
measures when opening the hole.
(2) The plastic expansion particles are not provided and should 
be bought locally.

Fig.1

Fig.2

Fig.3

Fig.4

in the holes.
(3) Fix the wall-mounting frame on the wall with tapping screws 

(ST4.2X25TA) and then check if the frame is firmly installed by

pulling the frame. If the plastic expansion particle is loose, 

please drill another fixing hole nearby.

3. Install Wall-mounting Frame

(1) Choose the position of piping hole according to the direction 
of outlet pipe. The position of piping hole should be a little 
lower than the wall-mounted frame.(As show in Fig.1)

4. Outlet Pipe

(1) The pipe can be led out in the direction of right, rear right, 
left or rear left.(As show in Fig.3)

(2) When selecting leading out the pipe from left or right, please 
cut off the corresponding hole on the bottom case.(As show in 
Fig.4)

(2) Open a piping hole with the diameter of Φ70mm on the 

selected outlet pipe position.In order to drain smoothly, slant 
the piping hole on the wall slightly downward to the outdoor 
side with the gradient of 5-10°.(As show in Fig.2)

Note:

Insulating pipe

Torque wrench

Open-end 

wrench

Indoor pipe

Pipe

Union nut

Union nut

Pipe joint

Pipe

Hex nut diameter(mm) Tightening torque(N.m)

Φ6

15~20

Φ9.52

30~40

Φ12

45~55

Φ16

60~65

Φ19

70~75

Refer to the following table for wrench moment of force

:

Fig.5

Fig.6

Fig.7

5. Connect the Pipe of Indoor Unit

(1) Aim the pipe joint at the corresponding bellmouth.(As show 
in Fig.5)
(2) Pretightening the union nut with hand.
(3) Adjust the torque force by referring to the following sheet. 
Place the open-end wrench on the pipe joint and place the 
torque wrench on the union nut. Tighten the union nut with 
torque wrench.(As show in Fig.6) 
(4) Wrap the indoor pipe and joint of connection pipe with 
insulating pipe, and then wrap it with tape.(As show in Fig.7)

6. Install Drain Hose

(1) Connect the drain hose to the outlet pipe of indoor unit.(As 
show in Fig.8)
(2) Bind the joint with tape.(As show in Fig.9)

Left

Wall

Φ70mm 

Right

Mark in the middle of it

Level meter

Rear piping hole

Wall

Space

to the

wall

above

150mm

Space

to the

wall

above

150mm

Φ70mm

Rear piping hole

Содержание OTEC IEWQ Series

Страница 1: ...IEWQ ICHQ Series High Wall Inverter Installation Manual...

Страница 2: ...intenance 2 3 Installation 5 3 1 Installation Dimension Diagram 5 3 2 Installation Parts checking 7 3 3 Selection of Installation Location 7 3 4 Requirement For Electric Connection 7 3 5 Installation...

Страница 3: ...1 Technical Information 1 Summary Part Technical Information Indoor Unit Outdoor Unit IEWQ036J3A RWI100 ICHQ036J3A RLH100 Remote Controller...

Страница 4: ...hout plug an air switch must be installed in the circuit The air switch should be all pole parting and the contact parting distance should be more than 3mm 12 Make sure all wires and pipes are connect...

Страница 5: ...d 4 If there is refrigerant leakage please take sufficient measure to minimize the density of refrigerant 5 Never touch the refrigerant piping or compressor without wearing glove to avoid scald or fro...

Страница 6: ...4 Electroprobe 7 Electronic leakage detector 10 Pipe pliers pipe cutter 2 Screw driver 5 Universal meter 8 Vacuum pump 11 Pipe expander pipe bender 3 Impact drill drill head electric drill 6 Torque wr...

Страница 7: ...m At least 15cm At least 250cm Space to the wall S p a c e t o t h e o b s t r u c t i o n r o o l f e h t o t e c a p S Space to the obstruction Drainage pipe Space to the wall Space to the obstructi...

Страница 8: ...Make the bound pipes pass through the wall hole and then connect outdoor unit Neaten the pipes Vacuum pumping and leakage detection Check after installation and test operation Finish installation Not...

Страница 9: ...le Air switch should be included magnet buckle and heating buckle function it can protect the circuit short and overload Caution please do not use the fuse only for protect the circuit 1 Choosing Inst...

Страница 10: ...ameter of 70mm on the selected outlet pipe position In order to drain smoothly slant the piping hole on the wall slightly downward to the outdoor side with the gradient of 5 10 As show in Fig 2 Note I...

Страница 11: ...lation when binding them When binding to a certain degree separate the indoor power and then separate the drain hose As show in Fig 15 3 Bind them evenly 4 The liquid pipe and gas pipe should be bound...

Страница 12: ...s show in Fig 20 4 Connect Indoor and Outdoor Pipes 1 Remove the screw on the handle and valve cover of outdoor unit and then remove the handle and valve cover As show in Fig 21 2 Remove the screw cap...

Страница 13: ...ldnt be higher than the outlet pipe hole of indoor unit As show in Fig 25 2 Slant the drain hose slightly downwards The drain hose Can t be curved raised and fluctuant etc As show in Fig 26 Note The d...

Страница 14: ...OMEGA IEWQ HQ High Wall Inverter Installation Manual IEWQ CHQ I3A IM1R0622 info otecomega com www otecomega com info otecomega com www otecomega com...

Отзывы: