07
User Manual
Positioning and Levelling
•
When installing the appliance, ensure that there is
enough space in the desired location to be able to pull
the appliance forwards and backwards, as this is
necessary when undergoing cleaning and maintenance.
•
The ground underneath the appliance must be flat and
stable. The wall immediately behind the appliance must
be made from non-flammable materials, such as tiles.
•
To level the appliance, turn the adjustable feet clockwise
and anti-clockwise, carefully ensuring that the surface of
the appliance is level. This step may only be undertaken
once all other installation steps have been completed.
Electrical Connection Safety
•
This appliance must be earthed by law. Before
connecting the appliance to the electrical supply, it is
necessary to check that your home’s earthing system is
working correctly.
•
Check that the unit and voltage power marked on the
appliance’s rating plate are compatible with the supply.
It is necessary that the feeding network is protected
by a powerful switch able to disconnect the network
completely, with a contact separation of at least 3mm.
Ensure that the yellow-green earth wire is not interrupted
by the switch.
•
In order to avoid potential health hazards, any electrical
work performed on this appliance or its associated wiring
should only be done by an authorised service technician
or a similarly qualified technician.
Installation Instructions
(Continued)
Mounting or Replacement of the Power Cord
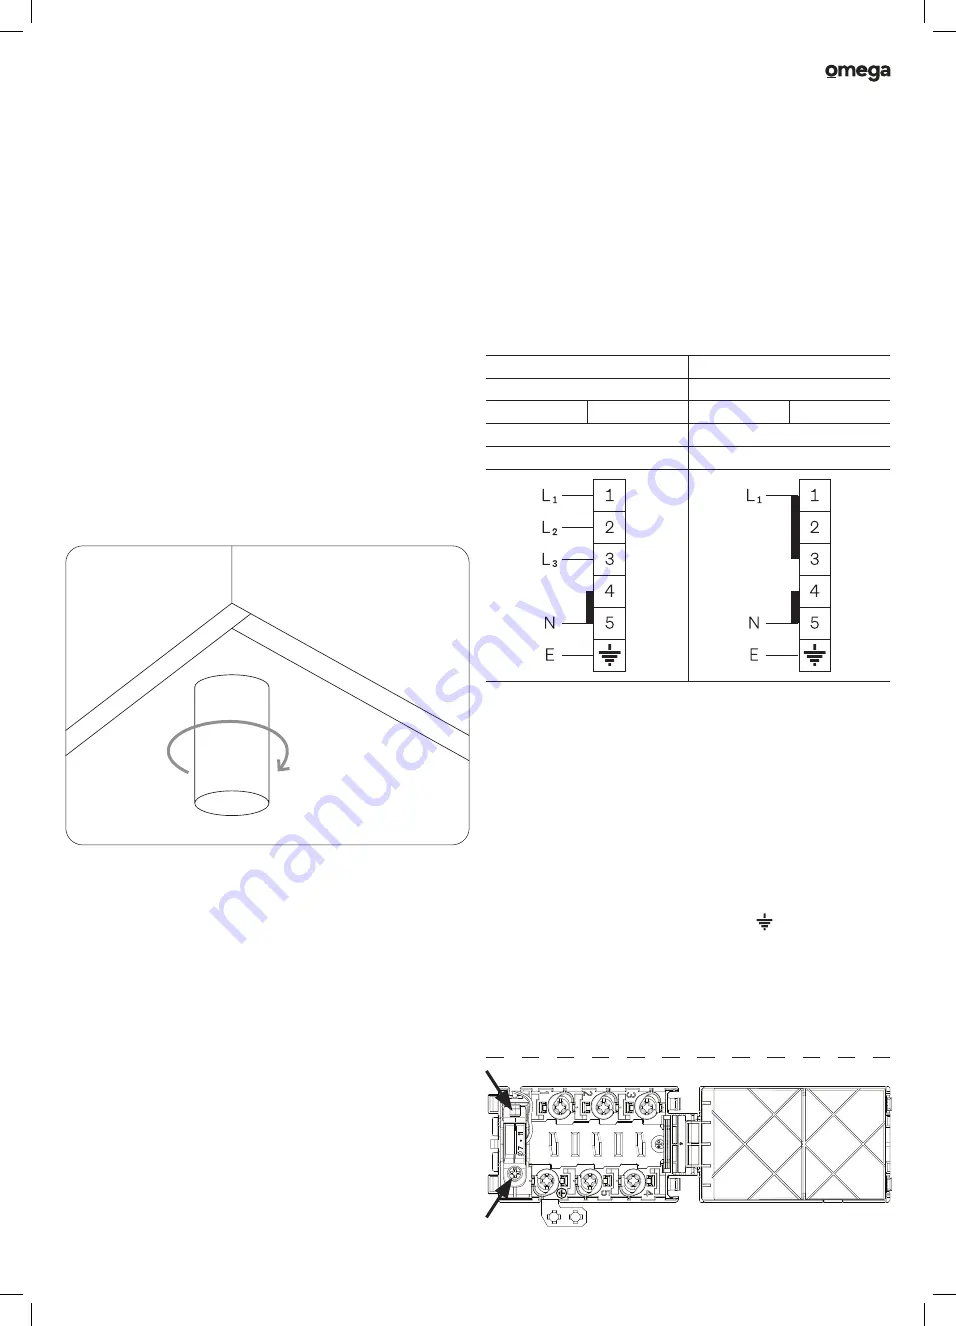
The mains cable is connected via the rear backboard.
The mains cable must be of the following type:
380–415V 3N~
220–240V
H05RR–F
H05RR–F
H05VV–F
5 x 2.5mm
2
H05VV–F
3 x 4mm
2
H05RN–F
H05RN–F
H07RN–F
H07RN–F
Leave the mains cable slightly long so that you can pull out
the appliance for cleaning purposes.
Proceed as follows:
1. Gently remove the rear backboard.
2. Undo the screw on the terminal block that fixes the cable
in place, taking care not to lose the screw.
3. Loosen the screw contacts and replace the cable with
a new one of the same length. Note that the cable must
comply with the stipulated specifications.
4. Connect the yellow-green wire to the terminal.
Note that the yellow-green wire must be at least 10mm
longer than the other wires.
5. Connect the blue neutral wire to the
N
terminal.
6. Connect the brown power wire to the
L
terminal.


