20
EN
5
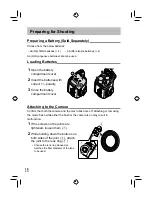
Slide the latch on the controller
in the direction opposite to that
indicated by the [LOCK
►
] icon
(
1
).
6
Attach the controller to the
camera’s hot shoe (
2
).
• Insert it
fi
rmly all the way into the hot
shoe until it clicks into place.
7
Slide the latch to the [LOCK
►
]
position (
3
).
3
2
1
8
Install each light-emitting part in its
respective joint.
• Insert it
fi
rmly all the way into the joint
until it clicks into place.
• When removing the light-emitting part,
pull it out while pressing the
UNLOCK
button.
This completes the installation.
Содержание STF-8
Страница 15: ...15 JP ...
Страница 71: ...71 KR 헪 칺푷 훟펞 몮핳핂 짪캫 폎픒 몋푾펞쁢 헪 펞 쭎쇪 쫂흫컪읊 힎 킪몮 많밚풂 OLYMPUS A S켊펞 캏샂 펺 훊킻킪폲 Tel 1544 3200 ...
Страница 99: ...99 TH ...
Страница 170: ...MEMO 170 ...
Страница 172: ... 2016 WD198401 Printed in China date of issue 2016 08 ...


