


Olympus FV1200 User guide
June 23, 2015
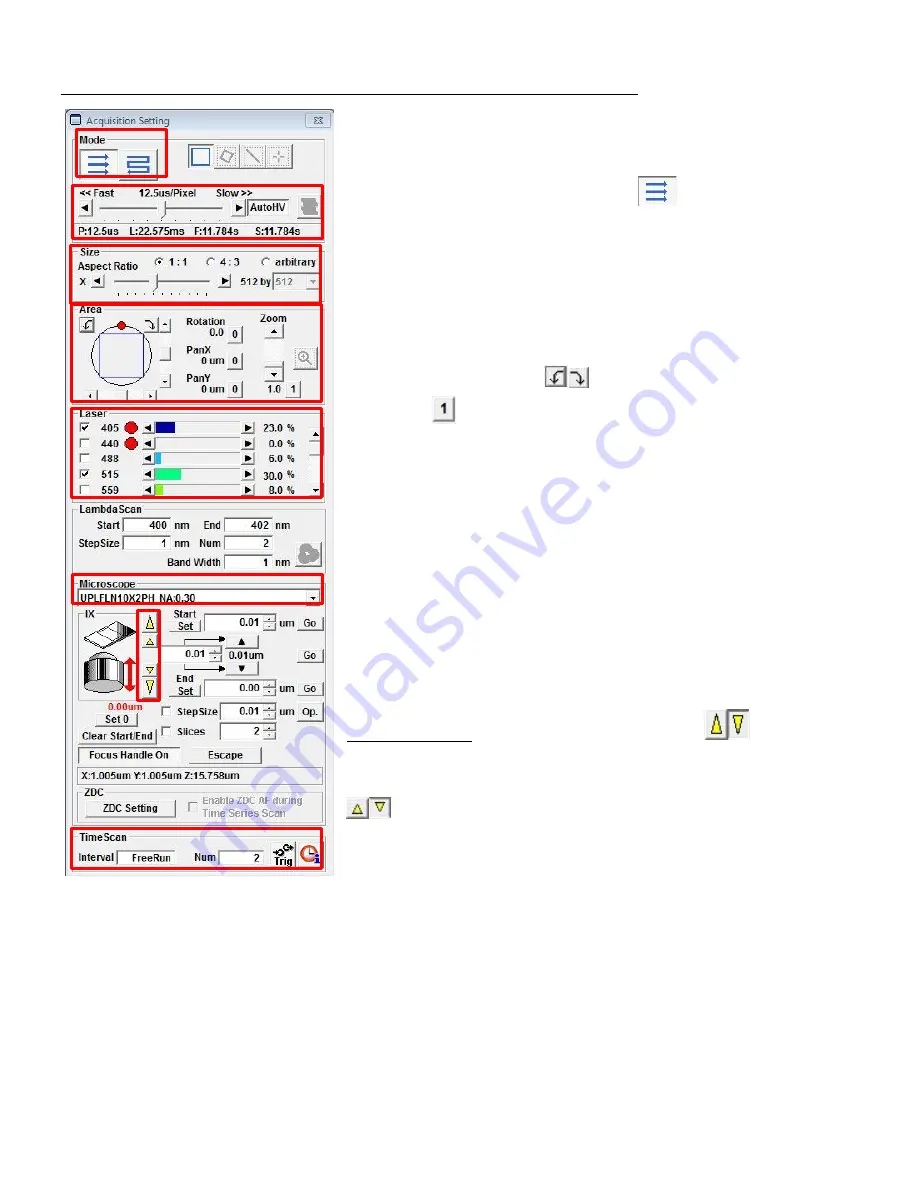
C. Outline of Acquisition Setting / Image Acquisition/ Image Viewer Windows
Before taking images, let’s get familiar with buttons and sliders on the
Acquisition Setting
Window (such as scan mode, scan speed, image
size etc).
Scan mode
: the default is unidirectional
.
Scan Speed:
The higher value, the slower, the better image. Around
12.5~20 us/pixel (microsecond per pixel) is a good speed
.
Image size (number of x,y pixel):
512x512 pixel is the default.
Area
: the image field can be optically zoomed in and rotated.
To rotate the viewing area, click on the red dot and drag clock- or
counter-clockwise (or click
). Zoom the imaging area with the
slider (click
to return to 1x). With zoomed view, you can select the
scanning area by moving the blue-lined box around.
Laser power control
: Checking the box will activate the laser. The
power can be adjusted by pointing the mouse pointer to the slider
area and clicking (large change), clicking the arrow heads (small
change), or rolling the mouse wheel on the slider area.
Lambda Scan:
for spectral imaging
.
Microscope
: Objective selection is displayed. Also selecting the
objective on the dropdown list will automatically change the objective.
Z position setting
: Clicking the large arrow heads
will move the
objective up or down to focus onto the sample. The extent of
movement is determined by the Step size. Clicking small arrow heads
will move objective in half the Step size.
Start Set and End Set determine the z series range.
Time Scan
: set up the time lapse series condition (interval and number of image acquisition.


