background image


D I G I T A L   T E C H N I C A L   S U P P O R T  


O L Y M P U S   I M A G I N G   A M E R I C A   I N C .  


( 8 8 8 )   5 5 3 - 4 4 4 8  


h t t p : / / w w w . o l y m p u s a m e r i c a . c o m / s u p p o r t


Olympus Imaging America Inc. 

Page 12 of 15 

Last updated on September 25, 2009 

I want to clear my recorder of all files. How do I format the recorder? 

The recorder should be formatted only by using the internal 

FORMAT

 function found in 

the menu. Formatting using the computer may corrupt system files needed to run the 
recorder and may delete the Voice Guide Data and Audible system files. When the 
recorder is connected to a computer, individual files can be deleted using its file-
browsing program (e.g. My Computer) without negative effects. 

How do I charge the recorder’s rechargeable batteries? 

The two bundled BR-401 NiMH batteries can be charged in the recorder via a USB 
connection to a computer. The USB cable should be plugged directly into a computer 
USB port and not into a USB hub. USB hubs split up the USB current and the battery 
may not fully charge through a hub connection.  
To charge the batteries through a USB port, first connect the USB cable bundled with 
this recorder to a computer. Next, press the [

STOP

] button on the recorder while 

plugging the other end of the USB cable into the recorder. Charging will be displayed in 
the charging indicator at the top of the LCD screen and the orange LED will be lit. The 
LED will go out when charging is completed. 
The batteries can also be charged using the optional 

AC Adapter A-514

which has a USB 

plug on its cable. To set up the recorder to charge from the AC adapter, in the menu go 
to 

USB Settings

 > 

USB Connect

 > 

AC Adapter

 and press the [

OK/MENU

] button. 

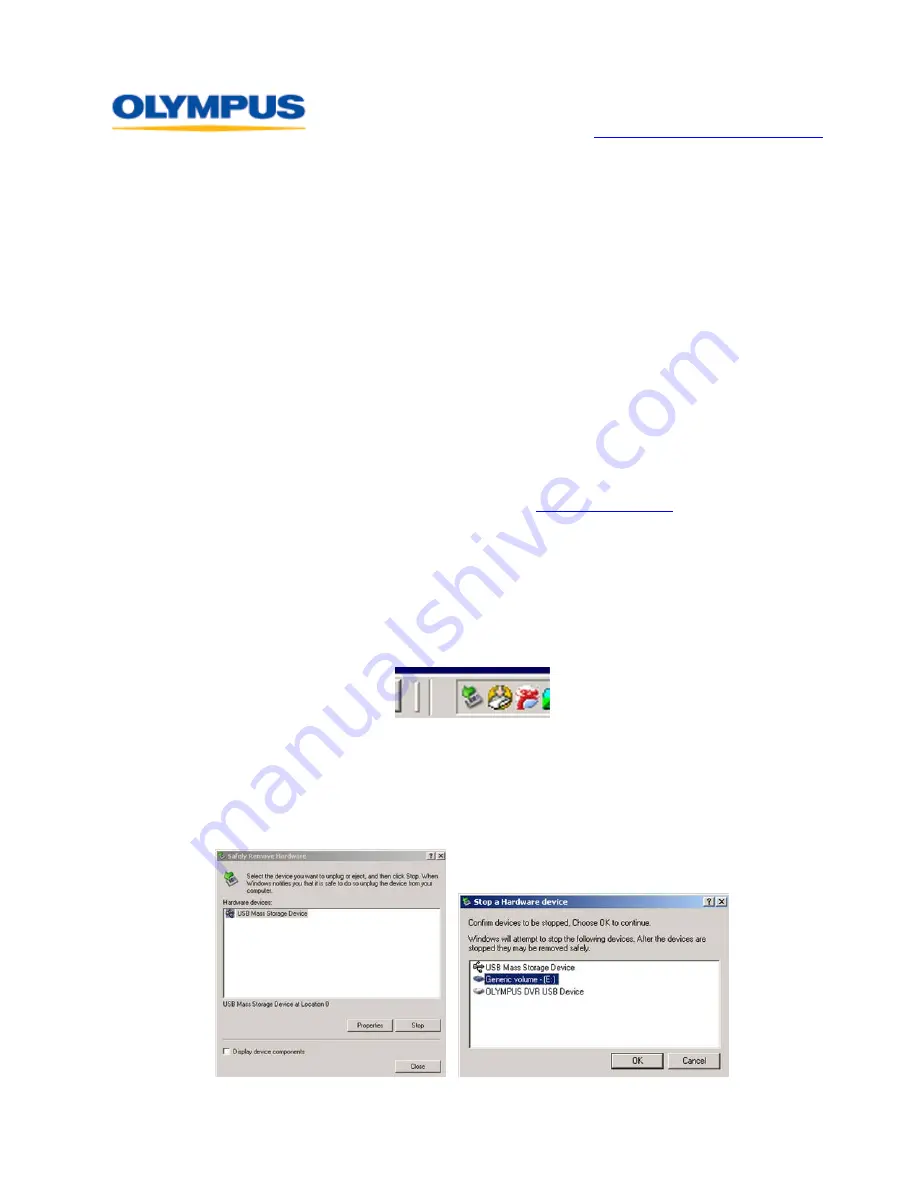
How should the recorder be disconnected from a Windows computer?  

Any USB device should be disconnected from a Windows

®

 computer using the [

Safely 

Remove Hardware

] icon located in the Taskbar in the lower right corner of the 

Desktop screen.  The icon features a green arrow suspended above a device and 
pointing to the lower left.   


Any open files should be closed before starting the disconnect process.  Simply removing 
the device from the USB port without using the recommended disconnect procedure can 
result in corruption of files or firmware. 
Double-clicking on the [

Safely Remove Hardware

] icon opens a dialog box to shut down 

the USB connection so that the device can be safely disconnected.  Select the device to be 
disconnected by clicking once on its name, and then click on the [

Stop

] button. 


Содержание DM 520 - Ultimate Recording Combo

Страница 1: ...struction manual Warranty card Two AAA NiMH rechargeable batteries Features and Benefits Model DM 520 Recording Format Linear PCM Pulse Code Modulation MP3 MPEG 1 Audio Layer 3 WMA Windows Media Audio...

Страница 2: ...kHz 320 kbps 256 kbps mode 44 1 kHz 256 kbps 192 kbps mode 44 1 kHz 192 kbps 128 kbps mode 44 1 kHz 128 kbps WMA ST XQ mode 44 1 kHz 128 kbps ST HQ mode 44 1 kHz 64 kbps ST SP mode 22 kHz 32 kbps HQ m...

Страница 3: ...rding PCM 48 kHz mode Approx 32 hours MP3 128 kbps mode Approx 37 hours ST XQ mode Approx 38 hours LP mode Approx 51 hours Playback Speaker PCM 48 kHz mode Approx 18 hours MP3 128 kbps mode Approx 19...

Страница 4: ...of preferred settings via a single menu selection Three of the Recording scenes are pre set with optimal settings for specific recording conditions another three can be customized by the user Five Pl...

Страница 5: ...de Zoom Low Cut Filter Off On On On VCVA Off Off Off Off Standby On On On On What are Playback Scenes The DM 520 has an option for the user to create up to five Playback Scenes to setup the recorder t...

Страница 6: ...order has a Low Cut Filter function to minimize low frequency sounds and record voices more clearly This function can reduce noise from air conditioners projectors and other types of white noise What...

Страница 7: ...o a single file Both Index Marks and Temp Marks are inserted using the INDEX SCENE button on the recorder Index Marks and Temp Marks cannot be added to files in the Audible folder What is the purpose...

Страница 8: ...e available in the DM 520 depends on several factors including the selected quality mode and whether the recorder is configured to use internal memory or a removable memory card sold separately When a...

Страница 9: ...ps 16 hrs 30 min 34 hrs 00 min 68 hrs 00 min ST XQ 16 hrs 00 min 33 hrs 00 min 66 hrs 00 min ST HQ 32 hrs 00 min 67 hrs 00 min 133 hrs 00 min ST SP 65 hrs 00 min 135 hrs 00 min 266 hrs 00 min HQ 65 hr...

Страница 10: ...ter the selection needs to be made in the Device Menu through the Memory Select function The available options are Built in Memory and microSD Card MicroSD and microSDHC cards from 512MB to 16 GB can...

Страница 11: ...be played in monaural even if they were recorded in stereo Can I rename my files when they are displayed on my computer Files in the DM 520 should not be renamed when displayed in a computer s file br...

Страница 12: ...led with this recorder to a computer Next press the STOP button on the recorder while plugging the other end of the USB cable into the recorder Charging will be displayed in the charging indicator at...

Страница 13: ...nge may not improve the quality of the recordings in a DM 520 The recorder has an overall frequency response of 40 23 000 Hz but the different quality modes modify the detail of the saved file data by...

Страница 14: ...t stored in the recorder Voice Guidance languages that can be downloaded into the DM 520 are Japanese English French German Italian Spanish Russian Finnish Czech Norwegian Swedish Portuguese Greek Dan...

Страница 15: ...elected language will upload to the recorder The Voice Guidance file set to the primary supported language in the recorder will be overwritten with the new Voice Guidance file in the selected language...

Отзывы: