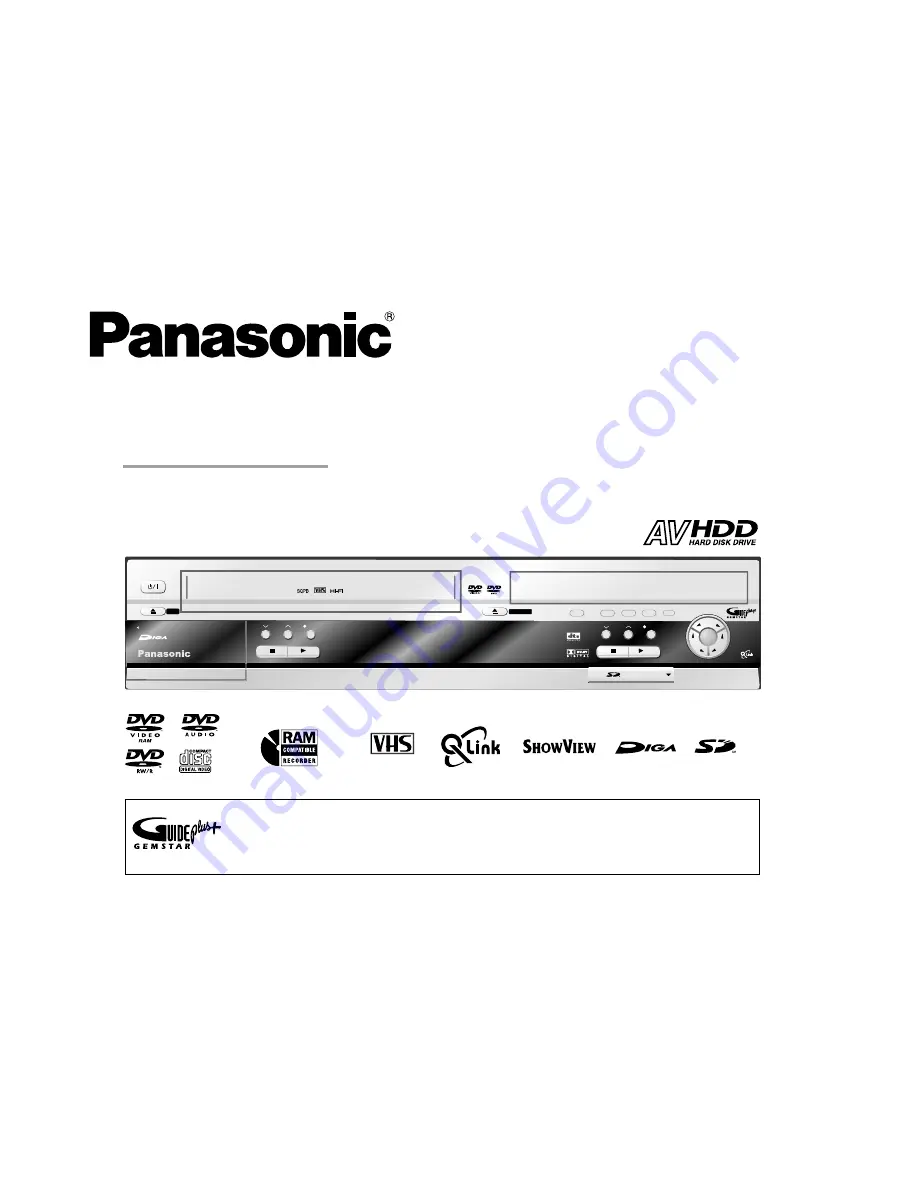
background image

DVD Recorder

Model No. DMR-EH80V

Operating Instructions

The GUIDE Plus+ System is available in these countries:
Belgium, Germany, France, Netherlands, Austria,

Switzerland,


Spain,

 Italy (Status: 30th April 2005).

PAL NTSC

VHS RECORDING

CH

REC

DMR-EH80V

PULL OPEN

DUBBING

REC

CH

/x1.3

PAL

NTSC

EJECT

OPEN/CLOSE

RAM

DVD-RAM/DVD-R/DVD-RW/+R RECORDING

HDD & DVD

HDD

SD

DVD

VHS

DRIVE SELECT

SD CARD / DV IN

HDD

VHS

DVD

  This service may not be available in some areas of the countries listed above. 

*

  The supplied areas may change.

*

Summary of Contents for DMR-EH80V

Page 1: ...a Switzerland Spain Italy Status 30th April 2005 PAL NTSC VHS RECORDING CH REC DMR EH80V PULL OPEN DUBBING REC CH x1 3 PAL NTSC EJECT OPEN CLOSE RAM DVD RAM DVD R DVD RW R RECORDING HDD DVD HDD SD DVD VHS DRIVE SELECT SD CARD DV IN HDD VHS DVD This service may not be available in some areas of the countries listed above The supplied areas may change ...

Page 2: ...Auto Setup 20 Overview DUBBING 81 GUIDE Plus setup 21 22 VHS FUNCTIONS 116 External devices 23 25 PLAYLISTS 91 95 Before requesting service 117 121 Creating a playlist 91 AUDIO OUT L R OPTICAL 24 GUIDE Plus System AV3 DV IN 25 Questions and answers 122 123 Edit chapters 94 95 COMPONENT VIDEO OUT 26 Glossary 124 Further information 125 Copying all pictures from an SD Card 96 Handling discs 27 Handl...

Page 3: ...se Inserting batteries The batteries last for about a year depending on how often you use the remote control unit Do not mix old with new batteries or batteries of different types Only use batteries without any harmful substances lead cadmium mercury Do not use rechargeable type batteries Remove the batteries if the remote control unit will remain unused for longer periods of time Do not heat or s...

Page 4: ...ING AND THAT NO OBJECTS FILLED WITH LIQUIDS SUCH AS VASES SHALL BE PLACED ON THE APPARATUS THIS UNIT IS INTENDED FOR USE IN MODERATE CLIMATES This product may receive radio interference caused by mobile telephones during use If such interference is apparent please increase separation between the product and the mobile telephone CAUTION DO NOT INSTALL OR PLACE THIS UNIT IN A BOOKCASE BUILT IN CABIN...

Page 5: ...N KIRJAKAAPPIIN TAI MUUHUN SULJETTUUN TILAAN JOTTA TUULETUS ONNISTUISI VARMISTA ETTÄ VERHO TAI MIKÄÄN MUU MATERIAALI EI HUONONNA TUULETUSTA JOTTA VÄLTETTÄISIIN YLIKUUMENEMISESTA JOHTUVA SÄHKÖISKU TAI TULIPALOVAARA ÄLÄ PEITÄ LAITTEEN TUULETUSAUKKOJA SANOMALEHDELLÄ PÖYTÄLIINALLA VERHOLLA TAI MUULLA VASTAAVALLA ESINEELLÄ ÄLÄ ASETA PALAVAA KYNTTILÄÄ TAI MUUTAAVOTULEN LÄHDETTÄ LAITTEEN PÄÄLLE HÄVITÄ PA...

Page 6: ... will appear within one second Recording to HDD hard disk drive The internal HDD saves up to 355 hours of your recordings when set to EP 8 Hours You can copy DUBBING your data at high speeds from HDD Hard disk drive to DVD RAM DVD R DVD RW DVD Video format or R SD Card drive You can copy DUBBING and save photos directly from the SD Card to the HDD or e g to DVD RAM Immediate playback Start the des...

Page 7: ...termined according to geographical areas A station that is not registered in your area is not displayed in the television programme list even if a signal can be received GUIDE Plus Your DVD Recorder can display a television programme list for analogue broadcast You can enjoy various useful features such as displaying the television programme list for up to the next 7 days and perform easy timer re...

Page 8: ... button INPUT SELECT CANCEL RESET ENTER Navigation Remote control Select the AV input on the television set Turn the television set on and off CH Select the channel on the television set VOLUME Volume control of the television set AV VOLUME CH TV 74 77 CH Channel select button A V channel Colour buttons Red Green Blue 15 1 5 5 0 5 5 0 5 15 0 1 5 TRACKING V LOCK PAGE CH 12 Press the corresponding b...

Page 9: ...ding VHS Functions SKIP INDEX STOP PAUSE PLAY SLOW SEARCH REW FF Stops recording replay or forward reverse action Basic SLOW SEARCH REW FF SKIP INDEX STOP PAUSE Press and hold more than 3 seconds to remove cassette PLAY PLAY x1 3 Hold PLAY during playback You can increase the playback speed RAM Exit a menu FUNCTIONS selection menu F U N C T I O N S Direction buttons in the menu navigation Navigati...

Page 10: ...10 Remote control REC ShowView Record TIMER RECORDING menu ShowView menu DUBBING REC Record TIMER RECORDING menu ShowView menu Switch timer on and off Direct TV record to DVD or HDD Record mode button XP SP LP EP Record mode button SP LP EP DUBBING menu Record with external recording control 51 54 56 54 58 59 60 58 REC 49 HDD DVD Functions VHS Functions P R O K G C H EC TIMER EXT LINK REC MODE DIR...

Page 11: ...dio channel or the sound track Erase a title or a chapter Launch the DISPLAY menu Detail information appears on the screen TIME SLIP Select the timeframe to be skipped Jumps forward 30 seconds VHS Functions JET REW For fast rewinding to the beginning of the tape Detail information appears on the screen Press several times to select sound playback mode AUDIO Comfort 38 114 69 38 36 39 112 113 115 4...

Page 12: ...n the path of the transmission The maximum range of the remote control is 7 m directly in front of the unit Keep the transmission window and the unit sensor clean The procedure can be impaired by direct sunlight or doors of glass cabinets Remote control signal sensor Switching to AV input on your Panasonic television set Some television models of the brands listed above e g older Panasonic units c...

Page 13: ...sired mode MODE 1 2 or 3 and confirm with ENTER Setting the remote control Setting options If you want to operate two units independently of each other with the same remote control then change the mode of the remote control Setting the remote control mode for unit Select the desired mode on the remote control Press and hold the ENTER button for approx 2 seconds and at the same time enter the numbe...

Page 14: ...n and close the disc tray Channel select button Channel select button Record Record AV3 input terminal Remove cassette S VIDEO input AV3 OPEN CLOSE VHS DVD Standby on switch Press to switch the unit from on to standby mode or vice versa In standby mode the unit is still consuming a small amount of power Front access EXT LINK VHS Recording with external recording control Display One Touch Dubbing H...

Page 15: ...ndicator VHS operating state e g playback search Tape speed SP normal recording duration LP double the recording duration EP triple the recording duration S VHS Dubbing display during a dubbing procedure SP LP EP TRK Track number GRP Group number TTL Title number PL Nummer of Playlist Channel display Blinking There are less than 10 minutes until the start of a programmed TIMER recording The device...

Page 16: ... Y S VIDEO S VIDEO out connector 2 VIDEO Video output 6 8 HDD DVD OUT 9 10 VHS DVD COMMON Luminance signal luminance Chrominance signal colour difference Chrominance signal colour difference 1 106 For a conventional tube television we recommend using the Scart socket You will get a high quality RGB video picture with an RGB compatible television If you want to use a progressive scan capable LCD pl...

Page 17: ...e steps below Disconnect the power from all units 1 Connect the aerial to the RF IN aerial input of the DVD Recorder 2 Connect the RF OUT aerial output of the DVD Recorder to the aerial input of the television set 3 Connect the AV1 socket 21 pin Scart socket of the DVD Recorder to the Scart input of the television set 4 Plug the DVD Recorder and the television set into the AC mains socket If your ...

Page 18: ...al input Audio Video input AC mains lead TV HDD DVD OUT Follow the steps below Disconnect the power from all units 1 Connect the aerial to the RF IN aerial input of the DVD Recorder 2 Connect the RF OUT aerial output of the DVD Recorder to the aerial input of the television set 3 Connect the HDD DVD OUT AUDIO L R VIDEO of the DVD Recorder to the input of the television set 4 Plug the DVD Recorder ...

Page 19: ...F cable HDD DVD OUT Follow the steps below Disconnect the power from all units 1 Connect the aerial to the RF IN aerial input of the DVD Recorder 2 Connect the RF OUT aerial output of the DVD Recorder to the aerial input of the television set 3 Connect the HDD DVD OUT AUDIO L R S VIDEO of the DVD Recorder to the input of the television set 4 Plug the DVD Recorder and the television set into the AC...

Page 20: ...Switch the unit on using the When the AV Standby on switch Country menu appears use to select the appropriate country and confirm with ENTER België Belgique Belgien Danmark Espa a ñ Nederland Italia Norge EëëÜäá France Deutschland Österreich Country RETURN leave ENTER access RETURN SELECT ENTER Auto Setup Auto Setup No Yes Do you want to setup the GUIDE Plus system 108 99 100 Automatic setup Regis...

Page 21: ...not want to setup select No You can perform the Setup at a later point in time by launching the GUIDE Plus system Enter the Postal Code of your location with or the number buttons on the remote control and press ENTER Should your Postal Code change you can update this information at a later point in time in the Setup of the GUIDE Plus system Use to select Yes and press ENTER The GUIDE Plus data is...

Page 22: ...l If no Host Channel was found a message appears No Host Channel detected Please check whether the right Host Channel has been allocated Which channels appear in the GUIDE Plus list depends on local reception conditions Sub optimum reception quality can result in missing or incomplete GUIDE Plus data German speaking part Flemish speaking part 80 Eurosport Eurosport Eurosport Canal Tele5 Eurosport ...

Page 23: ...and confirm with ENTER Use to select Decoder D H DVD HDD or VHS and confirm with ENTER Press RETURN and use to return to Connection Extra equipment for the connections shown Use to select Tuning to select Manual and confirm with ENTER Use to select an encrypted station and press ENTER In the Manual Tuning sub menu use to select Decoder and to select On Confirm the setting with ENTER 107 HDD DVD OU...

Page 24: ...urround Sound Amplifier example OPTICAL Optical digital audio cable Push the jack all the way into the socket with this side facing up Connecting a digital amplifier or a digital system component Connect an amplifier with a Dolby Digital DTS or MPEG decoder Use an Optical digital audio cable In the Sound SETUP menu change the Digital Audio Output setting according to your connected digital amplifi...

Page 25: ...o the DV input socket of the DVD Recorder Use the DV cable After you have connected the cables switch both devices on The DVD Recorder cannot be controlled by the connected DV unit The DV input of this unit is only intended for DV units A computer e g cannot be connected Some DV units do not allow for proper input of the picture and sound signal DV IN connection DV unit example DV IN Front connect...

Page 26: ... will be displayed properly However video material with an aspect ratio of 4 3 will be displayed stretched to the right and left If it is possible to adjust the aspect ratio of your television for progressive images set the Progressive setting to on If the AV1 Output setting in the SETUP menu is set to RGB without component no output will take place to the COMPONENT VIDEO OUT sockets Set this opti...

Page 27: ... cleaners or other solvents Note Only the label side of the disc may be written on Use a soft oil based felt pen Do not use a ball point pen or other hard writing instrument Do not affix any stickers or labels to the disc The disc can warp and may become unusable When not in use place the disc in its jewel case or cartridge so that is does not become scratched or dirty Do not drop the disc place t...

Page 28: ...ntent to another medium disc if you detect any problems Irregularities are manifested in repeated inexplicable noises and picture distortions Should you detect problems refrain from using your HDD In the worst case you will destroy the HDD Please take the unit to customer service Recordings saved to a damaged HDD cannot be recovered An unexpected sound may occur when switching the unit on and off ...

Page 29: ... vibrations and jolts Handling your HDD Remaining recording time on the HDD This unit records with a VBR Variable bit rate data compression system This means that the length of the programmed recording is variably adjusted based on the video data to be recorded Thus there may be differences in the display of the remaining recording time and the remaining recording length If there is not enough sto...

Page 30: ...by the manufacturer not all described functions may be able to be used Depending on the disc type the regional code and the recording conditions it may not always be possible to play the discs listed DVD RW DVD Video format Playback discs 200GB rewritable TIME SLIP function CPRM compatible supports 2 channel sound 16 9 format creation of playback lists deleting individual titles frees up storage s...

Page 31: ...rdings made with this unit must be finalised in order to be played back on a DVD player Digital programmes that allow one time only recording can not be recorded The DVD Video format can be recorded on DVD R or DVD RW RAM RAM 110 Disc formats Cartridge discs When the write protection device is activated you can neither record nor edit or delete the contents of a disc RAM Remove 8cm discs from the ...

Page 32: ...al channel sound programmes In the SETUP menu select Sound for Bilingual Audio Selection M1 or M2 Please note the following when copying in high speed mode If an external unit is connected select sound channel M1 or M2 on the external unit Copying from HDD to DVD in high speed mode You can copy titles from the HDD to DVD in high speed mode Before the titles are saved to the HDD please perform the ...

Page 33: ...with this unit Caution All saved data are deleted during formatting When the write protection device is activated you can neither record nor edit or delete the contents of the SD Card This unit supports SD Memory Cards that are formatted with FAT 12 and FAT 16 systems based on SD Memory Card spec Additional information is available on the Internet at http panasonic co jp pavc global cs write prote...

Page 34: ...ack 37 Start Slide Show 43 Quick View Play x1 3 38 JPEG MP3 format 44 Splitting a recording into chapters 38 Changing the audio channel 38 TIME SLIP 39 Playback 45 47 Delayed playback 39 Before playback 45 Using video cassettes 45 Erase protection of cassettes 45 Cleaning the video heads 45 MP3 playback 40 Playback 46 CD MP3 40 Ending playback 46 Selecting a group using the tree structure 40 PAUSE...

Page 35: ...uring the playback The unit saves the position The position is deleted if you switch the unit off Press PLAY to resume playback from the saved position To cancel the function press STOP several times RAM R RW V R RW VR HDD DVD HDD HDD DVD Playback Cancelling playback Press STOP to watch TV via the unit s tuner Press STOP during the playback Press STOP again to watch TV via the unit s tuner RAM R R...

Page 36: ... RETURN ENTER Select S SUB MENU Previous Next VIDEO PICTURE HDD HDD Playback Use the numeric buttons to select an entry e g number or number Use or the numeric buttons to select an entry and confirm with ENTER 5 15 A menu appears on the television screen VCD DVD A DVD V If appears on the television screen this function is not possible by the unit or the disc The operation of the disc menu depends ...

Page 37: ...put at the first fast forward speed Only for forwards direction Only motion pictures VCD DVD A Skipping chapters titles or pictures Press SKIP during playback or pause to skip chapters titles or pictures Each press increases the number of skips Only for forwards direction Only motion pictures VCD DVD A Not Not The pause feature is automatically switched on after approx 5 minutes RAM R RW V R HDD P...

Page 38: ...Output takes place in PCM with a digital connection Quick View is cancelled if SKIP or PAUSE is pressed or playback of a programme begins that was not recorded with Dolby Digital Quick View does not function during simultaneous recording and playback in XP or FR mode During playback press SKIP or SKIP to skip the chapter You can change the number of the audio channel e g the language setting by pr...

Page 39: ... picture in picture Playback picture Currently received picture receive channel The receive channel can be switched using the CH button This is not possible during a recording The TV picture is shown as picture in picture Press STOP to end the playback After 2 seconds press STOP again to stop the recording Use TIMER to stop a TIMER controlled recording Delayed playback Playback can be started whil...

Page 40: ...hows the track currently being TOTAL Selected track number played Total number of track numbers G Group number No Selected group number T Track number in the group Group Selected group name FUNCTIONS CD MP3 JPEG New MP3 Playback mode Recording Dubbing TIMERRECORDING ShowView DUBBING 23 To Others Playback MENU ENTER RETURN enu MENU Select file type JPEG MP3 RETURN ENTER The following information on...

Page 41: ...n to PICTURE JPEG VIEW HDD RAM Erase Picture Set up Protection Cancel Protection DPOF Other View Displaying the picture properties Select the desired picture and press ENTER Press STATUS twice Press STATUS again to exit the display 13 30 49 21 6 Date 16 6 2005 No 1 22 SD Card 42 Folder Picture No 101 0001 Return to TITLE VIEW SD CARD JPEG playback PICTURE Nächste Set up Protection Erase Picture Ca...

Page 42: ...Protection is displayed by Select Yes and confirm with ENTER Change the name of the selected folder Names created with this unit may not be able to be displayed by other units The selected folder and its contents are permanently deleted Even data that is not displayed with this unit Select Erase and confirm with ENTER The print settings DPOF made with this unit may not be able to be viewed on othe...

Page 43: ...3 015 Next Vorherige Nächste Slide Interval Start Slide Show Set display interval for Slide Show Press ENTER to set JPEG playback 017 RETURN ENTER Select S SUB MENU Previous Next DIRECT NAVIGATOR PICTURE JPEG VIEW SD CARD PICTURE The pictures in the selected folder are automatically played back one after the other The display duration for each picture is determined with the Slide Interval setting ...

Page 44: ...x34 through 6144x4096 sub scanning 4 2 2 or 4 2 0 MP3 format JPEG format CD RAM HDD SD CD JPEG XXXX JPG XXXX TIF DCIM XXXXX XXXX JPG XXXX TIF IM CDPF or IMEXPORT XXXX JPG XXXX TIF XXXX JPG XXXX TIF This unit can display the following Numbers XXX Letters Folders can be created on another unit However these folders cannot be selected as the target for a copy procedure A folder in which all numbers a...

Page 45: ...tapes for example from Panasonic During the playback of cassettes that were recorded on a different VHS recorder you may experience a lower picture quality 45 Playback Write protection of cassettes To protect against the accidental erasing of cassettes break out the write protection tab If you want to record on a protected cassette cover the hole with a piece of tape Cleaning the video heads Use a...

Page 46: ...atically stops after 5 minutes Image search forwards or backwards During playback press or The search speed increases by pressing the button twice JET SEARCH If you press and hold the button the image search lasts as long as the button is depressed Press PLAY to resume playback Fast forwarding or rewinding In stop mode press or Press STOP to end the forward rewind function JET REW For fast rewindi...

Page 47: ...nnel in progressive or RGB mode The television must be RGB or progressive capable Press DVD HDD and use CH to select the TP channel Press VHS and then PLAY Playback begins If the index signals are too close together this function may not work Thus the recordings should be at least 5 minutes long Setting the track position manually The unit automatically sets the track position If a cassette was re...

Page 48: ...k during recording Simultaneous recording and playback TIMER controlled recordings VPS PDC function controlled recordings FLEXIBLE REC FR Displaying the available recording time Manual programming Storage space on the disc Backup recording Checking changing or deleting TIMER RECORDINGS h ShowView TIMER RECORDING in the GUIDE Plus system Recording television programmes Displaying the approximate ti...

Page 49: ...ng duration Picture quality Maximum titles It is not possible to record to storage cards The recording is saved to free space If there is no more space left on the target drive you must delete recordings or use a new disc If you want to play a disc recorded using this unit on another playback unit you first have to finalise the disc Recording information It is not possible to simultaneously record...

Page 50: ...n recording dual channel or multi audio TV programmes on DVD R DVD RW or R only one audio channel can be recorded Programmed recording The TV programme list for the GUIDE Plus system is downloaded at night between 02 50 and 05 10 If you want to record during this time set the Auto Download Priority in the Setup menu of the GUIDE Plus system to Timer Prog When recording on DVD RAM in EP mode 8 Hour...

Page 51: ... PAUSE or REC again to resume recording The title is not divided DIRECTTV REC Recording VHS HDD DVD VHS Direct TV recording Press DIRECT TV REC for 3 seconds The recording begins Press STOP to end the recording If your television is equipped with Q Link functionality you can directly record the programme that you are watching on TV The programme position shown on the unit automatically switches to...

Page 52: ...ng recording you can start playback from the beginning of the programme Simultaneous recording and playback Press DIRECT NAVIGATOR during the recording or TIMER controlled recording Use to select a title and confirm with ENTER Press DIRECT NAVIGATOR again without selecting a title to exit the title view If you start the playback while the unit is in standby mode for a TIMER controlled recording th...

Page 53: ... begins Press RETURN to exit the FLEXIBLE REC window Press STOP to cancel the recording before the end has been reached Neither the channel nor the recording mode can be changed in PAUSE mode Displaying the available recording time Press STATUS several times The available time in minutes RAM R RW V R HDD Recording FLEXIBLE REC Recording in FR mode Maximum rec time 1 Hour 49 Min 1 Hour 49 Min Set r...

Page 54: ...he recording press TIMER again 66 R RW V R TIMER RECORDING ENTER RETURN CANCEL Date Start Stop Mode Name Programme Name Press ENTER to input a programme name 1 ARD 18 2 THU 7 50 8 50 HDD SP On Remain HDD 72 50 LP DVD 3 59 LP 12 09 37 18 2 THU VPS PDC Drive 55 VPS PDC function If the television station sends VPS PDC signals the beginning and end of a recording are synchronised with the current air ...

Page 55: ... your changes with ENTER Programmes that are currently being recorded cannot be changed Checking or changing Deleting If you selected VPS PDC On TIMER controlled recordings are deleted from the list after two days Make sure that the unit is switched to timer standby mode The symbol lights up in the unit display Name Programme position name of the TV station Date You can also programme titles to be...

Page 56: ... or pause the recording press TIMER again Name Date Start Stop Drive Mode VPS PDC RENEW 66 ShowView is a trademark of Gemstar Development Corporation The ShowView system is manufactured under licence from Gemstar Development Corporation ShowView ShowView 8 5 3 4 2 Enter ShowView Number by using 0 9 key Remain HDD 72 50 LP DVD 3 59 LP 12 09 37 18 2 THU TIMER RECORDING ENTER RETURN CANCEL Date Start...

Page 57: ...ng the TIMER Press TIMER to switch the unit to TIMER standby mode The TIMER symbol appears in your unit s display The GUIDE Plus programme list can be called again by pressing the GUIDE button No television picture appears in the preview screen in the GUIDE Plus programme list Programmes programmed in the TIMER RECORDING menu are provided with the symbol in the GUIDE Plus programme list To cancel ...

Page 58: ...Long Play mode approx 12 hours If you value a high quality picture select SP Displaying the approximate time remaining on the cassette Press FUNCTIONS Select the desired tape length in the VHS FUNCTIONS menu Press STATUS several times until the time remaining on the tape appears in the unit display With each press of the button the display changes as follows Current time Operating state and tape c...

Page 59: ...ress TIMER to switch the unit to timer standby mode The symbol lights up in the unit display To cancel or pause the recording press TIMER again The symbol turns off Name Programme position name of the TV station Date You can also programme titles to be recorded on a daily or weekly basis Start Start time Stop Stop time Press and hold the buttons to increase decrease the time in 30 minute increment...

Page 60: ...time must be set correctly to the start time given in the magazine When recording in the NTSC system the function may not work In the Timer recording screen check the start and end time and the VPS PDC signal If is displayed under Name use to select the desired programme position Use to select the recording mode A SP LP EP Save the programme using ENTER Press TIMER to switch the unit to timer stan...

Page 61: ...nd confirm with ENTER Confirm REC with ENTER Recording begins If the recording ends automatically confirm the message with ENTER Start the playback on your external DV unit Press Pause at the desired start position Use INPUT SELECT to select the DV channel If you want to record to VHS switch the unit to VHS and use INPUT SELECT to select the DC channel The DV signal is transferred via HDD DVD Use ...

Page 62: ...recording function via an external device e g receiver using EXT LINK Connect the external device with a 21 pin Scart cable to the AV2 socket Adjust the Ext Link function for the connected device TIMER recordings via external devices EXT LINK The programming of the recording must take place on the external device The recording begins when a corresponding signal is received from the connected devic...

Page 63: ...ess REC MODE to select the recording mode In stop mode use INPUT SELECT to select the input channel AV3 Start the playback on the external device Press REC at the point where you want to begin recording Use STOP to stop recording Recording to HDD DVD Press PAUSE to pause recording Press the button to resume recording This unit cannot record signals from PCs If M1 and M2 are selected on the connect...

Page 64: ...he recording mode Use INPUT SELECT to select the TP channel Press REC to start recording Use STOP to stop recording VHS Manually copying from HDD or DVD to VHS Start the desired title Press PAUSE where you want to start recording Use REC MODE to select the recording mode Use INPUT SELECT to select the DC channel Press PLAY Press PAUSE where you want to start the recording Press REC Then press PAUS...

Page 65: ...GEMENT SETUP FLEXIBLE REC PLAYLISTS DIRECTNAVIGATOR TIMERRECORDING ShowView DUBBING F U N C T I O N S GUIDE Plus EPG DVAUTOREC GUIDE Plus EPG Electronic programme guide DV AUTO REC The illustrations show DVD RAM menus The menu entries can be different depending on the disc or medium Press FUNCTIONS in stop mode Use to select a menu and confirm with ENTER To view the second screen page use to selec...

Page 66: ...ring a Title via the Number Buttons For Example the Letter R Press 7 to go to the 7th line Press 7 twice to select R and confirm with ENTER Selecting a Disc Name or Title from List Names Use SKIP to open List Names Use to select the disc name or title confirm with ENTER Erasing a Disc Name or Title from List Names Use SKIP to open List Names Use to select the title or name and press SUB MENU Confi...

Page 67: ... is currently being recorded The title overlaps other recordings HDD DVD was full or the maximum number of titles or scenes was reached so that the title could not be recorded The programme cannot be played back due to damaged data or cannot be recorded for another reasoon The title is write protected The television programme was copy protected so that the title could not be recorded The title was...

Page 68: ...play Other View S SUB MENU S SUB MENU ENTER ENTER RETURN ENTER DIRECT NAVIGATOR TITLE VIEW Rec time 0 01 SP Select Page 01 01 DVD RAM S SUB MENU No Name Date Day Time Name of title VIDEO PICTURE 01 ARD 12 9 THU 9 18 02 NTV 7 9 FRI 11 20 03 ZDF 12 9 THU 20 15 04 ARD 11 9 WED 13 00 05 ARD 11 9 WED 20 00 06 ARD 10 9 TUE 9 15 FUNCTIONS selection menu You can access further sub menus with SUB MENU Edit...

Page 69: ...operties Edit Chapter View Table View Other View VIDEO PICTURE 72 HDD DVD ERASE FUNCTIONS selection menu Remaining Time Corresponding chapter of PLAYLISTS will be erased Erase 2 00 SP Cancel Erase Properties TERRALUNA No 01 Date 13 7 2005 THU Name BBC1 Time 1 02 Rec time 0 01 SP TERRALUNA RETURN SELECT ENTER RETURN ENTER Sorting in TITLE VIEW only Table Display The titles can be sorted according t...

Page 70: ...NTER Use to select Erase and press ENTER To exit the menu use to select Exit and press ENTER Use PAUSE and SKIP to jump to the beginning or end of a title You can search for begin and end points with SLOW SEARCH TIME SLIP or Partial Erase RAM HDD Before you start erasing make sure that you really want to erase the recordings The complete name is displayed in the sub menu Properties Confirm Enter N...

Page 71: ...t where you want to divide the title and confirm Divide with ENTER Confirm Preview with ENTER The playback will take place 10 seconds before to 10 seconds after the dividing point Use to select Exit if you want skip the preview Confirm Exit with ENTER In the Divide Title screen use to select Divide and confirm with ENTER Divide Title RAM HDD F U N C T I O N S FUNCTIONS selection menu Edit Title Er...

Page 72: ...mbine Cancel 17 ZDF 1 10 FRI TERRALUNA DIRECT NAVIGATOR CHAPTER VIEW RETURN DIRECT NAVIGATOR TITLE VIEW Previous Next DVD RAM DVD RAM DVD RAM 02 03 ARD 12 9 THU TERRALUNA AUTO ASTRAL 01 ARD 23 9 THU ZDF 1 10 FRI 001 002 004 003 VIDEO PICTURE Use to select Erase and confirm with ENTER If you execute this procedure the chapter will be deleted and cannot be restored Subdivide the titles into chapters...

Page 73: ...pe view 75 Portrait view in the GUIDE Plus system 76 Changing stations in portrait view 76 Programme information in the GUIDE Plus system 77 Selecting the programme from the desired category in the GUIDE Plus system 77 Setup of the GUIDE Plus system 78 Setup 78 Postal Code 78 Changing the basic settings for your GUIDE Plus system Host Channel 79 Data Download 79 Auto Download Priority 79 Editor 80...

Page 74: ...s Die Abschl Freunde S O S Style Eine himmlische Familie 15 05 16 05 Eine himmlische 24 Hr 24 Hr TIMER REC Info Prog Type FUNCTIONS DVD RAM Disc Protection Off Recording Dubbing TIMERRECORDING ShowView DUBBING 23 To Others Playback DIRECTNAVIGATOR ENTER RETURN GUIDE Plus EPG F U N C T I O N S FUNCTIONS selection menu GUIDE Plus Direct access Press GUIDE on your remote control The GUIDE Plus list i...

Page 75: ...you select a programme the complete programme name and time appear in the line above the time bar Use to navigate within the GUIDE Plus list Only current and future programmes are shown You can also turn the smart wheel on your remote control to select an item Turning right Move the cursor downwards Turning left Move the cursor upwards Use PAGE to browse through the GUIDE Plus list Jump ahead 24 h...

Page 76: ... wheel on your remote control to select an item Turning right Move the cursor downwards Turning left Move the cursor upwards Use PAGE to browse through the GUIDE Plus list Jump ahead 24 hours Press the GREEN button to jump ahead by one day Jump back 24 hours Press the RED button You can only jump back to the current date Changing stations in portrait view To change stations press until the station...

Page 77: ...E Plus system The Programme Type function lets you display a GUIDE Plus list sorted by main category e g Movies Sport Each main category will contain individual sub categories The GUIDE Plus list for the selected main category only appears in the Portrait view Press the BLUE button to display the list of main categories Use to select the desired main category The sub menu for the selected main cat...

Page 78: ...the receipt of wrong or no data To change the Postal Code use to select Yes and press ENTER Use or the number buttons to enter your Postal Code and press ENTER Existing information can be lost by changing the Postal Code 7th Heaven 16 30 Editor Setup ENTER RETURN ARD ZDF RTL SAT1 RTL2 VOX PRO7 7th Heaven Abenteuer Wild Ta Fliege Die Talkshow Derrick Heute in Bianca Wege Das Familiengericht Das Jug...

Page 79: ...y The GUIDE Plus data update takes place several times each day In the timeframe shown in the menu recordings programmed with the TIMER RECORDING menu can be incomplete otherwise recordings programmed with the TIMER RECORDING menu always have priority GUIDE Plus In the timeframe shown in the menu the GUIDE Plus Data transfer has priority over the recordings programmed with the TIMER RECORDING menu...

Page 80: ...opriate Reference manually You can also manually assign the appropriate Reference if a station name was not recognised e g 06 The station names in the Reference list can deviate from the station list Use to select the desired station name Use PAGE to browse through the station list Use and to change the Reference setting of the appropriate station and press ENTER Changes in the station list in the...

Page 81: ...d playlists can be dubbed to the disc in the desired order Editing the playlist Deleting all saved dubbing settings and lists Dubbing information Recording and playback during dubbing Timer controlled Dubbing A finalized DVD R DVD RW DVD Video format R etc can be dubbed to the HDD and edited again While the disc is playing the material is dubbed to the HDD Hard disk drive according to the set time...

Page 82: ...HS Video SP 2 Dubbing Time Start Dubbing Cancel All Press ENTER to change settings 3 Time Setting On Dubbing Time 2 00 Dubbing Direction VHS 1 DVD Destination Capacity 2 14 Titles and playlists can be compiled and dubbed in a dubbing list Only pictures can be dubbed with the SD Card A title can be dubbed with just one push of the button without other settings being required You can copy directly b...

Page 83: ...n 1 and 15 minutes depending on the recording mode and the high speed compatible disc Playlists cannot be copied in high speed mode if The playlists are made up of different recording modes or the FR recording mode The playlists contain different audio modes The titles contain many deleted segments Copy direction Information on dubbing with the dubbing list In high speed mode it is possible to cop...

Page 84: ...at or Recording Mode and confirm with ENTER Format Select whether you want to transfer video or pictures Recording Mode Select the recording quality or the copy speed High Speed XP EP FR Use to select the desired setting and confirm with ENTER Use to return to Dubbing Mode 49 58 Cancel All All saved dubbing settings and lists will be erased In the DUBBING screen use to select Cancel All and confir...

Page 85: ...te List screen use to select the desired title and confirm with ENTER The title is transferred to the copy list Use to return to Create List In order to edit several elements use to select the desired title and press PAUSE appears In the case of high speed recordings to DVD R DVD RW DVD Video format or R only those programmes marked with can be selected Dubbing cannot begin if the Size value is mo...

Page 86: ... be erased Use to select Yes and confirm with ENTER Add Add new items to the dubbing list Use to select the desired playlist or title and confirm with ENTER Erase Erase the selected items Use to select Yes and confirm with ENTER Move The selected items are moved in the dubbing list and the order is changed Use to select the desired item and confirm with ENTER In order to edit several elements use ...

Page 87: ...hen only be played back on other players if they were finalized after dubbing If the dubbing of a title in high speed mode stops in the middle the affected title will not be recorded Even if the title was not dubbed to the DVD R DVD RW or R the remaining capacity of the disc is decreased Time lapsed playback editing etc are not possible during dubbing Regardless of the selected recording drive the...

Page 88: ...with ENTER Dubbing Direction Use to select Source and confirm with ENTER Use to select DVD or VHS and confirm with ENTER Use to return to Dubbing Direction and use to select Dubbing Mode Timer controlled Dubbing The entire disc cassette can be dubbed or the duration of the dubbing can be determined The titles are transferred without chapters The procedures and screen displays are also recorded dur...

Page 89: ...nation drive Recording Mode FR and Time Setting Off DUBBING starts after the cassette is rewound Titles for each index signal are automatically created for each index signal On DUBBING starts at the desired start position No titles are created Use or the numeric buttons to change the time setting and confirm with ENTER Dubbing Mode Use to select Recording Mode and confirm with ENTER Use to select ...

Page 90: ... select To Others ENTER PLAYLISTS ENTER When copying from HDD DVD to VHS or VHS to HDD DVD use AUDIO to select the desired audio channel for dual channel sound When copying from HDD DVD to VHS the recording begins at the beginning of the title No other functions are possible during the copy procedure from HDD DVD to VHS Starting DUBBING DUBBING preparation One Touch Dubbing You can copy directly b...

Page 91: ...arking use PAUSE to stop the playback Use SLOW SEARCH SKIP TIME SLIP or to select the position Use to select Exit and confirm with ENTER Press FUNCTIONS in stop mode Use to select To Others and confirm with ENTER Confirm PLAYLISTS with ENTER In PLAYLIST VIEW use to select the free Create field and confirm with ENTER You can create and then edit a playlist from your favourite chapters of your recor...

Page 92: ... Confirm PLAYLISTS with ENTER Use to select a playlist You can play the playlist with ENTER Erase Confirm Erase with ENTER In the next screen use to select Erase An erased playlist cannot be restored Confirm Erase with ENTER Properties Use to select Properties and confirm with ENTER Information on the playlist e g chapter and date is displayed Chapter View To edit several elements use to select th...

Page 93: ... Thumbnail menu press PLAY to start the playback Press ENTER at the selected spot Confirm Exit with ENTER The displayed preview is exchanged for this image Press FUNCTIONS Use to select To Others and confirm with ENTER Confirm PLAYLISTS with ENTER Use to select a playlist Press SUB MENU Use to select Edit and confirm with ENTER In the sub menu select the desired option To edit several elements use...

Page 94: ...TURN to go back to CHAPTER VIEW In CHAPTER VIEW use to select the desired chapter and press SUB MENU In the sub menu use to select the desired option and confirm with ENTER You can create a new chapter from the Source Title Edit Chapters PLAYLISTS CHAPTER VIEW Next Previous 002 004 03 ZDF 1 10 FRI 0 00 Seite 01 01 Add Chapter Move Chapter Create Chapter Combine Chapters Erase Chapter PLAYLIST View...

Page 95: ...e the dividing point can be lost Combine Chapters In the next screen use to select Combine and confirm with ENTER The selected chapter is combined with the next chapter Erase Chapter In the next screen use to select Erase and confirm with ENTER The original title is not erased by erasing the chapter PLAYLIST View Return to PLAYLIST VIEW Move Chapter Use to select the position where the chapter is ...

Page 96: ...ures from an SD Card You can copy all content from an SD Card to HDD or DVD using the COPY ALL PICTURES function To select the SD drive press SD Press FUNCTIONS Use to select To Others and confirm with ENTER Confirm COPY ALL PICTURES with ENTER Press RETURN for 3 second to stop the COPY ALL PICTURES procedure early To continue copying press RETURN To exit the screen press ENTER The copied folders ...

Page 97: ...m with ENTER Use to select the desired sub menu and use to switch to setting Use to select the desired setting and confirm with ENTER Use to select the desired option and confirm with ENTER Follow the menu navigation The unit saves your settings Use to return to the sub menu and use RETURN to exit the menu Use FUNCTIONS to return to the FUNCTIONS menu ENTER Tuning Manual Menu navigation in the SET...

Page 98: ...TIONS selection menu Disc Picture Sound Display Connection SETUP Others Manual Auto Setup Restart Download from TV Tuning Manual Tuning Pos Name Ch Pos Name Ch 1 ARD 7 Delete 95 PRO7 7 6 VOX 8 9 10 8 14 15 13 12 11 RETURN SELECT ENTER 5 SAT1 11 3 N3 2 4 RTL 12 2 ZDF 4 16 17 Pos Name 8 95 16 17 18 19 20 Pos Name Channel Fine Tuning Decoder Video System Manual Tuning 2 RETURN CHANGE ENTER 1 ARD Auto...

Page 99: ...d Moving television stations If the station table was not created using or similar funtions Use to select the station that you want to move Q Link Press YELLOW button Use to select a new position and confirm with ENTER Inserting an empty programme position If the station table was not created using or similar funtions Use to select the programme position in front of which an empty programme positi...

Page 100: ...an 7378 Lithunian 7684 Polish 8076 Slovenian 8376 Turkmen 8475 Afrikaans 6570 Bulgarian 6671 Finnish 7073 Interlingua 7365 Macedonian 7775 Portuguese 8084 Somali 8379 Twi 8487 Albanian 8381 Burmese 7789 French 7082 Irish 7165 Malagasy 7771 Punjabi 8065 Spanish 6983 Ukrainian 8575 Ameharic 6577 Byelorussian 6669 Frisian 7089 Italian 7384 Malay 7783 Quechua 8185 Sundanese 8385 Urdu 8582 Arabic 6582 ...

Page 101: ...ring a password Changing the Security Level Unlock Recorder Return to level 8 Change Password Change the password Change Level Change the unlock level Temporary Unlock You can temporarily unlock a disc for playback The unit is locked again when you switch to standby or open the disc tray DVD Audio Video mode Playback On Off On You want to play the DVD Video content of a DVD Audio If you change dis...

Page 102: ...y of the still image Field Select this function if the picture is disturbed with the Automatic setting Frame Select this function if small text or line structures are not displayed clearly with the Automatic setting S VHS Dubbing Setting If you are dubbing a video tape to DVD that was recorded in S VHS or in S VHS ET format select Automatic or SQPB Automatic Plays and dubs the tape in S VHS qualit...

Page 103: ...ncreased and the level of loud sections is decreased The sound is still clearly audible when the volume is decreased ON Off only Dolby Digital Bilingual Audio Selection If you want to record programmes on discs that were broadcast in dual channel tone you can choose between the original language M 1 or another available language M 2 If you are copying from an external source or a tape position to ...

Page 104: ...f the connected unit cannot decode the corresponding signal the setting must be switched to PCM Otherwise strong noise can cause damage to hearing or loudspeakers Perform settings based on your audio system ON The connected unit cannot process signals with a scan frequency of 96 kHz or 88 2 kHz Signals are converted to 48 kHz or 44 1 kHz Off The connected unit can process signals with a scan frequ...

Page 105: ...B On Screen Messages Grey Background On The grey background is displayed when there is no television reception FL Display Changes the brightness of the unit display Automatic The unit display becomes dark during playback In standby mode all displays are hidden If you selected Power Save On the brightness of the display cannot be changed Automatic Off Bright Dim Automatic ON Off Automatic The scree...

Page 106: ...ottom of your screen 16 9 4 3 Letterbox PAL NTSC ON Off On In COMPONENT VIDEO OUT mode the signal is displayed in full picture quality PAL You connect the unit to a PAL or multi system television set Programmes that were recorded with NTSC are played back as PAL60 NTSC You connect the unit to an NTSC television set Programmes that were recorded with NTSC are played back as NTSC AV1 Output Video wi...

Page 107: ...V2 Connection Decoder D H DVD HDD Upon connection of a decoder for recording on DVD or HDD Decoder VHS Upon connection of a decoder for recording on VHS Ext A satellite receiver is connected Ext Link Ext Link 1 For digital receivers that send a special recording control signal e g the F U N receiver TU DSF41 Ext Link 2 External recording control for satellites or digital receivers video signal RGB...

Page 108: ...time will influence the programmed recording of TV programmes don t forget to change summer time and winter time All settings except for the security levels with associated password and the time settings are reset to their factory settings All settings except for the programmed channels time country language and disc language settings the security levels including password and the remote control c...

Page 109: ...confirm with ENTER Use FUNCTIONS to return to the FUNCTIONS menu Disc Name Enter the name The name is displayed in the FUNCTIONS window You cannot give a name to a DVD R R RW V after it has been finalised Disc Protection This procedure allows you to activate or deactivate write protection Use to select Yes and confirm with ENTER Write Protection On The padlock is closed To deactivate write protect...

Page 110: ...even if protected Start formatting Yes No Start Cancel Format Disc Some discs are not formatted Before you can use them in this unit they must be formatted The formatting erases all data on the disc Use to select Yes and confirm with ENTER Use to select Start and confirm with ENTER The formatting process begins After it is complete a message is displayed Press ENTER Press RETURN to stop the format...

Page 111: ...m with ENTER If Top Menu is selected the disc menu appears first If Title 1 is selected the playback begins at the beginning of the disc Finalize Finalizing turns DVD Rs into DVD Videos in DVD Video format They can be replayed on all DVD players which play the DVD Video format Use to select Yes and confirm with ENTER Use to select Start and confirm with ENTER The finalization process begins and ta...

Page 112: ...gital 2 Och VCD DVD A DVD V DVD A RAM R RW V R RW VR DVD V DVD A RAM R RW V R RW VR DVD V DVD A Soundtrack Change the language by changing the soundtrack Subtitle Angle Audio channel PBC Subtitle language Select another recording angle Select the audio channel L R L R PBC displays whether the menu playback control is switched on or off Sound properties LPCM PPCm Dolby Digital DTS and MPEG signal t...

Page 113: ...Video if the Auto setting disrupts the video content Auto1 Auto2 Video Select Video if Auto1 or Auto2 settings disrupt the video content PAL output signal NTSC output signal Disc Play Picture Sound Other Playback NR Off Playback NR Reduces noise and image distortion On Off Progressive On Transfer Auto Disc Play Picture Sound Other V S S Off Dialog Enhancer Off DVD V RAM RW V R RW VR DVD A DVD V RA...

Page 114: ... changes each time that the button is pressed To exit the display press STATUS 1 Current medium 2 Current recording and playback state input channel Displaying the information Record Pause recording Quick View Playback x1 3 Playback Pause playback Fast forward 5 speeds Rewind 5 speeds Slow motion Slow motion rewind 5 speeds 6 Available recording time and recording mode e g 0 50 SP shows 50 minutes...

Page 115: ...lelvision screen The tape counter is automatically set to 0 00 00 when a video cassette is inserted Rewind Tape counter Time Tape remaining Forward Playback The remaining time on the tape depends on the correct setting of the tape length Use CANCEL RESET to set the counter to 0 00 00 Recording Fast forward Fast rewind These displays do not apper in PAUSE mode or during slow motion playback Changin...

Page 116: ...confirm with ENTER Press ENTER for 5 seconds to start the QUICK ERASE function The erase procedure takes about 30 minutes for an E 180 cassette Once the end of the cassette has been reached the unit automatically rewinds the tape Press STOP to cancel the procedure Settings in the VHS FUNCTIONS Menu Erase all recordings on a played tape AUTO Automatically detects PAL or MESECAM PAL When the PAL sys...

Page 117: ...nit for 10 seconds The settings are retained Resetting the security level settings î Press DVD With the disc tray open press and hold Rec and Play 1 3 on the unit for at least 5 seconds Restoring the default factory settings while retaining your main settings î In the SETUP menu for Shipping Condition select the option Yes All settings except for password time and security level will be reset to t...

Page 118: ...ed î When recording or high speed dubbing to a DVD R DVD RW DVD Video format and R the rotation sound is louder than normal This is not a malfunction î When recording to the HDD Hard disk drive set Rec for High Speed dubbing in the SETUP menu to On î The HDD Hard disk drive is in SLEEP mode HDD SLP appears in the display of the unit î The unit is currently recording î The unit is out of order With...

Page 119: ...ons for the television î There is a malfunction The numbers following the letter H indicate the condition of the unit Switch the unit to standby I If the unit does not switch to standby mode press and hold I for approx 10 seconds or unplug it from the power supply for approx one minute and reconnect the cable Press I to switch the unit on If the malfunction is not eliminated after this contact cus...

Page 120: ...has been changed î Some titles and chapter of DVD Video are not played back if the Ratings have changed î The languages were not recorded on the disc î You may need to use the disc menu to select the languages î The language is not recorded on the disc î The subtitles are not recorded on the disc or are not switched on î The angle perspective can only be changed for scenes that were recorded in di...

Page 121: ...ideo cassette cannot be copied to disc î When recording from disc to video cassette the DC channel was not selected î DVD is copy protected Some or all recorded programmes were lost î If the power goes out during recording or editing or the power plug is disconnected from the power socket the programme can be lost or the disc can be damaged The TIMER controlled recording cannot be cancelled î Pr e...

Page 122: ...properly The reference station is not assigned correctly in the SUB MENU Editor Select the correct reference station There was a programme change Check the current program e g on the Web site for the GUIDE Plus system provider or station provider How do I add or hide a station in the GUIDE Plus system For these stations select On Off manually in the SUB MENU under Editor You can only view stations...

Page 123: ... I cancel a TIMER programming The T symbol appears in the GUIDE Plus when a TIMER recording is programmed with the GUIDE Plus system To cancel a TIMER RECORDING programming press PROG CHECK Select the desired entry and press CANCEL Can I receive GUIDE Plus system data via a connected satellite receiver or a Set Top Box No only via the built in tuner To perform timer recordings with satellite recei...

Page 124: ... time Films are made up of 24 or 30 frames per second and DPOF is the standard format for printing pictures recorded intervals The number of scans per second is called the cinema movies generally 24 frames per second Videos with a digital camera etc It enables automatic printing in a scan frequency The higher the scan frequency the better are made up of 60 so called split frames per second photo s...

Page 125: ...ompensation for loss of recorded or edited material nor for consequential damages attributed to a defect in the unit or the disc Information on disposal for users of waste electrical electronic equipment private households This symbol on the products and or accompanying documents means that used electrical and electronic products should not be mixed with general household waste For proper treatmen...

Page 126: ...r 2 2 5x Rev 2 0 Playable discs DVD R Gen Ver 2 0 Ver 2 0 4x Rev 1 0 Ver 2 x 8x Rev 3 0 DVD RW Ver 1 1 Ver 1 1 2x Rev 1 0 Ver 1 2 4x Rev 2 0 DVD R Ver 1 0 Ver 1 1 Ver 1 2 Playback only discs PAL MESECAM SP 23 39 mm s 240 min LP 11 7 mm s 480 min EP 7 8 mm s 720 min NTSC SP 33 35 mm s 168 min EP 11 12 mm s 505 min with E 240 cassettes Recording mode Recording time DVD RAM DVD R DVD RW R RW DVD Vide...

Page 127: ...V 6 dBV The output impedance of each output socket is less than 1 kOhm 6 dBV 6 dBV VHS Audio interface Input Output Video interface TV system PAL 625 50 SECAM input only NTSC 525 60 Input The input impedance of each input socket is 75 Ohm AV1 SCART Video 1 Vp p AV2 SCART Video 1 Vp p Y 1 Vp p C 0 3 Vp p PAL Burst RGB 0 7Vp p 625 50 AV3 Socket Video 1 Vp p S Video Y 1 Vp p C 0 3 Vp p PAL Burst 625 ...

Page 128: ... channel 64 Still Mode 102 Name 66 Decoder 23 107 Subtitle 101 112 NTSC 31 62 63 106 Default Settings 108 S VHS Dubbing Setting 102 Dialog Enhancer 113 Symbols 67 On Screen Messages 105 Digital Audio Output 104 OPTICAL 16 24 Disc formats 30 31 Tape length 58 116 OSD 116 Disc Protection 109 Time 108 Dolby Digital 24 104 125 TIME SLIP 39 PAL 31 98 106 DPOF 42 Title Page 98 PB Colour system 116 DTS 2...

Reviews: