background image

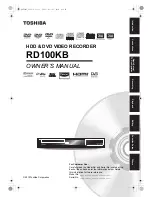
OWNER’S MANUAL

Recording

Playback

Library

Function setup

Other

s

Intr

oduction

Editing

OPERATIONS

Read “INSTALLATION GUIDE” first.

PM0015867010

T

OSHIB

A


D

VD VIDEO 

RECORDER


D-R2SU/D-R2SC/D-KR2SU

S

Printed in China

Printed on 70% Recycled Paper

DIGITAL VIDEO

DVD VIDEO RECORDER

 © 2004 Toshiba Corporation

D-R2SU

D-R2SC

D-KR2SU

Summary of Contents for D-KR2SU

Page 1: ...Others Introduction Editing OPERATIONS Read INSTALLATION GUIDE first PM0015867010 TOSHIBA DVD VIDEO RECORDER D R2SU D R2SC D KR2SU S Printed in China Printed on 70 Recycled Paper DIGITAL VIDEO DVD VIDEO RECORDER 2004 Toshiba Corporation D R2SU D R2SC D KR2SU ...

Page 2: ...rd 63 Skipping to the next previous chapter or track 64 Playing in slow motion 64 Playing frame by frame 65 Viewing still pictures Playing a disc that contains still pictures 65 Locating by entering the number 66 Locating by entering the number of a desired section 66 Locating a specific point by entering its elapsed time Time Search 67 Selecting the camera angle 68 Selecting subtitles 69 Zooming ...

Page 3: ...stomizing the function settings 122 DVD player settings 126 Picture Audio settings 129 Display settings 131 Operational settings 132 DVD recorder operation 133 Management settings 135 Setting of picture and sound quality for recording 135 Others Before calling service personnel 138 Error codes on the display window 141 Recording duration 142 Language code list 143 Specification 144 Limited Warrant...

Page 4: ...4 Introduction Introduction Caution for safety Read SAFETY PRECAUTIONS IMPORTANT SAFETY INSTRUCTIONS Precautions and others of the INSTALLATION GUIDE first ...

Page 5: ...ompatible discs later in this Introduction and to the discussion of DVD playback and features later in this manual may appear on the TV screen during operation means that the operation is not permitted by the recorder or the disc Recording Restrictions Copy protected contents of DVD Video disc VIDEO CDs or audio CDs on the market cannot be copied on this recorder Contents without copy protection s...

Page 6: ... discs comply with the global standard DVD VR Video Recording format and are optimized for recording of TV programs You can rewrite repeatedly without deterioration of an image quality erase unnecessary parts divide a chapter or specify playback area by frame Its cartridge is suitable for a longer term storage and family use and its large capacity of 9 4 GB allows more recording space DVD R discs ...

Page 7: ...y on page 5 For playback only DVD video disc 12cm 43 4 in 8cm 31 4 in Region number 1 or ALL Color system NTSC The region number of this DVD recorder is 1 If region numbers corresponding to a specific playable area are printed on your DVD video disc and you do not find 1 or ALL or the disc is encoded to permit playback only in regions other than Region 1 disc playback will not be allowed by the re...

Page 8: ... do not remove the disc even when you can Refer to the instruction manual that comes with the disc if it is absolutely necessary to remove the disc Some commercially available cartridge discs cannot be recorded or edited once the inside discs are removed To protect recorded contents Slide the write protect tab to PROTECT with something small enough The disc can play but cannot be edited or erased ...

Page 9: ...ages for which copying is prohibited or restricted copy once or copy prohibited cannot be recorded Even if the disc is labeled as CPRM compatible this recorder can only be used to record copy free material DVD VR mode recording is not possible Recommended discs Victor JVC VD RW47BU 4 3 LB 16 9 LB 16 9 PS 2 2 3 Mark Meanings Number of audio streams recorded in the disc 2 streams such as English and...

Page 10: ...throom or near a humidifier Store discs vertically in a case Stacking or placing objects on discs outside of their case may cause warping DVD video disc Title 1 Title 2 Chapter 2 Chapter 1 Chapter 2 Chapter 3 Chapter 1 Track 1 Track 2 Track 3 Track 4 Track 5 VIDEO CD audio CD Structure of disc contents Normally DVD video discs are divided into titles and the titles are subdivided into chapters VID...

Page 11: ...se recorded contents to use the disc repeatedly Initialize the disc Yes Yes If the disc has been executed DVD Video finalizing process first cancel the process then delete contents Yes If the disc has been executed DVD Video finalizing process first cancel the process then delete contents Yes Yes After you execute DVD Video finalizing process on a recorded disc you cannot name a title or create a ...

Page 12: ...n playing REC PLAY Illuminates when copying within a disc 7 PLAY button page 59 Starts playback 8 Disc tray page 20 Loads a disc into the disc drive Front panel The above illustration displays the front panel with the cover open See the following page on how to open or close the cover 9 Front panel display page 18 Ä STOP button page 35 59 Stops playback or recording Å PICTURE SEARCH button page 63...

Page 13: ...te Do not place a heavy object on the cover while it is open Doing so may damage the recorder à INPUT SELECT button page 32 Pressing repeatedly selects between various input sources â INPUT 2 jacks page 36 Use this when recording from other input source such as a VCR or a camcorder ä DV input terminal page 112 Use this when recording from a digital video device such as a digital video camera ...

Page 14: ...audio input jack When connecting the optical digital cable remove the cap and fit the connector into the jack firmly When not using the jack keep the cap inserted to protect it from dust intrusion 1 AC IN socket page 15 in INSTALLATION GUIDE Connects the supplied power cord 2 Ventilation fan 3 VHF UHF RF IN FROM ANT input socket page 14 in INSTALLATION GUIDE Connects to an antenna or cable signal ...

Page 15: ...15 Recording Playback Editing Library Function setup Others Introduction 9 OUTPUT jacks page 15 17 18 22 in INSTALLATION GUIDE Outputs video and audio signals to a connected TV or amplifier ...

Page 16: ...ELECT ZOOM P in P TIME BAR CHP DIVIDE DISPLAY INPUT SELECT PROGRESSIVE QUICK MENU INSTANT SKIP INSTANT REPLAY TOP MENU MENU RETURN DVD TV TIMESLIP F R A M E ADJUST PICTURE S E A R C H SK I P S L O W SETUP ENTER 1 2 3 4 5 6 10 7 8 9 DELETE T SEARCH VCR Plus REC MODE CLEAR 0 EXTEND TV CODE 1 2 3 4 5 6 7 8 9 10 11 12 13 14 15 16 17 18 19 20 21 44 45 46 47 43 48 49 50 42 41 40 39 38 37 36 35 34 33 32 ...

Page 17: ...MMER button page 19 FL SELECT button page 19 Buttons for TV operation page 46 in INSTALLATION GUIDE ON STANDBY button page 20 21 RETURN button 2 CHANNEL buttons page 20 33 AUDIO button page 71 INSTANT SKIP button page 63 INSTANT REPLAY button page 63 CONTENT MENU button page 53 89 EDIT MENU button page 104 SKIP button page 64 PICTURE SEARCH button page 53 63 ENTER button page 53 122 PLAY button pa...

Page 18: ...cator Illuminates when displaying the bit rate selected for recording or when displaying the actual bit rate 5 REMAIN Remaining space indicator Illuminates when an available recording time is displayed 6 VCD CD indicator VCD Illuminates when a VIDEO CD is loaded CD Illuminates when an audio CD is loaded 7 Title indicator Illuminates when a title number is displayed 8 TRK Track indicator Illuminate...

Page 19: ... dimmed off Switching the display Every time you press the FL SELECT button the display changes between the channel title number and time The display may not change depending on the disc or recording conditions Ñ Channel indicator Displays the current channel or other numbers such as a title number track number bit rate or input selection Ö Multi display Displays the current time elapsed time rema...

Page 20: ...tput TV channel signals to the connected TV also in the stop mode You can select a desired channel by pressing the CHANNEL buttons or the number buttons These buttons can select channels of a connected cable box or satellite system if IR control page 37 in INSTALLATION GUIDE is set to On ON STANDBY button CHANNEL buttons ON STANDBY button ON STANDBY indicator Loading e g Loading a disc Check disc ...

Page 21: ...he loaded disc may become recording disabled In such a case executing an initialization of the disc using the formatting function of the recorder may refresh it However all contents stored on the disc will be completely erased by this initialization process This recorder may indicate alert messages with some DVD RAM discs right after insertion If such a disc is used for playback or recording on ot...

Page 22: ...apter division Forward skip by 1 20 Reverse skip by 1 20 Accompanied with the followings DVD RAM DVD RW DVD R Title number title name and chapter number chapter name DVD VIDEO Title number and chapter number VCD CD Track number Notes To disable the status display set On Screen Display page 131 to Off You can add the current status of the settings to this display See page 79 x1 2 Title End Chapter ...

Page 23: ...icture to the full of the screen You can change playback speed See page 63 3 To stop press STOP A current channel broadcast appears TV xxxch accompanies Pressing the REC button starts recording On recording see page 25 Continued ENTER PLAY STOP EASY NAVI 005 2004 04 03 07 00am TV 18 TV 12ch Original 00 54 30 00 10 15 DVD RAM Play Time Time Slip TR TV Viewing Delete Title Finalize R RW Format RAM R...

Page 24: ...ppears Actual selections vary depending on operational status 2 Press to select an item then press ENTER To exit the Quick Menu Press QUICK MENU again Alternatively Select Exit with then press ENTER Quick Menu Title information Restart title Auto Power Off Exit Bit rate Special playback mode e g To exit the EASY NAVI Press EASY NAVI again Note For a disc other than the specified one the finder can...

Page 25: ...eo disc VCD VIDEO CD CD Audio CD For CD containing JPEG or MP3 WMA files see page 74 76 Most instructions are based on remote control operation unless otherwise noted You can use the buttons on the remote control and those on the main unit as well when they have the same function If copy protection signal is detected during recording on this recorder the recording automatically pauses and a messag...

Page 26: ...cedure displayed on screen to format the DVD RAM disc compatible with this recorder Some DVD RAM discs formatted on a PC may not be usable Note This recorder records on a DVD RAM disc if it complies with DVD RAM standard Version 2 0 or 2 1 However you may not record on some DVD RAM discs that have complicated contents often to protect the recorded data When you select a DVD RAM discs that has alre...

Page 27: ... process writing managing information Operations other than changing channels cannot be done until this icon disappears The time for executing this process differs depending on the recording time or capacity of the disc Note that all recording content may be deleted if the unit is disconnected from a wall outlet or a power failure occurs during recording If a power failure occurs within five minut...

Page 28: ...button to eliminate the window Before recording Continued Recording Be sure to read this section prior to using a DVD RAM RW disc on this recorder for the first time For DVD R initializing is not necessary Initializing a DVD RAM RW disc Logical format A disc should be initialized in the following cases The recorder may display a message to request you to do so e g When you use a DVD RAM RW disc on...

Page 29: ...g A disc which is not formatted correctly The disc which has errors during writing because of dirt on the disc and cannot be further recorded or cannot initialize normally You need to start physical formatting from the first step again when you use a failed disc Physical formatting does not work if the disc contains a lot of voids beyond the limitation of this recorder If an error occurs in physic...

Page 30: ...racter being selected appears e g Operation guidance of the remote control To enter the character normally use the direction buttons on the remote About the other buttons to be used are shown on the operation guide Shifts a cursor Enters the number Erases one character immediately to the left side of the cursor Erases all the characters on the input column Caps Lock Saves the changes on the input ...

Page 31: ...the cursor Select BkSp by pressing the buttons then press the ENTER button Alternatively open the lid of the remote control and press the DELETE button 1 Press the button to select an input mode 2 Press the buttons to select a character then press the ENTER button The selected character is input on the cursor 3 Repeat steps 1 and 2 to enter characters 4 When finished press to save the characters T...

Page 32: ...ted to the INPUT2 jacks on the front panel page 36 L 3 To record a source connected to the INPUT3 jacks on the rear panel page 36 To record a program from a connected set top box set the channel to Ch 3 Ch 4 L 1 or L 3 according to the connection the same as page 40 on INSTALLATION GUIDE If the connection of the supplied IR control cable and the necessary settings are all done you can select chann...

Page 33: ... channel to record The CHANNEL buttons are also available 3 Press QUICK MENU to display the Quick Menu If you want to use the default setting for AV record quality skip to step 7 4 Press to select AV record quality then press ENTER 5 Press ADJUST to select the setting number e g See page 40 for details on Mode Rate and Audio quality Continued 1 2 3 4 5 6 7 8 9 0 AV record quality Custom setting 5 ...

Page 34: ...nd recording the same sound is recorded on both the left and right channels When Audio is set to L PCM multi channel sound is recorded as stereo sound When playing this recorded sound you will hear MAIN and SAP sounds simultaneously Press the AUDIO button to select a desired sound When DVD compatible mode is set to Main or SAP the unit records the same sounds on both the left and right channels wh...

Page 35: ...corder holds a timer program of recording The programmed end time must be set for 5 minutes later than the current time To play a title recorded on a DVD RAM disc while recording another on the same disc Recorded Title Play DVD RAM During recording you can play a title recorded on the same disc 1 While recording on a DVD RAM disc press CONTENT MENU 2 Press to select a desired title then press ENTE...

Page 36: ...type onto a DVD R RW disc neglecting the setting of DVD compatible mode page 134 DVD R RW discs cannot record contents with copy restriction signal embedded copy protected or copy once contents DVD RAM discs can record copy once contents Some satellite programs via a connected tuner may contain both 4 3 pictures and 16 9 pictures DVD R RW discs cannot record such contents under restriction of DVD ...

Page 37: ...the front panel L 3 To record pictures from equipment connected to the INPUT 3 jacks on the rear panel 2 Start playback of the source content on the connected equipment 3 Press REC of this recorder to start recording 4 When recording is completed press STOP TIMESLIP EASY NAVI INSTANT SKIP INSTANT REPLAY PLAY STOP PAUSE REC LIBRARY REC MENU EDIT MENU CONTENT MENU ANGLE OPEN CLOSE SUBTITLE AUDIO CHA...

Page 38: ...ns such as pausing resuming fast forwarding CUE and fast reversing REVIEW etc may produce noises which may be detected as copy protection signals Therefore first start playback on the source equipment to confirm that the desired source can be played properly and then start recording on this recorder Do not operate the source equipment during recording After completing the desired scene stop the re...

Page 39: ...ttons 4 When complete press ENTER To program another recording press the button to move to the next line then repeat steps 2 to 4 5 Press REC MENU to exit Your program is entered REC MENU Timer Programing 1 1 9 00 pm 4 3 Sa Audio Video Media End Disc 4 6 D M1 DVD CH Date Start Exec am am SP TIMESLIP EASY NAVI INSTANT SKIP INSTANT REPLAY SETUP ENTER T SEARCH CLEAR 3 1 2 VCR Plus REC MODE EXTEND TV ...

Page 40: ...able when L PCM is selected For longer recording but inferior to SP in picture quality Not applicable when L PCM is selected Customized setting of rate bit rate To set a rate automatically according to the remaining volume of the disc If the disc does not have room for the TV program the program cannot be recorded to the end Not applicable when SP LP or AT is selected You can set a rate at interva...

Page 41: ...r program You can specify detail items for each of your timer program 1 Press QUICK MENU at step 3 on page 39 The Quick Menu is displayed e g 2 Press to select an item and press ENTER For details see Quick menu items 3 Press to make a selection and press ENTER The selection you have made for the timer program is shown at the bottom of the display Quick menu items AV record quality Select an item f...

Page 42: ... beginning of a clip during playback It does not create completely independent chapters or automatically divide into chapters when no audio portion is found Off This feature is disabled On Division for chapters when no audio portion is found Notes Divisions for chapters may not be created depending on the contents of the program or the condition of no audio portion or it may be created at differen...

Page 43: ... then press ADJUST to set the item 4 When complete press ENTER 5 Press REC MENU to exit Note While the recorder is preparing for or executing a programmed recording you cannot add a timer program which will start within 5 minutes and 15 seconds from the current time Deleting a timer program 1 Press REC MENU The REC MENU appears 2 Press to select a timer program you want to delete 3 Press QUICK MEN...

Page 44: ...dia End Result Date Start DVD HDD Elapsed Available Selected current DVD Notes When a Reservation disc is inserted in the recorder page 48 you cannot check the remaining volume of other discs The nearest 8 programs are calculated at a time While the recorder is preparing for or executing a programmed recording any program modification cannot be registered Only programs which will start after 5 min...

Page 45: ...ss displays the programmed end time in the front panel display Each time you press the button it is delayed 10 minutes up to 60 minutes Notes Pressing a button except EXTEND in the above procedure will set the currently selected delay You cannot delay the end time of a programmed recording which will end within 1 minute from the current time Even if you delay the end time of a programmed recording...

Page 46: ... to erase them and press the number buttons to re enter again Note When you enter the number starting from 0 a 9 digit number is entered 3 Press ENTER The entered program is highlighted 5PM 5 35 FAM Cartoon POPEYE MAKING OF A CHAMPION A look at gymnast and Olympic hopeful Kim Zmeskal from novice to seasoned competitor One of Ted s teachers stays at the ranch TBS Comedy GOOD TIMES USA Comedy MY TWO...

Page 47: ...rogram starts even if when the start time arrives prior to the end of the previous program 4 Select an item by pressing then press ADJUST to set the item if necessary For details about items see page 40 Recording channels and IR control setting page 37 INSTALLATION GUIDE When set to Off make sure CH shows the channel you want to record When set to On select a channel on the set top box connected t...

Page 48: ...he entry data and icon are displayed in gray To cancel the Reservation Disc setting Load the disc you want to cancel and select the recording option on the REC MENU Press the QUICK MENU button to select Unlock program record then Yes and press the ENTER button To delete the information of a Reservation Disc If you lose a Reservation Disc delete the information of the Reservation Disc Press the QUI...

Page 49: ... of the remote control and press DELETE Alternate method Press QUICK MENU then press to select Title delete Chapter delete and press ENTER 3 Read the message and press to select Yes then press ENTER Notes Deleting a title a chapter decreases the numbers of the succeeding titles chapters A chapter of about 5 seconds or shorter may not be deleted Deleting a short chapter may not change the display o...

Page 50: ...ight and shadows such as a water surface This recorder has a two settings 2 hour recording at SP mode or 4 hour recording at LP mode both assume a blank 4 7 GB DVD RAM It is recommended to consider the SP mode as a standard mode and use the LP mode when you want to record for long time regardless of the picture quality If you want to record for about 2 hours or are uncertain which one to select se...

Page 51: ...ater Playing a TV program currently being recorded Playing at various speeds Locating by entering the number Selecting the camera angle Selecting subtitles Zooming a picture Selecting the sound Viewing JPEG files Playing MP3 WMA files Watching a TV broadcast in the sub window P in P playback Checking the current status and settings Functions in the Quick Menu ...

Page 52: ...en press the REC button to start recording Screen Protection If you pause playback or display a menu and leave it still for about 15 minutes the recorder switches the output picture source to a TV broadcast or connected equipment A still picture may be displayed after all titles are played In this case the screen protection activates after about 10 seconds Notes Do not move the recorder during pla...

Page 53: ...ording will start within 15 seconds This thumbnail cannot start playback Playback TIMESLIP EASY NAVI INSTANT SKIP INSTANT REPLAY PLAY STOP PAUSE REC LIBRARY REC MENU EDIT MENU CONTENT MENU ANGLE OPEN CLOSE SUBTITLE AUDIO CHANNEL QUICK MENU TOP MENU MENU RETURN DVD F R A M E ADJUST PICTURE S E A R C H SK I P S L O W ENTER TV VIDEO CHANNEL VOLUME REMAIN DIMMER FL SELECT ZOOM P in P TIME BAR CHP DIVI...

Page 54: ...tedly until the beginning of the title appears To play the other title Press the SKIP button repeatedly PAUSE Notes Depending on the status or the contents playback may not start from the location last stopped but instead another location For example from the beginning of the disc or title Depending on the disc there may be a slight difference between the location the recorder memorized and the ac...

Page 55: ...of the thumbnails on the CONTENT MENU as if they were recorded in one video tape 1 During stop press QUICK MENU The Quick Menu appears 2 Press to select Special playback mode then press ENTER e g 3 Press to select Play all ORG titles then press ENTER e g Playback starts from the beginning of title 1 Notes To stop this playback feature press the STOP button twice However doing this when you are pla...

Page 56: ...DVD Quick Menu Edit title name Edit chapter name Del chapter name Record date time Lock Genre Exit Del chapter name First press the PICTURE SEARCH button to display the chapter you want then select this item Record date time The recording date is highlighted so that you can correct the digits Lock Set the protection for the currently selected title The protection icon appears page 49 Genre The sub...

Page 57: ...elect the order then press the ENTER button Sort by genre Titles of the selected genre are sorted Press the buttons to select the genre then press the ENTER button Sort by original Titles Original are sorted Sort by playlist Titles Playlist are sorted Note The recorder holds your selection until the power is turned off To cancel select Display changeover then Cancel Arrange Narrowing from the Quic...

Page 58: ...sc recorded in DVD VR mode DVD RW See page 53 Notes Some disc s conditions or discs which contain copy once contents may not permit proper playback Title resume page 132 is not available Original 2004 06 08 07 00 am TV 4 Title List Page MENU CONTENT 1 2 0 53 45 Original 2004 06 08 11 00 pm TV 6 0 29 50 Original 2004 07 11 07 00 am TV 8 0 54 30 Original 2004 07 12 09 00 pm TV 10 0 51 28 Original 20...

Page 59: ...a of a disc To stop playback Press STOP To pause playback still playback Press PAUSE To resume normal playback press the PLAY button or the PAUSE button Note Sound is muted during still mode Note DVD video disc provides high resolution pictures and a lot of information Because of this you may notice some fine picture noises on TV screen which you have never seen with regular broadcast TV program W...

Page 60: ... the structure of contents or select a scene Most of the top menus automatically appear in certain scenes and also are displayed on demand Actual operation of the top menu depends on the disc This section explains a general example of how to operate a top menu Also refer to the instructions of the disc itself 1 Press TOP MENU 2 Press to select the title you want If the titles in the top menu are a...

Page 61: ...he PAUSE button then press the FRAME button To resume normal playback press the PLAY button You can play in fast forward to within 10 seconds prior to the current broadcast 4 Press TIMESLIP to exit this mode The recorder stops storing the broadcast on a DVD RAM disc A message appears and asks you whether you will save the stored data or erase it Press the buttons to select then press the ENTER but...

Page 62: ...d fast reverse Press the PICTURE SEARCH button Forward reverse Slow motion Press the SLOW buttons Forward reverse frame by frame play First press the PAUSE button then press the FRAME button To resume normal playback press the PLAY button You can play in fast forward to within 10 seconds prior to the current broadcast 4 Press TIMESLIP to exit The current broadcast returns Notes Time slip recording...

Page 63: ...st forward playback at speed may be disturbed To resume normal playback Press PLAY To skip the contents in pre determined increments During playback press INSTANT SKIP Each time you press the button you can skip by the specified time You can select the interval per press of the button See Instant skip interval of Operational settings page 132 To skip by 1 20 of whole During playback press Each tim...

Page 64: ...or a DVD R RW disc you can locate chapters only in the current title if DVD title stop page 128 is set to On To access chapters in other titles set to Off However in this instance even though you press the SKIP button to go back to the previous title playback starts not from the last chapter of the title but from the first chapter Playing in slow motion 1 Press SLOW during playback Forward slow mo...

Page 65: ...dvance more than 1 frame at a time Depending on the scene some frames may not be played When playing a VIDEO CD reverse frame by frame playback is not available Viewing still pictures Playing a disc that contains still pictures 1 Press PLAY The first still picture on a disc is displayed Some DVD video discs may allow you to change the pictures using the PLAY ENTER or SKIP button 2 Press FRAME Disp...

Page 66: ... To clear the display press the T SEARCH button several times depending on the disc This method of locating a title is available only on a disc that contains title numbers If a title is erased the numbers of the following titles decrease respectively When you record a new title Original on a DVD RAM disc it is added prior to current titles Playlist and each following title Playlist reference numbe...

Page 67: ...epending on the disc Press the button until the following display appears e g 2 Press the number buttons and to enter the desired time location on the disc e g To enter 1 hour 25 minutes and 30 seconds 0 1 2 5 3 0 hour minute second 3 Press ENTER Playback starts from the selected location Notes Some discs may not respond to this process Some scenes may not be accessed precisely as you specified Th...

Page 68: ...ONTENT MENU ANGLE OPEN CLOSE SUBTITLE AUDIO CHANNEL QUICK MENU TOP MENU MENU RETURN DVD F R A M E ADJUST PICTURE S E A R C H SK I P S L O W ENTER TV VIDEO CHANNEL VOLUME REMAIN DIMMER FL SELECT ZOOM P in P TIME BAR CHP DIVIDE DISPLAY INPUT SELECT PROGRESSIVE TV Notes You can also change the camera angle during still playback The camera angle changes to the new setting when you resume normal playba...

Page 69: ...urns off after about 3 seconds if you do not make a selection TIMESLIP EASY NAVI INSTANT SKIP INSTANT REPLAY PLAY STOP PAUSE REC LIBRARY REC MENU EDIT MENU CONTENT MENU ANGLE OPEN CLOSE SUBTITLE AUDIO CHANNEL QUICK MENU TOP MENU MENU RETURN DVD F R A M E ADJUST PICTURE S E A R C H SK I P S L O W ENTER TV VIDEO CHANNEL VOLUME REMAIN DIMMER FL SELECT ZOOM P in P TIME BAR CHP DIVIDE DISPLAY INPUT SEL...

Page 70: ...d The magnification level varies depending on the picture size you select page 44 INSTALLATION GUIDE The zoom feature is not available while displaying a GUI The zoom feature is canceled when you stop playback or start playback To cancel the zoom Press ZOOM TIMESLIP EASY NAVI INSTANT SKIP INSTANT REPLAY PLAY STOP PAUSE REC LIBRARY REC MENU EDIT MENU CONTENT MENU ANGLE OPEN CLOSE SUBTITLE AUDIO CHA...

Page 71: ...broadcast DVD RAM TV channel signals Stereo sound Stereo left channel and right channel Stereo L left channel Stereo R right channel Back to Stereo SAP sound Main SAP Main SAP Back to Main DVD RW DVD VIDEO DVD R Language name sound recording system No of channels e g VCD Stereo Stereo L Stereo R Back to Stereo The display turns off if you do not operate for more than 3 seconds If you press the but...

Page 72: ...o Mono Stereo On Stereo SAP L R SAP Dual Mono Mono SAP Mono SAP Dual Mono Stereo L R Stereo Mono Mono Mono Stereo Main Off Stereo SAP L R Stereo Mono SAP Mono Mono Stereo Stereo L R Stereo Mono Mono Mono Stereo On Stereo SAP L R L R Stereo Mono SAP Mono Mono Stereo Stereo L R Stereo Mono Mono Mono Stereo SAP Off Stereo SAP L R Stereo Mono SAP Mono Mono Stereo Stereo L R Stereo Mono Mono Mono Stere...

Page 73: ...8 kHz 16 bit 48 kHz 16 bit 44 1 kHz 16 bit 44 1 kHz 16 bit Bitstream 48 kHz 16 bit 48 kHz 16 bit 48 kHz 16 bit Analog L R jacks 48 kHz 20 bit 48 kHz 16 bit 48 kHz 20 bit 48 kHz 24 bit 48 kHz 16 bit 48 kHz 20 bit 48 kHz 24 bit 48 kHz 16 bit 44 1 kHz 16 bit 44 1 kHz 16 bit Noise 48 kHz 20 bit 48 kHz 16 bit 48 kHz 16 bit Analog L R jacks 48 kHz 20 bit 48 kHz 16 bit 48 kHz 20 bit 48 kHz 24 bit 96 kHz ...

Page 74: ...ges depending on the size Operation to JPEG file will be disabled at about 5 minutes before a programmed recording starts TIMESLIP EASY NAVI INSTANT SKIP INSTANT REPLAY PLAY STOP PAUSE REC LIBRARY REC MENU EDIT MENU CONTENT MENU ANGLE OPEN CLOSE SUBTITLE AUDIO CHANNEL REC QUICK MENU TOP MENU MENU RETURN DVD F R A M E ADJUST PICTURE S E A R C H SK I P S L O W ENTER To rotate a picture Press ANGLE r...

Page 75: ...015 022 DH100018 002 DH100002 Auto 005 DH100001 008 DH100004 011 DH100007 014 DH100010 017 DH100013 020 DH100016 023 DH100019 003 DH100001 006 DH100002 009 DH100005 012 DH100008 015 DH100011 018 DH100014 021 DH100017 024 DH100020 1 3 013 CONTENT MENU File number If you select this icon and press the ENTER button upper folders appear e g Page CD JPEG 1 8 Pictures CONTENT MENU e g Page CD 001 DH1000...

Page 76: ...UST PICTURE S E A R C H SK I P S L O W ENTER Page CD MP3 1 1 001 MP3_0001 004 MP3_0004 007 MP3_0007 010 MP3_0010 002 MP3_0002 005 MP3_0005 008 MP3_0008 011 MP3_0011 003 MP3_0003 006 MP3_0006 009 MP3_0009 012 MP3_0012 Audio List CONTENT MENU File number Current folder If you select this icon and press the ENTER button upper folders appear e g Page CD MP3 JPG_MP3 All 1 1 MP3c MP3a MP3b 002 MP3_0002 ...

Page 77: ...hat permission is required in order to download MP3 WMA files and music from the internet Toshiba has no right to grant such permission Permission should always be sought from the copyright owner Microsoft Windows Media and the Windows Logo are trademarks or registered trademarks of Microsoft Corporation in both the United States and other countries 2 Press to select a track or folder Pressing the...

Page 78: ...ETURN DVD F R A M E ADJUST PICTURE S E A R C H SK I P S L O W ENTER TV VIDEO CHANNEL VOLUME REMAIN DIMMER FL SELECT ZOOM P in P TIME BAR CHP DIVIDE DISPLAY INPUT SELECT PROGRESSIVE TV CHANNEL Notes You can change the channel of the sub window by pressing the CHANNEL button The P in P function is available only during playback You cannot swap the playback picture with the picture within the sub win...

Page 79: ... M E ADJUST PICTURE S E A R C H SK I P S L O W ENTER TV VIDEO CHANNEL VOLUME REMAIN DIMMER FL SELECT ZOOM P in P TIME BAR CHP DIVIDE DISPLAY INPUT SELECT PROGRESSIVE TV Virtual surround DNR Recording Picture Quality Audio Quality Audio Audio Output Subtitle Off Off SP 1 Stereo R Original Bitstream Off 002 3 00 22 01 00 00 07 0005 Stereo Title repeat Title Chapter D M1 DVD RAM Checking the current ...

Page 80: ...ding end time if it comes within 30 minutes Elapsed time Locator Shows the current location TIME BAR PLAY STOP PAUSE REC QUICK MENU F R A M E ADJUST PICTURE S E A R C H ENTER TV VIDEO CHANNEL VOLUME REMAIN DIMMER FL SELECT ZOOM P in P TIME BAR CHP DIVIDE DISPLAY INPUT SELECT PROGRESSIVE TV 01 30 00 00 00 00 00 30 00 00 00 00 00 55 00 00F Location 00 18 00 Location Changing the location of the time...

Page 81: ...me title Chapter repeat To repeat the same chapter Track repeat VCD CD To repeat the same track Disc repeat DVD RW DVD R To repeat the entire disc Repeat all ORG titles DVD RAM To repeat all original titles in a disc Repeat all PL titles DVD RAM To repeat all playlist titles in a disc Cancel repeat in Repeat playback mode To resume normal playback Playback of a DVD RAM disc stops Notes Some discs ...

Page 82: ...st input 0 e g 0 0 3 To cancel the numbers press the CLEAR button To input a chapter number press the buttons to shift the cursor 01 T CT 11 T CT 21 T CT 02 T CT 12 T CT 22 T CT 03 T CT 13 T CT 23 T CT 04 T CT 14 T CT 24 T CT 05 T CT 15 T CT 25 T CT 06 T CT 16 T CT 26 T CT 07 T CT 17 T CT 27 T CT 08 T CT 18 T CT 28 T CT 09 T CT 19 T CT 29 T CT 10 T CT 20 T CT 30 T CT 2 Press to select the next box...

Page 83: ... rate then press ENTER Bit rate Note To turn off the bit rate display select this item again To check information on a title DVD RAM DVD RW DVD R 1 During playback press QUICK MENU 2 Press the buttons to select Title information then press ENTER Title information To exit the Quick Menu DVD RAM DVD RW DVD VIDEO VCD CD DVD R Press QUICK MENU again or Press to select Exit then press ENTER Exit ...

Page 84: ...84 ...

Page 85: ...ur own movie from your assembled scenes Before editing Creating chapters Playlist editing Creating thumbnails High speed Library dubbing Deleting selected Items Combine Original titles DVD Video finalizing process DV recording ...

Page 86: ...le Creating your own music compilation by collecting songs from music programs you record from Monday to Friday Editing You can create one title for one recording In the example above five titles are created as you recorded programs five times from Monday to Friday The content you recorded is called Title Original All chapters in a title Original are chapters Original Specify the range a favorite ...

Page 87: ... playback order in the right example the chapter names are Monday Wednesday and Friday and the playback order is Wednesday Friday Monday For actual playback the contents of the source chapter Original are played Basically it is a list for the recorder to go and find the content You can create a part from the Original as many times as you want and you can make different titles with the same parts b...

Page 88: ...g a title Original or a chapter Original will affect the related title Playlist or chapter Playlist Some recorded content cannot be edited for example a title including still images The boundary of the title with unnecessary part deleted and titles Playlist having different parts cannot be played back seamlessly without break Proceed to the practical operations See Creating chapters page 89 and Pl...

Page 89: ...t reverse Fast forward Slow motion You cannot divide a title of a DVD R RW disc into chapters It is possible to create chapters in a DVD R RW disc by pressing the CHP DIVIDE button during recording at the desired points or by selecting an option that inserts chapter marks automatically during recording at regular intervals page 134 If you want to modify the chapter division or want to place a chap...

Page 90: ... MENU EDIT MENU CONTENT MENU ANGLE OPEN CLOSE SUBTITLE AUDIO CHANNEL QUICK MENU TOP MENU MENU RETURN DVD F R A M E ADJUST PICTURE S E A R C H SK I P S L O W ENTER TV VIDEO CHANNEL VOLUME REMAIN DIMMER FL SELECT ZOOM P in P TIME BAR CHP DIVIDE DISPLAY INPUT SELECT PROGRESSIVE TV SLOW FRAME ADJUST PAUSE PICTURE SEARCH SKIP 00 54 30 00 00 00 03F 00 00 00 4 3 B EDIT MENU Chapter Editing Original Aspec...

Page 91: ...NTENT MENU returns TIMESLIP EASY NAVI INSTANT SKIP INSTANT REPLAY PLAY STOP PAUSE REC LIBRARY REC MENU EDIT MENU CONTENT MENU ANGLE OPEN CLOSE SUBTITLE AUDIO CHANNEL QUICK MENU TOP MENU MENU RETURN DVD F R A M E ADJUST PICTURE S E A R C H SK I P S L O W ENTER TV VIDEO CHANNEL VOLUME REMAIN DIMMER FL SELECT ZOOM P in P TIME BAR CHP DIVIDE DISPLAY INPUT SELECT PROGRESSIVE TV 00 00 21 24F 4 3 B EDIT ...

Page 92: ... the beginning of a chapter currently selected 1 Perform steps 1 to 5 on page 89 to 90 2 Press QUICK MENU 3 Press to select Chapter break edit mode then press ENTER 4 Press to select the item then press ENTER by frame VR mode The chapter mark shifts by one frame by GOP Video mode The chapter mark shifts by a GOP about 0 5 second which is a unit of editing in DVD Video format 5 Press to select a ch...

Page 93: ... Quick Menu on the CONTENT MENU Chapter List Naming a chapter 1 From the EDIT MENU Chapter Editing select a chapter which you want to name 2 Press QUICK MENU 3 Press to select Edit chapter name then press ENTER A keyboard appears Enter a name following the on screen icon guides Notes There is a limit to the number of chapters which can be named If exceeded a message appears You can also access the...

Page 94: ...nal 2004 06 08 11 00 pm TV 6 0 29 50 Original 2004 07 11 07 00 am TV 8 0 54 30 Original 2004 07 12 09 00 pm TV 10 0 51 28 Original 2004 06 12 09 00 pm TV 3 0 52 40 Original 2004 07 12 11 00 pm TV 4 0 30 08 HDD DVD RAM MENU CONTENT Quick Menu Title information Create thumbnail High speed dubbing Playlist editing Original title combination Playlist Mon Fri Playlist everyweek Chapter function Edit fu...

Page 95: ...ARY REC MENU EDIT MENU CONTENT MENU ANGLE OPEN CLOSE SUBTITLE AUDIO CHANNEL QUICK MENU TOP MENU MENU RETURN DVD F R A M E ADJUST PICTURE S E A R C H SK I P S L O W ENTER TV VIDEO CHANNEL VOLUME REMAIN DIMMER FL SELECT ZOOM P in P TIME BAR CHP DIVIDE DISPLAY INPUT SELECT PROGRESSIVE TV A A A B B Playlist editing Source Title Object Title Original PlayList Start Title Entire time EDIT MENU DVD RAM E...

Page 96: ...er which is being edited cannot be selected as an item You cannot add a title of still pictures or a title or a chapter which contains both still and moving pictures to a playlist By copying dubbing a Playlist a title Original of the same contents is created You cannot program a Playlist of contents recorded on a DVD R RW disc Down arrow on the thumbnails means Orange This title already selected G...

Page 97: ...correct 2 Press QUICK MENU 3 Press to select Playlist re editing and then press ENTER The EDIT MENU Playlist editing appears Follow the procedure from steps 4 on page 95 add or delete parts as necessary Note You cannot edit a title Playlist of still pictures or a title Playlist which contains both still and moving pictures Using a part in a Playlist also in another Playlist 1 In play or stop mode ...

Page 98: ...ri To sort out programs recorded on the same time on Monday to Friday to make a Playlist 4 Press ENTER Notes Only titles Original can be sorted The maximum number of sorted titles is 99 If you modify the recording start time or date of one of the recorded serials the title will not be sorted out Contrarily any program can be sorted if its channel recording start time and date are modified as the s...

Page 99: ...to the next or previous page press the PICTURE SEARCH button To select a chapter select a title and press the button The Chapter List appears By pressing the button again you can return to the Title List 3 Press QUICK MENU The Quick Menu appears Original 001 2004 06 08 07 00 am TV 4 Title List Page 1 2 0 53 45 Original 2004 06 08 11 00 pm TV 6 0 29 50 Original 2004 07 11 07 00 am TV 8 0 54 30 Orig...

Page 100: ... CHANNEL QUICK MENU TOP MENU MENU RETURN DVD F R A M E ADJUST PICTURE S E A R C H SK I P S L O W ENTER TV VIDEO CHANNEL VOLUME REMAIN DIMMER FL SELECT ZOOM P in P TIME BAR CHP DIVIDE DISPLAY INPUT SELECT PROGRESSIVE TV SLOW FRAME PICTURE SEARCH SKIP Creating thumbnails Continued Editing 00 29 50 2004 06 08 11 00pm Ch 6 00 00 00 0 29 50 B 00 00 00 03F Original Location Create Thumbnail Select desir...

Page 101: ...yback Notes You cannot create thumbnails of chapters in a title that contains a still picture If you create a chapter thumbnail and then shift the chapter mark page 92 or record or edit the disc on other devices the chapter thumbnail may return to the top of the chapter ...

Page 102: ...n the same disc at high speed high speed in a shorter time than actual playing time of the title or chapter Follow this procedure when you convert a playlist into an original title CONTENT MENU QUICK MENU ENTER TIMESLIP EASY NAVI INSTANT SKIP INSTANT REPLAY PLAY STOP PAUSE REC LIBRARY REC MENU EDIT MENU CONTENT MENU ANGLE OPEN CLOSE SUBTITLE AUDIO CHANNEL QUICK MENU TOP MENU MENU RETURN DVD F R A ...

Page 103: ...D CD R CD RW DVD R or DVD RW disc is not possible If copying is not allowed due to some conditions such as lack of disc space etc a message will appear Follow the procedure indicated there Depending on the contents some reference information or appendix data may not be copied A title that contains a still picture cannot be copied To cancel copying halfway through the operation 1 During copying pre...

Page 104: ...CT ZOOM P in P TIME BAR CHP DIVIDE DISPLAY INPUT SELECT PROGRESSIVE TV 1 During playback or stop press EDIT MENU The EDIT MENU Main Menu appears 2 Press to select Del Selected Items e g 3 Press ENTER The EDIT MENU Del Selected Items appears e g Thumbnails of the parts in the disc are displayed in the upper area A A A B B Del Selected Items Title Object Original Start EDIT MENU DVD RAM 3 2 1 3 2 1 ...

Page 105: ...g cannot be canceled once started Be careful when executing the deletion process If you select a title for the part to be removed you cannot select chapters in that title Chapters in DVD R RW discs cannot be selected to delete 4 Following steps 4 to 6 on page 94 95 assemble the items to delete 5 Press repeatedly to select Start then press ENTER The recorder begins the deletion process To cancel de...

Page 106: ... Cursor TIMESLIP EASY NAVI INSTANT SKIP INSTANT REPLAY PLAY STOP PAUSE REC LIBRARY REC MENU EDIT MENU CONTENT MENU ANGLE OPEN CLOSE SUBTITLE AUDIO CHANNEL QUICK MENU TOP MENU MENU RETURN DVD F R A M E ADJUST PICTURE S E A R C H SK I P S L O W ENTER TV VIDEO CHANNEL VOLUME REMAIN DIMMER FL SELECT ZOOM P in P TIME BAR CHP DIVIDE DISPLAY INPUT SELECT PROGRESSIVE TV PICTURE SEARCH DVD RAM A A A B Comb...

Page 107: ... has started You cannot combine a protected title or a title containing still pictures The title name of the first title is given to the title after combining The second title is combined into the first title maintaining the chapter divisions and chapter names Titles and chapters show their names for about 2 seconds at the bottom of the screen when they are selected You can not use playlists as pa...

Page 108: ...REPLAY PLAY STOP PAUSE REC LIBRARY REC MENU EDIT MENU CONTENT MENU ANGLE OPEN CLOSE SUBTITLE AUDIO CHANNEL QUICK MENU TOP MENU MENU RETURN DVD F R A M E ADJUST PICTURE S E A R C H SK I P S L O W ENTER TV VIDEO CHANNEL VOLUME REMAIN DIMMER FL SELECT ZOOM P in P TIME BAR CHP DIVIDE DISPLAY INPUT SELECT PROGRESSIVE TV EDIT MENU ENTER ENTER DVD RW DVD R Title Finalize Menu Title Title 3 2 1 3 2 1 1 2 ...

Page 109: ...ame 11 1 hour 24 min Total title number Total time Disc Name F1 GP Vol 2 EDIT MENU Return Next DO NOT MR SATO PLEASE JOIN US TO CREATE MANUALS LEAVE HERE DO NOT LEAVE HERE DO NOT LEAVE HERE DO NOT LEAVE HERE DO NOT LEAVE HERE DO NOT LEAVE HERE DO NOT LEAVE HERE DO NOT LEAVE HERE DO NOT LEAVE HERE DO NOT LEAVE HERE DO NOT LEAVE HERE DO NOT LEAVE HERE DO NOT LEAVE HERE DO NOT LEAVE HERE DO NOT LEAVE...

Page 110: ... Video Finalize Chapter Menu Select press ENTER and select Yes using then press ENTER A message appears to ask you if you want the power to turn off automatically or not when the process is completed 10Press to select Yes or No then press ENTER A message disappears and the finalize process starts The progress is displayed on the screen and in the front panel display on the recorder TIMESLIP EASY N...

Page 111: ...last recorded On DVD RW discs it is possible to cancel the DVD Video finalizing process or to initialize for a new use To cancel the finalize process DVD RW You can cancel the DVD Video finalizing process executed to a DVD RW disc so that the disc can be recordable again 1 During stop press QUICK MENU A quick menu appears 2 Press to select Disc management then press ENTER 3 Press to select Cancel ...

Page 112: ...NU EDIT MENU CONTENT MENU ANGLE OPEN CLOSE SUBTITLE AUDIO CHANNEL QUICK MENU TOP MENU MENU RETURN DVD F R A M E ADJUST PICTURE S E A R C H SK I P S L O W ENTER TV VIDEO CHANNEL VOLUME REMAIN DIMMER FL SELECT ZOOM P in P TIME BAR CHP DIVIDE DISPLAY INPUT SELECT PROGRESSIVE TV EDIT MENU ENTER ENTER Recording DV Original Picture Saved Title 3 2 1 3 4 5 2 1 DV Recording DV Recording When using DV term...

Page 113: ...e by the buttons then press the ENTER button To stop the recording select Stop Save by the buttons then press the ENTER button TIMESLIP EASY NAVI INSTANT SKIP INSTANT REPLAY PLAY STOP PAUSE REC LIBRARY REC MENU EDIT MENU CONTENT MENU ANGLE OPEN CLOSE SUBTITLE AUDIO CHANNEL QUICK MENU TOP MENU MENU RETURN DVD F R A M E ADJUST PICTURE S E A R C H SK I P S L O W ENTER TV VIDEO CHANNEL VOLUME REMAIN D...

Page 114: ...ch as a PC Depending on the connected DV format digital video camera the display at step 5 may not show Manufacturer or Equipment If the DV terminal is connected to more than one DV format digital video camera DV recording may not work properly For proper functioning of DV recording connect only one device to the DV terminal Do not keep the DV terminal connected unless you record from a DV format ...

Page 115: ...Library To facilitate your collecting Using Library data ...

Page 116: ... The LIBRARY MENU may not display all characters of a registered name of a disc 1 Press LIBRARY The LIBRARY MENU DVD All Disc No Summary appears e g 2 Press QUICK MENU A Quick Menu appears e g 3 Press to select an item then press ENTER For details on each item see from the next page TIMESLIP EASY NAVI INSTANT SKIP INSTANT REPLAY PLAY STOP PAUSE REC LIBRARY REC MENU EDIT MENU CONTENT MENU ANGLE OPE...

Page 117: ...press ENTER e g 4 Press or ADJUST to enter the page number 5 Press ENTER The designated page appears LIBRARY MENU DVD All Disc No Summary Disc Name No Estimated 001 2h02m 45m BASEBALL GAMES 002 CARTOONS Current default data rate SP 1 4 D M1 4 6 6 22 Tu 2 49 pm Total recording time approx 122min with 4 7 GB unused Custom setting 5 4 3 2 1 L PCM Manual Manual Manual S P L P 6 0 4 6 2 2 6 0 3 2 Mode ...

Page 118: ...you manually register a disc several discs in same number consequently may be registered In such a case it is recommended to change the disc number page 57 Using Library data Continued Library Maintenance of Library data The recorder usually controls the Library Management system automatically However in the following cases you must maintain and create data manually When you want to add informatio...

Page 119: ...lect Library management then press ENTER 4 Press to select Del disc no from library then press ENTER 5 Press ADJUST to select a number to delete then press ENTER Erasing Library data You can erase all Library data stored in the recorder to restart the database 1 Press LIBRARY 2 Press QUICK MENU 3 Press to select Library management then press ENTER 4 Press to select Delete all DVD RAM information t...

Page 120: ......

Page 121: ...Function Setup You can change the default settings to customize performance to your preference Customizing the function settings ...

Page 122: ...TURE S E A R C H SK I P S L O W ENTER Open the lid 1 During stop press SETUP The following setup display appears 2 Press to select the icon of a group that contains a desired item then press ENTER For details on each setting see the next page e g When Display settings is selected 3 Press to select a desired item then press ENTER 4 Refer to the explanations on pages beginning from 126 to change the...

Page 123: ...t a preferred language for disc menus To select a preferred language for the sound track To select a preferred language for subtitles To turn on or off a function that makes faint sounds easier to hear even if you lower the volume during late hour playback To turn on or off the vocal output during DVD KARAOKE disc playback To turn the parental lock function on or off To turn on or off a feature th...

Page 124: ...res To turn on or off the Start up Screen setting that makes the background picture appear automatically when turning on the power To turn the screen saver on or off To select a display status when no video signals are present To select where you turn on or off closed caption To turn on or off the confirmation beeper announcing when each remote command is received To select whether or not a buzzer...

Page 125: ...r setting when you cannot adjust the image quality with Custom Picture Setting of the Picture Audio Settings To adjust the level of recording sound To set the aspect ratio for DVD R RW recording To set the audio for DVD R RW recording To set whether or not chapters are to be automatically created at a specified interval for DVD R RW recording To activate or deactivate the 3D digital noise reductio...

Page 126: ...uage choice After pressing the ENTER button follow steps 1 4 below 1 Obtain the language code of the preferred language from the Language code list page 143 2 Select the first character by pressing or ADJUST 3 Press to shift Select the second character by pressing or ADJUST 4 Press ENTER Note Some DVD video discs may not include your preset language In this case the recorder automatically displays...

Page 127: ...or a DVD KARAOKE disc recorded in Dolby Digital Multi Channel format If you want to enjoy the KARAOKE function connect an amplifier or other such device to this recorder DVD parental lock DVD VIDEO DVD video discs equipped with the Parental Lock function have a predetermined limitation level The limitation level or limitation method may differ depending on the disc For example the total disc may n...

Page 128: ... US is selected its limitation level corresponds to the following settings Level 7 NC 17 Level 3 PG Level 6 R Level 1 G Level 4 PG13 To change the limitation level of the Parental Lock function Follow step 1 3 above To change the password 1 Press STOP 4 times after selecting On and Off in order and then press ENTER The password is cleared 2 Enter a new 4 digit password by using the number buttons ...

Page 129: ...DVD RAM DVD RW DVD VIDEO VCD DVD R There are two types of source content in pictures recorded in DVD video discs film content pictures recorded from films at 24 frames per second and video content video signals recorded at 30 frames per second Make this selection according to the type of content being viewed Auto Select this position normally The DVD player automatically detects source content fil...

Page 130: ...put Customizing the function settings Continued Function Setup Analog 2ch Select this when a TV or other audio device is connected to this recorder via the ANALOG output connectors PCM Select this when a 2ch digital stereo amplifier is connected to this recorder When you play back a disc recorded in Dolby Digital or MPEG1 format the sound is converted to the PCM 2ch format and output Virtual surro...

Page 131: ...me slip mode the playback pause is released If this function is set to On the recorder if freezes may return to the normal by leaving it for about 15 minutes or longer Off Deactivates the Screen Protector function On Activates the Screen Protector function Note Toshiba does not guarantee that this function protects the TV screen by all means Background Selects a screen color when receiving no vide...

Page 132: ...val DVD RAM DVD RW DVD VIDEO VCD CD DVD R Sets how far back is replayed when the INSTANT REPLAY button is pressed 5 sec 10 sec 30 sec 5 min Title thumbnail point DVD RAM DVD RW DVD R For recorded titles sets how far a scene from the start is set as the title thumbnail 0 sec 3 sec 10 sec 35 sec 1 min 5 min Note Thumbnails can also be changed to other scenes See page 99 Title playback DVD RAM Sets t...

Page 133: ...asts or other external input Only use this setting when you cannot adjust the brightness satisfactorily with the Custom picture setting in the Picture Audio settings Page 129 of this recorder Important This setting changes the video signal to record and the recorded signal is not returned to the original state even when this setting is changed after recording When duplicating from VHS tape if you ...

Page 134: ...re to be automatically created at a selected interval during DVD R RW recording Off Chapters are not set 5 min 10 min 15 min 20 min To set the interval at which chapters are automatically created to 5 10 15 or 20 minutes Note The number of chapters has the upper limit which varies depending on the disc condition If the number reaches it no more chapters are created Rec DNR DVD RAM DVD RW DVD R Sel...

Page 135: ... 3 Press to select a genre name then press ENTER The selected genre name replaces the previous one of the position you selected at step 1 4 Repeat steps 1 to 3 to register genre names 5 When genre names are registered press the O button to return to the Management settings menu Eco mode To set the front panel display to turn on off in the standby mode Off Sets the front panel display to turn on in...

Page 136: ......

Page 137: ...Others Before calling service personnel Error codes on the display window Recording duration Language code list Specification ...

Page 138: ...le securely Antenna signal is poor Consult your dealer for adjustment Playback A DVD or CD does not play The format of the recorded data does not correspond to this recorder or the region number is neither 1 nor ALL Check the disc A defective or dirty disc is inside Change the disc During playback picture noise appears Picture noise may appear in the following cases It is not a malfunction There i...

Page 139: ...completed Complete TV Cable setting page 34 INSTALLATION GUIDE Recording Data cannot be recorded on a DVD RAM disc The disc is protected from deleting data Set the write protect tab to the opposite of PROTECT page 8 The disc is protected by a PC or the recorder Disable the protection on the device which protected the disc The disc space is not sufficient Delete unwanted data page 49 or prepare a n...

Page 140: ...ers 23 ft from the receptor of this recorder There are obstacles between the remote control and this recorder Remove any obstacles The receptor is disturbed by sunlight or fluorescent light Change the place of this recorder or shield the light The remote mode is not appropriate Adjust the remote mode of the remote control and this recorder page 48 INSTALLATION GUIDE Clock The clock blinks Complete...

Page 141: ...RR 2E Error detected in encoding or creating of menu ERR 2F Overflow of the menu size detected ERR 30 Exceeded maximum number of menus detected ERR 31 Recovery of writing executed depending on conformity of disc and drive ERR 32 No compatibility of disc format detected ERR 33 Write protection information on a disc detected ERR 34 Copy restricted data or control information error detected ERR 35 Ex...

Page 142: ... 4 6 6 6 8 7 0 7 2 7 4 7 6 7 8 8 0 8 2 8 4 8 6 8 8 9 0 9 2 06 04 04 03 03 03 03 02 02 02 02 02 02 02 02 01 01 01 01 01 01 01 01 01 01 01 01 01 01 01 01 01 01 01 01 01 01 01 07 22 01 43 27 14 02 51 42 33 26 19 13 07 02 57 52 48 44 40 37 34 31 28 26 23 21 18 16 14 12 11 09 07 06 04 03 01 05 04 03 03 03 03 02 02 02 02 02 02 02 02 01 01 01 01 01 01 01 01 01 01 01 01 01 01 01 01 01 01 01 01 01 01 01 01...

Page 143: ...NA NE NO OC OM OR PA PL PS PT QU RM RN RO RU RW SA SD SG SH SI SK SL SM SN SO SQ SR SS ST SU SV SW TA TE TG TH TI TK TL TN TO TR TS TT TW UK UR UZ VI VO WO XH YO ZU Guarani Gujarati Hausa Hindi Croatian Hungarian Armenian Interlingua Interlingue Inupiak Indonesian Icelandic Hebrew Yiddish Javanese Georgian Kazakh Greenlandic Cambodian Kannada Kashmiri Kurdish Kirghiz Latin Lingala Laotian Lithuani...

Page 144: ...tems 2 at rear 1 in front VIDEO output 1 0Vp p 75Ω Sync signal negative Pin jack x 1 systems 1 at rear S VIDEO input Y 1 0Vp p 75Ω Sync signal negative C 0 286Vp p 75Ω 2 at rear 1 in front Mini DIN4 Pin x 3 systems S VIDEO output Y 1 0Vp p 75Ω Sync signal negative C 0 286Vp p 75Ω 1 at rear Mini DIN4 Pin x 1 system COMPONENT output Y PB PR Y output green 1 0Vp p 75Ω Sync signal negative Pin jack x ...

Page 145: ...F 95 F 5 C 35 C Position Horizontal Clock display 12 hour digital display Clock accuracy Quartz monthly deviation approximately 30 seconds The design and specifications may change without prior notice The Illustrations and screens described in this manual may be exaggerated or simplified for easy recognition and may be slightly different from the actual unit ...

Page 146: ...D PLAYER RECORDER or parts which have been lost or discarded by you or to damage to DVD PLAYER RECORDER or parts caused by misuse accident Acts of God such as lightning or fluctuations in electric power improper installation improper maintenance or use in violation of instructions furnished by TACP or to units which have been modified or had the serial number removed altered defaced or rendered il...

Page 147: ...tion and insurance charges for the DVD PLAYER RECORDER to the Service Station For additional information visit TACP s web site www tacp toshiba com Time for Taking Action ALL WARRANTIES IMPLIED BY THE LAW OF ANY STATE OF THE U S A INCLUDING THE IMPLIED WARRANTIES OF MERCHANTABILITY AND FITNESS FOR A PARTICULAR PURPOSE ARE EXPRESSLY LIMITED TO THE DURATION OF THE LIMITED WARRANTIES SET FORTH ABOVE ...

Page 148: ...148 ...

Page 149: ...149 Recording Playback Others Introduction Editing Function setup Library Memo ...

Page 150: ...150 Memo ...

Page 151: ...151 Recording Playback Others Introduction Editing Function setup Library Memo ...

Reviews: