background image


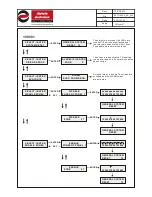
TEST MODE

HARDWARE CHECK

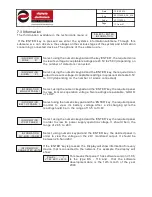
When  ‘ENTER’  is  pressed  the  system  will  start  a  check  that  includes  a 
HARDWARE  check  of  the  panel,  the  zones,  the  sirens,  and  the    ‘24V-
monitored’ outputs. In   every   check it issues a message stating the right   
or  wrong  configuration  of  each  input  or  output.

TEST MODE

COMMUNICATIONS

External  devices  communication  test.

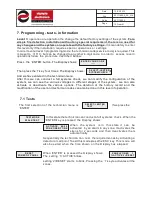
7.2 Programming

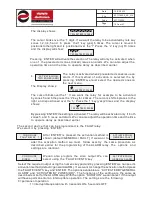
The  second  selection in the technician menu is                                        If we press ‘ENTER’ 
we enter the sytem configuration submenu.
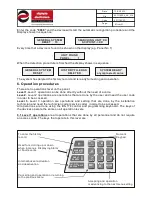
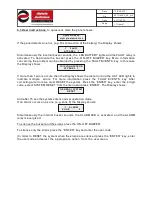
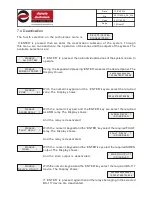
With  this  submenu    we    can  change  the  mode  of  operation  of  the  system  outputs.  Before 
entrance to the  submenu  is  admitted  the  system  warns  us  and  ask  for  confirmation . The  
display  shows: 

SELECT->ENTER

CONFIGURATION *

!!CAUTION!!

SYSTEM  SETTINGS

MAYBE 

CHANGED

ARE YOU SURE  ?

ENTER=YES

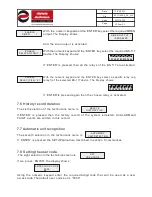
If  ‘ENTER’  is    pressed    we  enter  the  system  configuration  submenu(programming).The 
selections  that  are  available  are:

CONFIGURE

ALARM RELAY    1

ACTIVATE MODE *

GENERAL ALARM

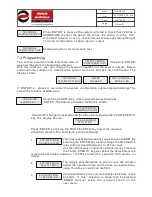
Select the ALARM relay   of the required panel and press 
‘ENTER’. The 

default 

 activation  method  is  shown:

 If we want to change the activation method then we must press the ‘FAULT EVENTS’ 
key. The  display  shows:

Press ‘ENTER’ and using the‘FAULT EVENTS’ 

k

ey select the required 

activation  method. The  selections  are  the  following:

ACTIVATE FROM

GENERAL ALARM

1.

The relay is activated when any zone issues an ALARM. By 
pressing the ‘ENTER’ key we can change the time that the 
relay will be activated between 1 to  255 seconds
(the time 000 means continious operation) or by pressing 
the ‘FAULT EVENTS   key we can set the delay before the 

ACTIVATE FROM

FAULT EVENTS

2.

The relay is activated when an error occurs. We can also 
adjust  the  operation  time  and  the  time  to  operate  delay 
using  the  above  mentioned  method.

CHANGE MODE OF

ACTIVATION  *

relay will be activated   between   1 to 255 seconds ( the   selection   000   means   no   
delay).

ACTIVATE FROM

1-16 ZONES (OR)

3.

It is activated when one or more preselected zones  issue 
an  alarm.  If    this    selection  is  made  then  by  pressing 
‘ENTER’ we must   select   the   required   zones   on   the   
next  menu.

14


from

 21

921116000

Date

File

Code

Page

921116000_09_016

13/03/2013

Содержание BS-116

Страница 1: ......

Страница 2: ...6 3 User instructions 7 Programming tests information 7 1 Tests 7 2 Programming 7 3 Information 7 4 Deactivation 7 5 Activation 7 6 History record deletion 7 7 Automatic unit recognition 7 8 Setting...

Страница 3: ...tection control and programming device Indication device repeater 16 Relay device Extinguishing device with adjustable delay Public address megaphone device with microphone Type Description BS 114 BS...

Страница 4: ...anel can also accept a BS 620 megaphone driving device Any configuration between the minimum and maximum described is possible In this way a fire detection panel with the required capabilities can be...

Страница 5: ...No 2 No 3 BS 116 16 64 Repeater BS 115 No 2 Repeater BS 115 No 3 BS 116 16 64 BS 116 16 64 BS 116 16 64 BS 118 fire extinguishing device No 8 Figure 2 BS 118 fire extinguishing device No 1 Control key...

Страница 6: ...1 detector base on zone 1and connecting 2 bases of detectors on zone 2 One detector also has a BS 572 remote LED indicator connected to it Detector base Detector base 5 6 IN IN OUT OU T R IN IN OUT OU...

Страница 7: ...st action that the BS 114 control keyboard must take is to recognize all the external devices that are connected to the network If the ENTER key is pressed then the display shows Each panel has the re...

Страница 8: ...accessed Level 3 Level 3 operation are operations and setting that are done by the installation technician and need the technician code service code in order to be accessed All operations are done usi...

Страница 9: ...nged with another 4 digit code if it is required In order to enter level 2 user level we must follow the following procedure Press the ENTER key The Display shows If the 0 key is pressed 4 time then t...

Страница 10: ...ENTER ENTER ENTER ENTER ENTER ENTER ENTER ENTER The detectors are reset the LEDs are tuned off the sirens are silenced and the relays are deactivated After 15sec The panel enters normal operation A ma...

Страница 11: ...more information press the FAULT EVENTS key After correcting all errors we must RESET the system Press the ENTER key enter the 4 digit code select SYSTEM RESET from the menu and press ENTER The Displ...

Страница 12: ...nician code service code is required This is preset to 1111 but can be changed to any other 4 digit code In order to access level 3 operations follow the procedure described bellow ENTER YOUR CODE SEL...

Страница 13: ...EST MODE SIREN 1 The setting 2 DEACTIVE blinks If the 1 key is pressed then the output is activated and the setting 1 ACTIVE starts to blink To deactivate the output press the 2 key SIREN 1 1 ON 2 OFF...

Страница 14: ...red panel and press ENTER The default activation method is shown If we want to change the activation method then we must press the FAULT EVENTS key The display shows Press ENTER and using the FAULT EV...

Страница 15: ...only if both zones 5 and 6 issue and alarm We can also adjust the operation time and the time to operate delay as described earlier The second device that can be programmed is the FAULTrelay We selec...

Страница 16: ...hing module that we want to adjust the delay 1 120 seconds Programming the repeater panel functions CONFIGURE REPEATER 1 If a BS 115 is installed then using this selection we can adjust the permissibl...

Страница 17: ...operation voltage Two readings are available GOOD or LOW INFORMATION BATT OF PANEL 1 Select using the numeric keypad and the ENTER key the required panel in order to view its battery voltage After a 2...

Страница 18: ...23456 DISABLE ALARM RELAY 1 With the numeric keypad and the ENTER key we select the required ALARM relay The Display shows And the relay is deactivated ALARM RELAY 1 IS DISABLED DISABLE FAULT RELAY 1...

Страница 19: ...that were previously deactivated are now activated ENABLE ZONES OF PANEL 1 With the numeric keypad and the ENTER key select the required panel The Display shows ENABLE ZONE 01 With the numeric keypad...

Страница 20: ...activated 1234567890123456 7 6 History record deletion The sixth selection of the technicians menu is If ENTER is pressed then the history record of the system is deleted All ALARM and FAULT events a...

Страница 21: ...RESET If we try to program an option on a device that is not on the network then the system issues the following message on the display SET SERVICE PHONE SERVICE PHONE UNIT IS NOT CONNECTED 220 240 VA...

Отзывы: