background image

Copy/Print media

25

B5 Envelope

6.93 x 9.84 in

176 x 250 mm

0.04 inch

1.00 mm

0.71 inch

18.00 mm

0.4 inch

10.16 mm

0.4 inch

10.16 mm

Monarch

3.875 x 7.50 in

98.43 x 190 mm

0.04 inch

1.00 mm

0.71 inch

18.00 mm

0.4 inch

10.16 mm

0.4 inch

10.16 mm

User-defined

Minimum

3.875 x 5.85 in

98.43 x 148.5 mm

0.04 inch

1.00 mm

0.71 inch

18.00 mm

0.25 inch

6.35 mm

0.25 inch

6.35 mm

Maximum

8.5 x 14 in

215.9 x 355.6 mm

0.04 inch

1.00 mm

0.71 inch

18.00 mm

0.25 inch

6.35 mm

0.25 inch

6.35 mm

* The bottom margin indicated in the above table is for colour printing. For black and white
printing, the bottom margin is 0.51 in (13 mm).

The paper size PHOTO (3.5 x 5.5 in), which can be selected only from the PAPER group
using       on the operator panel, is handled manually 

only in copier mode

 from the bypass

feeder.

  Single sheets

See 

Loading paper

 in 

Installation

 for instructions on how to insert standard size single

sheets in your multifunctional copier

  Note cards

Your multifunctional copier can handle two types of note cards: plain paper and photographic
paper.  You can insert the cards either in packs of up to 50 in the input tray or 5 at a time in
the bypass tray. If you use the input tray, you must first open the intermediate rear guide.

  Envelopes

You can insert 21 lb/80 g/m

2

 envelopes either in packs of up to 25 in the input tray or 3 at a

time through the bypass tray.

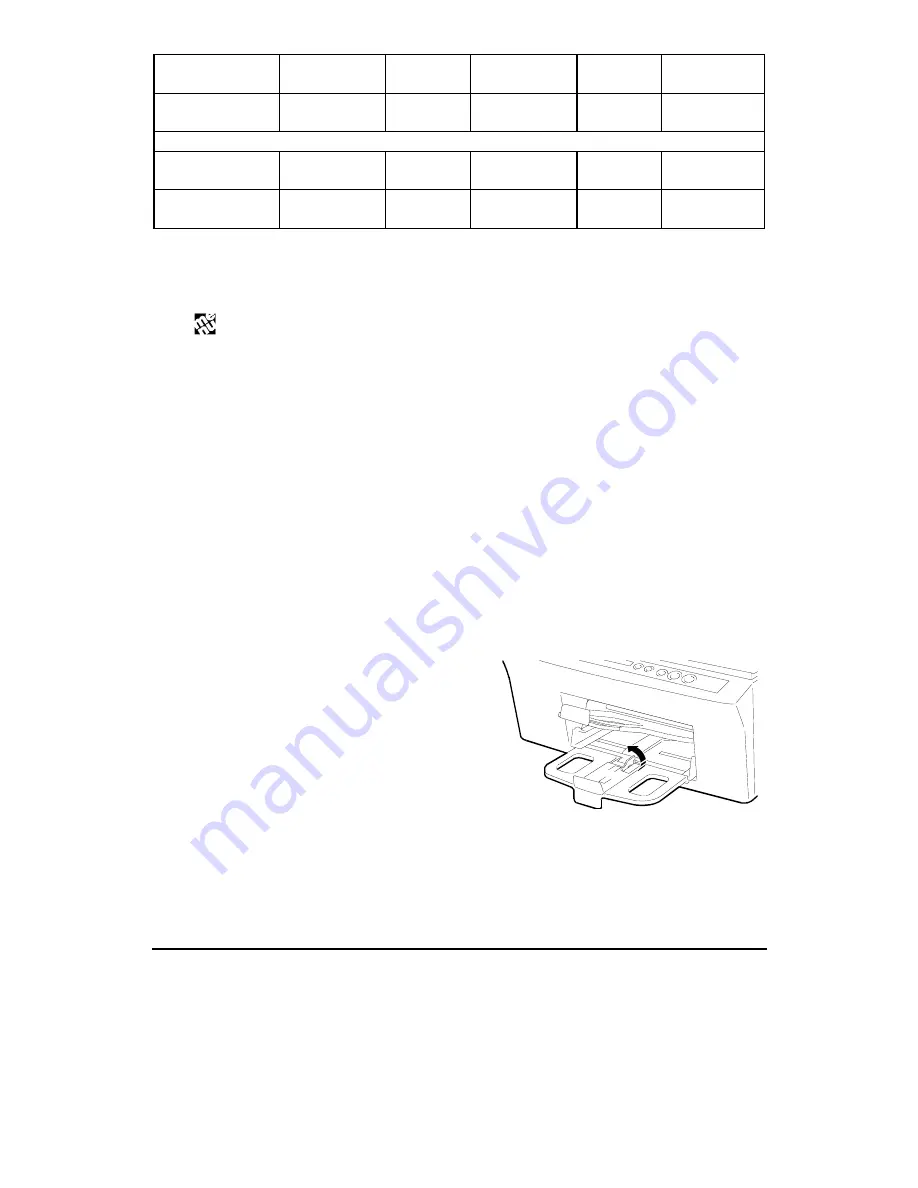
You must first open the intermediate rear guide if
you use the input tray.

Содержание STUDIOJET 300

Страница 1: ...User s guide 290597 Y Printed in Italy GB...

Страница 2: ...is equipment does cause harmful interference to radio or television reception which can be determined by turning the equipment off and on the user is encouraged to try to correct the interference by o...

Страница 3: ...nvironment 14 Driver installation from diskettes 16 DOS environment 18 Uninstalling software 20 Operator panel 21 Buttons and light indicators 21 Liquid crystal display LCD 23 Copy Print media 24 Pape...

Страница 4: ...nd precautions 48 Cleaning the print heads 49 Moving your multifunctional copier 50 Service 50 Troubleshooting 51 Status messages 67 Error messages 68 Product characteristics 69 Basic features 69 Copi...

Страница 5: ...check that all the parts have been delivered and are undamaged The packing carton should contain 1 Your multifunctional copier 2 Two print heads colour and black 3 Installation and software applicati...

Страница 6: ...glass then close the document cover again 3 Raise the scanner module to access the print head carriage area 4 Remove the cardboard stop that blocks the print head carriage in its rest position pullin...

Страница 7: ...your multifunctional copier those with which you should familiarise yourself before continuing Installation Front view 1 Print head carriage in loading position with heads inserted 2 Operator panel 3...

Страница 8: ...4 Installation Rear Side view 8 Power cable socket 9 multifunctional copier serial number 10 Parallel cable port 11 Main ON OFF switch 9 10 8 11...

Страница 9: ...ltifunctional copier so that it slides completely into the slots on the underside of the machine casing 2 Insert the output tray in the lateral guides in the paper output area above the input feed tra...

Страница 10: ...are completely open 3 After fanning the paper thoroughly load it as a single stack on the input tray inserting it carefully until it stops inside the machine The surface to be printed should be face d...

Страница 11: ...operating position During multifunctional copier operation the side guides on the output tray must remain open and the paper length guide should be positioned to accommodate the paper size used LETTER...

Страница 12: ...by wall outlet The outlet should only supply power to your multifunctional copier and not be shared 5 Press the ON OFF switch on the left side of your multifunctional copier to switch it on The ON OFF...

Страница 13: ...Choosing a language 1 Press the Select button for English 2 Press the plus or minus button on the operator panel to select a different language and confirm it by pressing 3 The LCD will now show INSE...

Страница 14: ...ilm Do not touch the electrical contacts gold coloured part or the printing jets or rest the print head on either of them 4 With the gold coloured electrical contacts facing the rear of the multifunct...

Страница 15: ...NEW COLOUR HEAD NO YES 9 Press on the operator panel The LCD shows ALIGN PRINTHEAD NO YES 10 Press on the operator panel The LCD shows CLOSE COVER 11 Close the scanner module The LCD shows PLEASE WAI...

Страница 16: ...or and then press 6 The LCD shows the flashing message VERTICAL ALIGN SELECT n default value If the alignment corresponding to n looks the best press if not select a different value using or and then...

Страница 17: ...dure Windows environment To install an application read the instructions supplied with the individual programs System requirements For Windows 3 1x PC 486 or better at least 16 Mbytes RAM For Windows...

Страница 18: ...is powered Windows will recognise it as new and display the message New Hardware Found Click the Cancel button on the Wizard screen that appears 3 Insert the Installation CD in your computer CD ROM d...

Страница 19: ...folder group created in Settings Program Manager They allow immediate access to the Printer Monitor the On line Documentation the Uninstaller program the CONFIG EXE program for use in DOS environment...

Страница 20: ...t 6 Click Have Disk in the window now displayed 7 Insert printer driver diskette no 1 in drive A usually of your PC click OK 8 Click Next 9 Make sure LPT1 is highlighted click Next 10 Select whether y...

Страница 21: ...he printer scanner driver diskette no 1 in floppy disk drive usually a of your PC 2 Open File Manager 3 Access the diskette 4 Click on setup exe The installation of the printer scanner driver starts 5...

Страница 22: ...not already contain the settings you require The programmable features available through CONFIG EXE are the following Parameter Identifier Value s Qualifier PaperFormat A4 A5 US Letter US Legal US Exe...

Страница 23: ...9 ISO 69 France 20 CP 860 Portugal 21 UNIX International 22 CP 863 French Canadian 23 PC Abicomp International 24 PC Abicomp Portugal 25 CP 852 26 CP 857 Turkey 27 CP 866 Cyrillic 28 CP 210 Greece 29...

Страница 24: ...re install the driver s To do this you must first uninstall the driver s by clicking on the specific Uninstall icon s created when you first loaded the software This allows a complete and correct rem...

Страница 25: ...ality Normal Draft Selects a copy quality value Colour Intensity One of five lit more saturated saturated normal pale paler Selects a copy colour intensity value Reduce Enlarge Selects a fixed scale v...

Страница 26: ...e resets the number of copies to be made Pressed twice restores copy default values With menu active exits from menu B W Copy grey button Starts a black and white copy job Colour Copy purple button St...

Страница 27: ...liquid crystal display shows the multifunctional copier operating condition machine status and error messages It also shows and allows selection of the various programmable and machine care features t...

Страница 28: ...x 8 5 in 139 7 x 215 9 mm 0 04 inch 1 00 mm 0 71 inch 18 00 mm 0 13 inch 3 30 mm 0 13 inch 3 30 mm B5 size 7 2x10 1 in 182 x 256 mm 0 04 inch 1 00 mm 0 71 inch 18 00 mm 0 167 inch 4 2 mm 0 167 inch 4...

Страница 29: ...mm The paper size PHOTO 3 5 x 5 5 in which can be selected only from the PAPER group using on the operator panel is handled manually only in copier mode from the bypass feeder Single sheets See Loadin...

Страница 30: ...ither in packs of up to 50 sheets in the input tray or 10 at a time in the bypass tray Photographic paper This type of paper has a sophisticated glossy coating and gives a professional finish to your...

Страница 31: ...in your multifunctional copier you should select its type and size Use the Operator panel if you are using the machine in copier mode or the Printer Monitor if you have loaded the printer driver and...

Страница 32: ...ypes of special printing media always read the instructions included with the media pack Remember that heavily printed pages tend to curl and thus not stack correctly They also tend to stain the rear...

Страница 33: ...t damaged sheets of paper that must be removed 3 Raise the scanner module and open the jam release behind the print head area 4 Remove the jammed page s from the multifunctional copier pulling them ou...

Страница 34: ...Open the document glass cover 2 Place the original you wish to copy on the copier glass aligning it correctly with the scale at the glass edge 3 Close the document glass cover 4 Select the number and...

Страница 35: ...en black white and saturate or soften colour on the copies you make It has five values shown by light indicator 3 Reduction Enlargement button You can select any one of the values displayed cyclically...

Страница 36: ...max 400 min 25 5 Paper button Using this button you can select the paper type you intend to use PLAIN PHOTO ON PLAIN GLOSSY PHOTO COATED TRANSPARENCIES T SHIRT Which PAPER TYPE setting should you sel...

Страница 37: ...r a parameter use or on the operator panel 3 To select the function displayed or to confirm a selection made within the function press on the operator panel How to exit from the menu To exit from the...

Страница 38: ...ult value ON selected for all text documents select OFF for photographs and images COLOUR ADJUSTMENT this setting controls the colour intensity select using the corresponding button on the operator pa...

Страница 39: ...t fit under the document cover e g a book you can remove the cover lifting it straight upwards Once you have finished copying you must replace the document cover fitting the attachment hinges in their...

Страница 40: ...cuments from the exit tray and open the lateral and rear guides completely 2 Load not more than 10 sheets face down on the tray aligning the leading edge against the feed rollers Make sure that the sh...

Страница 41: ...Make sure that the multifunctional copier is selected as the output device for your print job You should now 1 Open the word processing desk top publisher application you generally use 2 Open or creat...

Страница 42: ...ion loaded when you installed your printer driver 3 Any modification you make to the parameter choices must be confirmed to be saved Click Apply at the bottom of the screen to confirm the new choices...

Страница 43: ...ick Option and then Printer Setup 3 Highlight your multifunctional copier printer name in the Installed Printers box and click on the Set as Default Printer button your multifunctional copier printer...

Страница 44: ...and print head and paper handling It is structured in two parts How do I and Troubleshooting The information contained in the How do I and Troubleshooting is organised in topics e g Paper Print heads...

Страница 45: ...perform care functions to maintain optimum working conditions Printer Care How to access the Printer Monitor Under Windows 3 1 3 11 You can access the Printer Monitor from your printer driver group a...

Страница 46: ...ts of paper Clean Click Clean before changing the print head if you notice deterioration in the print quality Follow the instructions displayed Activate dry delay time Click Dry delay time if you are...

Страница 47: ...y loaded in your PC Scanner screens Your multifunctional copier scanner monitor has three pages Basic Image Quality and About The Basic page appears automatically after your multifunctional copier and...

Страница 48: ...t your local power company The multifunctional copier should be installed near the power outlet which should be easily accessible Do not allow anything to rest on the power cord Do not locate the mult...

Страница 49: ...ll liquids on or in the multifunctional copier Always keep the document cover closed during operation and storage Avoid direct viewing of the scanner lights The lamps are bright and while not harmful...

Страница 50: ...is function is displayed on the LCD to print a test page The LCD displays PRINTING TEST PAGE during the operation The print test page contains technical information on the printer emulation and firmwa...

Страница 51: ...rriage moves to the head loading position 2 Press the appropriate lever to release the required head 3 Pulling upwards by the thumb and finger grip remove the required head 4 Insert a new print head o...

Страница 52: ...before inserting the print head in the printer Take care to insert the print head in the correct seat on the print head carriage colour left black right Take care not to get ink on your clothes the i...

Страница 53: ...the print head and in the housing on the print head carriage with a slightly damp lint free cloth taking care not to touch the print head jets 3 Re insert the print head in the printer and close the s...

Страница 54: ...always switch off your multifunctional copier BEFORE switching off your PC Disconnect all cables Repack your multifunctional copier in its original carton whenever possible Take care not to drop your...

Страница 55: ...to the power supply Check that the multifunctional copier is connected properly to the electrical power supply socket Check that the multifunctional copier is switched on When you press the ON OFF sw...

Страница 56: ...er module the jam release closes with it 7 Check for and discard damaged imperfect sheets in the paper pack 8 Reload the paper in the input tray and re insert the output tray Make sure that there is n...

Страница 57: ...the scanner module The multifunctional copier will reinitialise automatically and will be ready for use when COPIES 1 100 PLAIN is displayed on the LCD Copy print media repeatedly jams or the multifu...

Страница 58: ...oo tight or too loose Problems with print heads Lines or dots are missing from the copied printed characters Print head s is are not inserted correctly in the carriage Remove and re insert the print h...

Страница 59: ...ntly busy with a print job If a document is printing your copy job will be queued and will start after the print job is finished The LCD indicates that the multifunctional copier is printing Best copy...

Страница 60: ...or newspaper photos do not copy well Repetitive patterns are visible on the copy Document being copied is already a copy not an original When material is reprinted repetitive patterns may be visible o...

Страница 61: ...ted is making the copy too large or too small Correct the setting Wrong paper size The paper size setting currently selected does not correspond to that loaded in the input tray Load the correct paper...

Страница 62: ...oading paper in Installation Multifunctional copier produces a blank page Print head still has its protective tape Remove the print head from the multifunctional copier and remove the protective tape...

Страница 63: ...the page orientation selected is the correct one Paper not held correctly Make sure the adjustable lateral and rear paper guides of the paper tray are closed properly against the paper Poor print qua...

Страница 64: ...ia types particularly transparencies you should select the Dry Delay Time feature Printing on wrong side of media Make sure you are printing on the correct surface of the print media Always use manufa...

Страница 65: ...multifunctional copier icon and then from the File menu click Set As Default Fault in document file Check that your document file is not corrupted Multifunctional copier computer communication proble...

Страница 66: ...the queue order by selecting and dragging your print job up the queue of waiting jobs Best Quality printout selected Change the speed and quality of your print job Best Quality is the slowest setting...

Страница 67: ...al copier Glass and or under side of scanner cover is are dirty Clean the glass and or the underside of the scanner cover with a soft damp cloth Poor quality original Some types of originals such as n...

Страница 68: ...n may not be able to recognise the characters and process them correctly You may see joined characters in the scanned document Joined characters are two or more characters that appear as one such as w...

Страница 69: ...ssing text Text colour in documents particularly blue yellow and most pastels can cause the text to blend into the background and the text may not be processed correctly by your scanner application It...

Страница 70: ...nner cover with a soft damp cloth Scan job is taking too long Wrong cable Use the interface cable delivered with the multifunctional copier Large colour original The larger and more colourful the orig...

Страница 71: ...COPYING scale No in progress quantity Print mode PC connected COPIES No of copies scale Type of paper Printing PRINTING READY TO COPY scale No of copies Copy operation started during a print job PLEA...

Страница 72: ...opy mode Cover open CLOSE COVER Paper jam CLEAR PAPER JAM no paper paper misfeed CHECK PAPER PRESS SELECT Wrong print head WRONG PRINT HEAD Any button pressed during copy operation COPYING BUSY CLEAR...

Страница 73: ...paper Envelopes up to 25 envelopes 80 g m 2 paper Bypass Feeder Capacity up to 10 sheets of plain paper from A5 to A4 Letter size Output Tray Capacity 60 printed sheets 80 g m 2 21 lb paper Paper Typ...

Страница 74: ...mode Electrical Characteristics Power supply voltage 115 VAC 120 VAC 10 50 60 Hz 220 VAC to 240 VAC 10 50 60 Hz Power absorbed multifunctional copier off max 1 watt multifunctional copier in sleep mod...

Страница 75: ...9 pages per minute black Resident Emulation PCL III and an extended graphic command set Printer Memory 2 Mbytes incorporated RAM 0 5 Mbytes input buffer Interface Parallel Centronics IEEE 1284 Scanner...

Отзывы: