


Getting Started
10
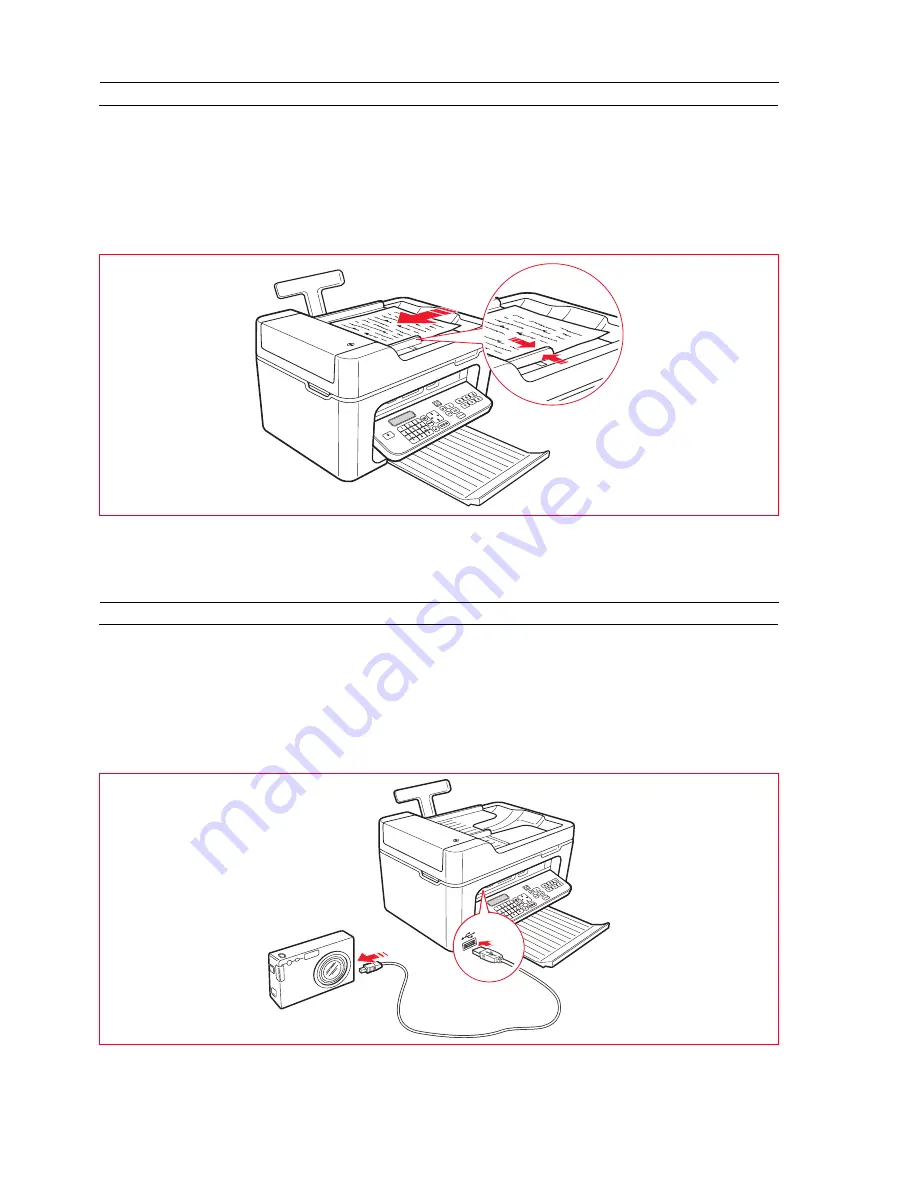
LOADING DOCUMENTS ONTO THE AUTOMATIC DOCUMENT FEEDER
The automatic document feeder for copying or faxing documents can contain a maximum of 35 sheets of 80 g/m
2
plain
paper.
The document sizes supported are: A4, Legal, Letter and A5.
Note:
Do not insert postcards, photos, small items or light materials (such as newspaper cuttings). For these types of
materials, use the scanner and the computer.
1
The original document must be inserted with the printed side to be copied facing upwards.
2
Adjust the paper width guide of the automatic document feeder and make sure that it is positioned against the
edge of the paper.
CONNECTING A DIGITAL CAMERA TO THE PRINTER
1
1
Switch on the digital camera. For more information, read the digital camera’s User Guide.
2
With the printer switched on, connect one end of the USB cable to the USB connector of the digital camera, and
the other end to the USB connector on the printer front panel. The connection LEDs and the
Start printing
key
icon illuminate.
Note:
If you are connecting a PictBridge digital camera, the
Start printing
key icon does not illuminate because
printing is controlled directly from the digital camera.
The green USB status LED illuminates to indicate that a correct connection has been established.
If the connection is not established, make sure you have connected a compatible device.
Содержание LINEA Office
Страница 1: ...USER GUIDE LINEA ...
Страница 9: ...Getting Started 3 LOCATING THE PRINTER COMPONENTS ...
Страница 44: ...INK CARTRIDGEs 38 ...
Страница 52: ...Maintenance and Troubleshooting 46 ...
Страница 60: ...Technical Specifications 54 ...
Страница 61: ...Code 535315 gb ...


