


E-29
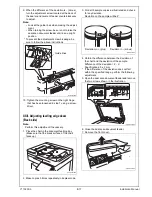
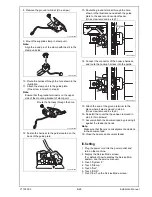
8. Remove the ground terminal. (One screw)
9. Mount the supplied stamp in stamp unit.
Note:
Align the round pin of the stamp with the slit in the
stamp unit side.
10. Route the harness through the hole shown in the
illustration.
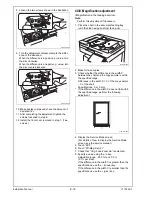
11. Attach the stamp unit to the guide plate.
(One screw removed in step 8)
Note:
Ensure that the ground terminal is on the upper
side of the mounting bracket of stamp unit.
12. Fasten the harness to the guide located on the
back of the guide plate.
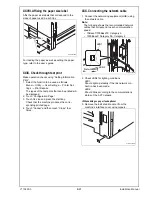
13. Route the ground terminal through the hole
shown in the illustration and attach the guide
plate to the dual scan document feeder.
(One screw removed in step 7)
14. Connect the connector of the hookup harness,
and route the hookup harness into the guide.
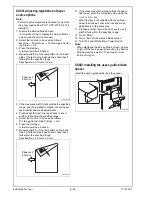
15. Attach the end of the ground terminal to the
place where it was removed in step 5.
(One screw removed in step 5)
16. Reinstall the cover that have been removed in
step 4. (Two screws)
17. Securely attach the document pad by pressing it
against the feeder by hands.
Note:
Make sure that there is no misalignment and slack
in the document pad.
18. Close the dual scan document feeder.
III. Setting
1. Plug the power cord into the power outlet and
turn on the machine.
2. Display the Service Mode screen.
(For details of how to display the Service Mid-
eastern, see the service manual.)
3. Touch “System 2.”
4. Touch “Stamp.”
5. Touch “Set.”
6. Touch “END.”
7. Touch “Exit” on the Service Mode screen.
A3CEIXC028DA
4614IXC007DA
A3CEIXC029DA
Route the harness through the hole.
A3CEIXC042DA
A3CEIXC030DA
Screw
A3CEIXC031DA
Y115290-3
Installation Manual


