6
F
GB
I
2
INSTALLAZIONE
Collocare l’apparecchio in un ambiente
adeguato. Il suo utilizzo è consigliato in
tutti gli ambienti dove esistono problemi di
umidità eccessiva, quali ad esempio bagni,
cantine, ed in generale tutti gli ambienti
interni, esclusi i locali lavanderia.
Non installare o usare l’apparecchio nelle
immediate vicinanze di vasche da bagno,
docce, lavandini, piscine, in quanto
eventuali spruzzi d'acqua possono
comprometterne la sicurezza.
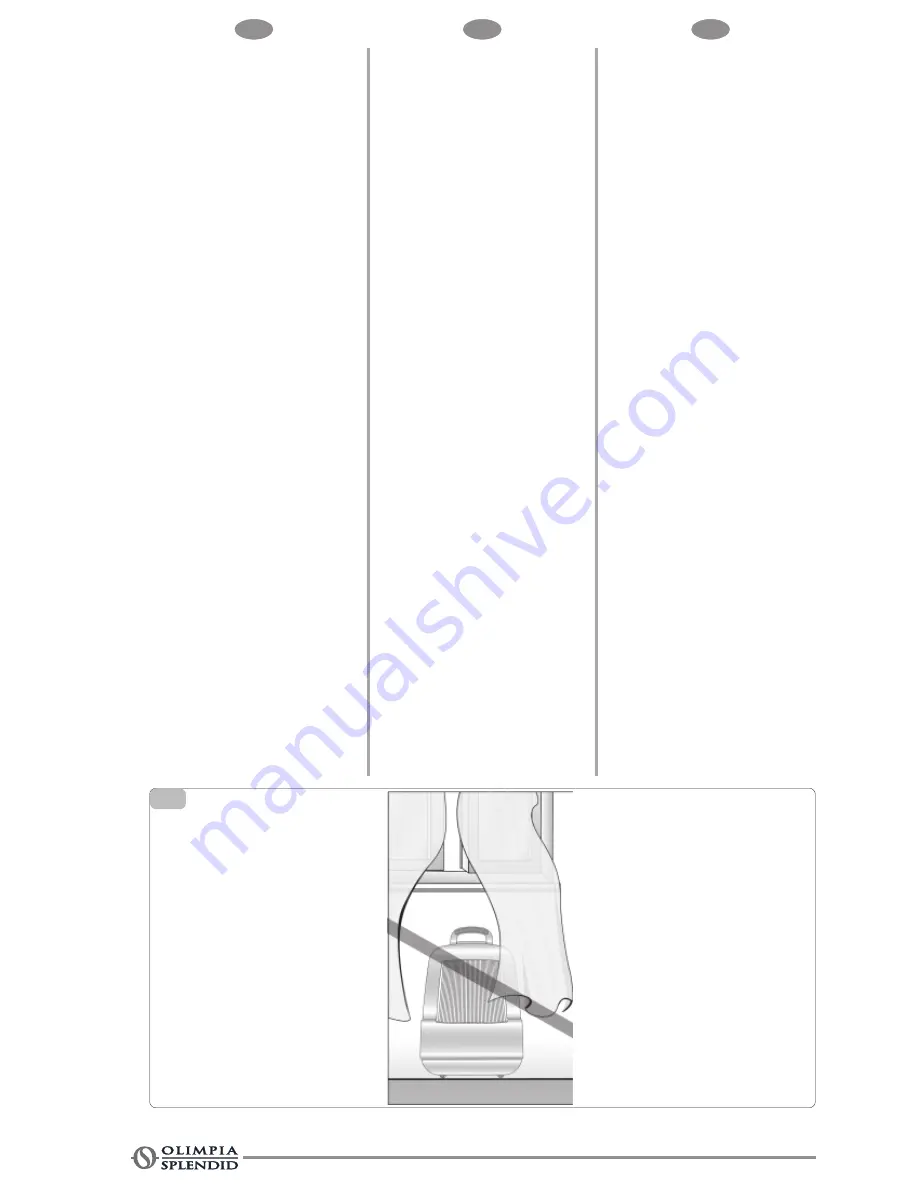
Vi raccomandiamo di mantenere uno
spazio libero di almeno 50 cm sul fronte
delle griglie di aspirazione e uscita aria,
assicurandovi inoltre che tende o altri
oggetti non ostruiscano il flusso d’aria. (Fig.
2).
ALLACCIAMENTO ELETTRICO
Prima di collegare il deumidificatore
assicurarsi che:
• i dati di targa siano corrispondenti a quelli
della rete di distribuzione elettrica (la
targa è situata nel vano della tanica);
• la linea di alimentazione sia dotata di
messa a terra, dimensionata per una
corrente di spunto di 20 A e protetta da
un fusibile di 10 A,T.;
• la presa abbia una portata di 10 A a 250
V. Qualora non fosse compatibile con la
spina del deumidificatore sostituirla con
una a norme CEI;
• il conduttore di un’eventuale prolunga
abbia sezione almeno di 1.5 mm
2
.
• il deumidificatore sia installato secondo
le normative nazionali;
• l’assorbimento del deumidificatore,
sommandosi a quello degli altri
elettrodomestici, non provochi
l’interruzione dell’erogazione dell’energia
elettrica, causata da sovraccarico.
INSTALLATION
Position the machine in a suitable room.
It is recommended for use in environments
where excessive humidity is a problem
like, for instance, in bathrooms, cellars
and rooms in general, except for the
laundry room.
Do not install or use the device in the
immediate vicinity of bath tubs, showers,
wash basins or swimming pools, as any
splashes may be a hazard to safety.
Be sure to maintain a free space of at least
50 cm in front of the air intake and outlet
grids and make sure that curtains or other
objects do not obstruct the airflow (Fig. 2).
ELECTRICAL POWER SUPPLY
Before connecting up the dehumidifier,
make sure that:
• the data on the identification plate
correspond to those of the electrical
power supply mains (the plate is located
in the tank compartment);
• the power supply line has an earth
connection of appropriate size for a
starting current of 20 A and is protected
by a 10 A, T fuse;
• the socket has a capacity of 10 A at 250
V. If it is not compatible with the
dehumidifier plug, replace it with one
meeting CEI standards;
• the extension cable wire (if used) has a
cross section of at least 1.5 mm
2
;
• the dehumidifier is installed in
accordance with national legislation;
• the power absorption of the
dehumidifier, when added to that of other
household appliances, does not
overload the mains supply and hence
cause an electrical power failure.
INSTALLATION
Installer l’appareil dans une pièce
appropriée. Son utilisation est
recommandée dans tous les espaces
posant des problèmes d’humidité
excessive, ainsi dans les caves ou les
salles de bains, et de manière plus générale
dans tous les espaces internes. Ne pas
installer ou utiliser l'appareil près de
baignoires, douches, lavabos, piscines,
car toute éclaboussure d'eau peut en
compromettre la sécurité.
Nous vous recommandons de ménager un
espace libre d'au moins 50 cm sur le devant
des grille d'aspiration et de sortie de l'air et
de vous assurer en outre qu'aucun rideau
ni aucun autre objet n'obstrue le flux d'air
(Fig. 2).
RACCORDEMENT ÉLECTRIQUE
Avant de raccorder le déshumidificateur,
s’assurer:
• que les données de la plaquette
correspondent à celles du réseau de
distribution électrique (la plaquette est
située dans le logement du bidon);
• que la ligne d’alimentation est équipée
d’une prise de terre proportionnée à un
courant de pointe de 20 A et protégée par
un fusible de 10 A.T.;
• que la prise a une portée de 10 A à 250
V. Si elle n’est pas compatible avec la
fiche du déshumidificateur, la remplacer
par une prise conforme aux normes CEI;
• que le conducteur d’une rallonge
éventuelle a une section d’au moins
1,5 mm
2
;
• que le déshumidificateur est installé
conformément aux normes nationales;
• que l’absorption du déshumidificateur,
additionnée à celle des autres appareils
électroménagers, ne provoque pas
l’interruption de la distribution d’énergie
électrique pour cause de surcharge.
Содержание SeccoReale Elettronico
Страница 20: ......


