Page 12
DH3 WIRELESS GATEWAY
USER GUIDE
8.
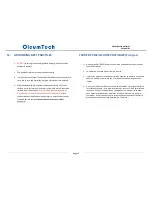
QUICK REFERENCE -
CONFIGURATION/INSTALLATION SEQUENCE
Configuration
1.
Download and install latest BreeZ® Software v5.0 or higher to a PC
Download Center: http://support.oleumtech.com
(requires login credentials)
2.
Check for latest DH3 Firmware on Download Center
3.
For Ethernet connectivity, choose method for deployment (DHCP/Static IP
addressing) Factory default is set to Static Address: 10.0.0.10
4.
Create a BreeZ® Project File (
see sec. 15
)
5.
Connect DH3 to Local LCD Display (Optional)
6.
Power up DH3 (9-30Vdc) and wait until boot-up sequence is complete
(both LEDs will turn off once boot-up is complete)
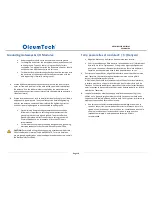
7.
If upgrading Firmware, follow these instructions:
a.
Insert a USB Flash Drive with latest DH3 Firmware to DH3’s USB
port
b.
Power cycle DH3 to initiate upgrade sequence
c.
DO NOT UNPLUG USB while upgrading Firmware
d.
Wait until both LEDs on DH3 turn green (It may take a few
minutes for upgrading process to finish)
e.
Remove USB Flash Drive with Firmware
f.
Power cycle DH3 to reboot
8.
Connect PC to DH3 (
see sec. 20
)
a.
USB (PC) to Mini USB (DH3)
b.
Ethernet (DHCP/Static IP addressing) (Default Static IP: 10.0.0.10)
Default DH3 usernames and passwords (DO NOT LOSE PASSWORDS)
Changing login information is strongly recommended for security
purposes
Case Sensitive
username:
admin
password:
admin (all rights)
username: user
password: user (access only)
username: guest
password: guest (Web Server only)
9.
Select a DH3 in BreeZ® Project Tree (
see sec. 20
)
10.
Update DH3 with BreeZ® Project File (
see sec. 20
)
11.
Confirm DH3 “Configuration Download OK” in Build Tab Window in BreeZ®
(
see sec. 20
)
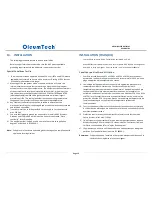
Installation (see sec. 10-14)
1.
Install DH3 inside an enclosure on 35mm DIN rail
2.
Follow best grounding practices
3.
Setup and connect an Antenna with Lightening Arrestor to DH3
4.
Connect DH3 to third-party Serial device(s) or to an Ethernet network
5.
Power up DH3
6.
Power up/reboot any impacted sensors/devices if necessary
7.
Verify RF and data communications
a.
Use Modbus Register Polling and Write features in BreeZ®
b.
Use DH3 Web Server to view Modbus table, trends, and system
events
c.
Verify communication from third-party device(s) or SCADA system
Содержание WG-0900-DH3
Страница 9: ...Page 9 DH3 WIRELESS GATEWAY USER GUIDE 5 HARDWARE OVERVIEW...
Страница 10: ...Page 10 DH3 WIRELESS GATEWAY USER GUIDE DIMENSIONS 6 NETWORK DIAGRAM...
Страница 32: ...Page 32 DH3 WIRELESS GATEWAY USER GUIDE 16 BreeZ MAIN SCREEN VIEW...
Страница 58: ...Page 58 DH3 WIRELESS GATEWAY USER GUIDE 12 Radio Page 13 Ethernet Port Page 14 Serial Ports Page...


