User’s Guide> 43
C
HECKING
CURRENT
SETTINGS
Carry out the following steps to generate a Configuration report
(Menu Map) to confirm that your printer is correctly configured.
1.
Ensure that there is Letter paper in Tray 1 (to be used in this
operation).
2.
Ensure that the display panel indicates that the printer is
ready to print.
3.
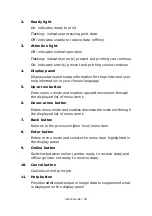
Press the
Up-arrow
or
Down-arrow
buttons repeatedly
until Print Information is highlighted.
4.
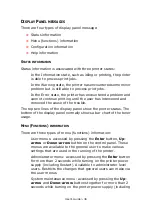
Press the
Enter
button to select Print Information.
5.
Press the
Up-arrow
or
Down-arrow
buttons repeatedly
until Configuration is highlighted.
6.
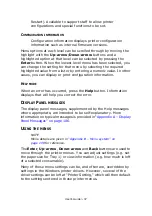
Press the
Enter
button to select Configuration.
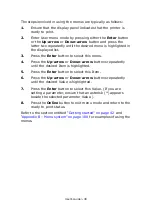
7.
Press the Enter button to execute the command and a
Configuration document is printed.
8.
After printing the configuration document, the printer returns
to the ready to print status.
You can use this document to check your printer
configuration. System values and installed accessories are
listed at the top of the first page while status values and
settings follow.
Содержание proColor Pro510DW
Страница 1: ...p r o 5 1 0 D W U s e r s G u i d e...
Страница 2: ......
Страница 21: ...User s Guide 21 9 Top cover handle 10 Face down stacker 11 Power on off switch 1 2 3 4 5 6 7 8 9...
Страница 22: ...User s Guide 22 12 Face up stacker 13 Interface unit 14 Network interface connector 10 11 12...
Страница 25: ...User s Guide 25 29 Drum basket 27 28 29...
Страница 57: ...User s Guide 57 4 Turn on the printer...
Страница 63: ...User s Guide 63 2 Pull the release lever 2 and pull open the side cover 3 Carefully remove the jammed paper 2...
Страница 73: ...User s Guide 73 7 Replace the two top covers 8 Raise the front cover of the duplex unit...
Страница 74: ...User s Guide 74 9 Push the duplex unit back into position...


