


3
A
SSIGN AN
IP
ADDRESS TO
THE
P
RINTER
If you are not using DHCP, you need to
obtain an IP Address from your
network Administrator and enter it
using the front panel:
1.
Confirm that the printer displays
[Ready to print].
2.
Press
T
key until [Admin Setup]
appears. Press E
NTER
.
3.
Continue to Setup? displays.
Press E
NTER
to select Yes. The
printer goes offline and Running
Setup displays. This will take about
a minute.
4.
The Setup Menu displays, press
T
to select [Network Setup]. Press
E
NTER
.
5.
Press
T
to select [Protocol
Setup]. Press E
NTER
.
6.
Press
T
to select [TCP/IP Setup].
Press E
NTER
.
7.
Press
T
to select [Ethernet
Setup]. Press E
NTER
.
8.
[TCP/IP Ethernet] displays.
Select Yes and press E
NTER
.
Enable AutoIP Config? displays.
Select No. Press E
NTER
.
9.
The default IP Address displays.
Use
▲
/
T
to change each octet.
Press E
NTER
to proceed to the next
octet or to leave the octet
unchanged.
10.
[Subnet Mask] displays. Repeat
instructions in step 9.
11.
[TCP/IP bound to Ethernet]
displays. Press E
NTER
.
12.
[Gateway Address] displays.
Repeat instructions in step 9.
13.
Press E
NTER
to exit TCP/IP Setup,
Protocol Setup, and Network
Setup.
14.
Select Yes and press E
NTER
to Save
Changes. Press E
NTER
to Exit the
Setup Menu.
15.
Printer restarts the server and
initializes. [Ready to Print]
displays.
4
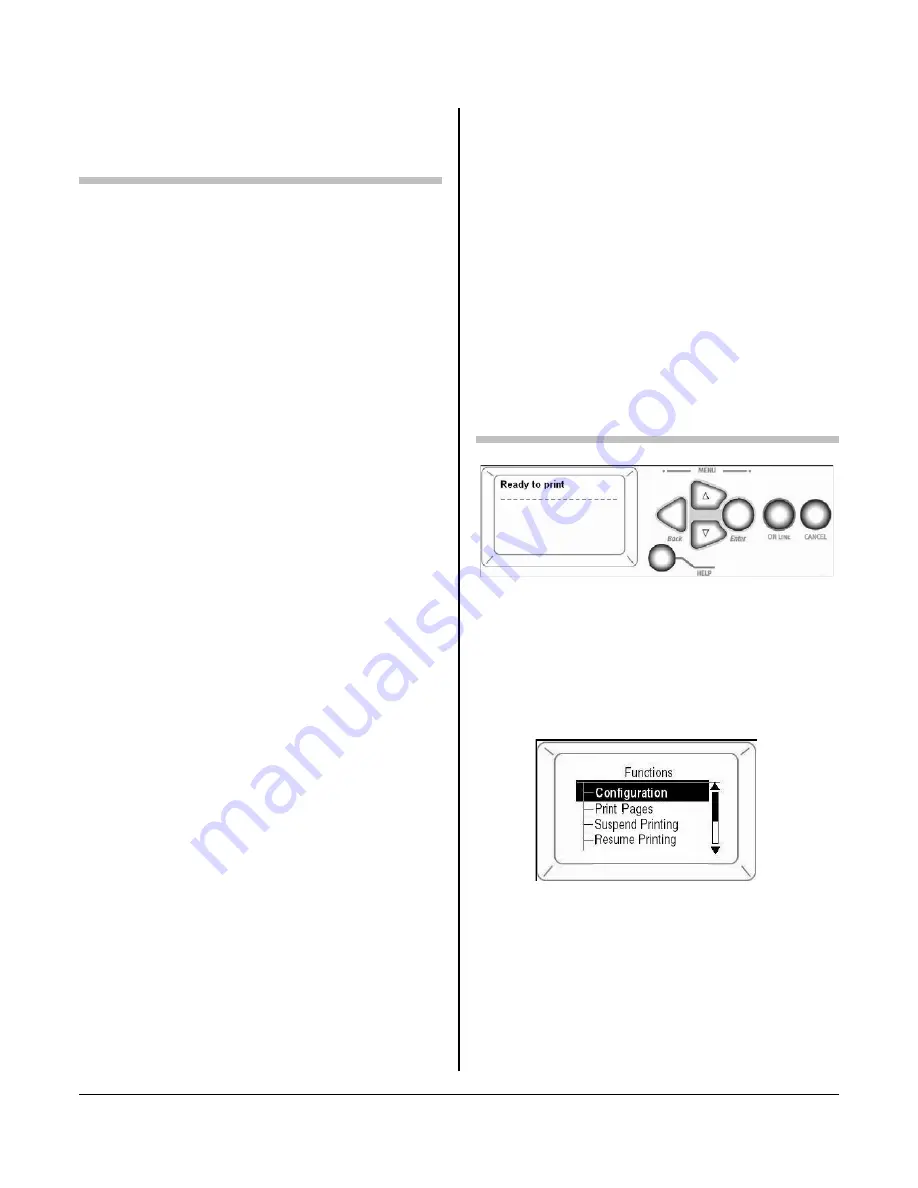
C
ONFIGURE
P
RINTER
Press E
NTER
to switch to the menu
ode.
3.
Use the
T
/
S
and E
NTER
keys to drill
down to the item you wish to
change.
m
1.
Use the
T
key to scroll down to the
function you wish to change.
2.
Press E
NTER
.
4.
Use the
S
/
T
keys to move to the
setting you wish to engage.
5.
Press E
NTER
.
An asterisk appears next to the new setting.
3
Содержание LUCIDIOM EQ-9800
Страница 1: ...LUCIDIOM EQ 9800 Installation Guide ...
Страница 12: ......
Страница 13: ......
Страница 14: ......