Oki C834DN Скачать руководство пользователя страница 23

- 23 -

Preparing Your Printer

1

1.


Setup

Auto Power Off Function

When a certain period of time elapses after 

printing, this printer will turn off automatically.

Memo


The factory default setting for time that elapses before the 

printer power turns off automatically is 4 hours.


For how to change the time that elapses before the 

printer power turns off automatically, refer to 

“Settings for 

Turning Power Off Automatically (Auto Power Off)” P.78

.

Note


While connecting to a network, a printer does not enter 

the auto power off mode.

Installing Options

This section explains how to install options on 

your printer. The following options are available:


Additional tray unit (Tray 2/3/4)


Additional RAM (256 MB or 512 MB)


16 GB SD memory card kit

Note


Be sure to turn off your printer and unplug the AC cord 

and Ethernet or USB cable before installing options. 

Installing options while your printer is turned on may 

damage your printer and options.

Memo


After installing options, set the option settings with a 

printer driver. Refer to 

“When Adding Options” P.55

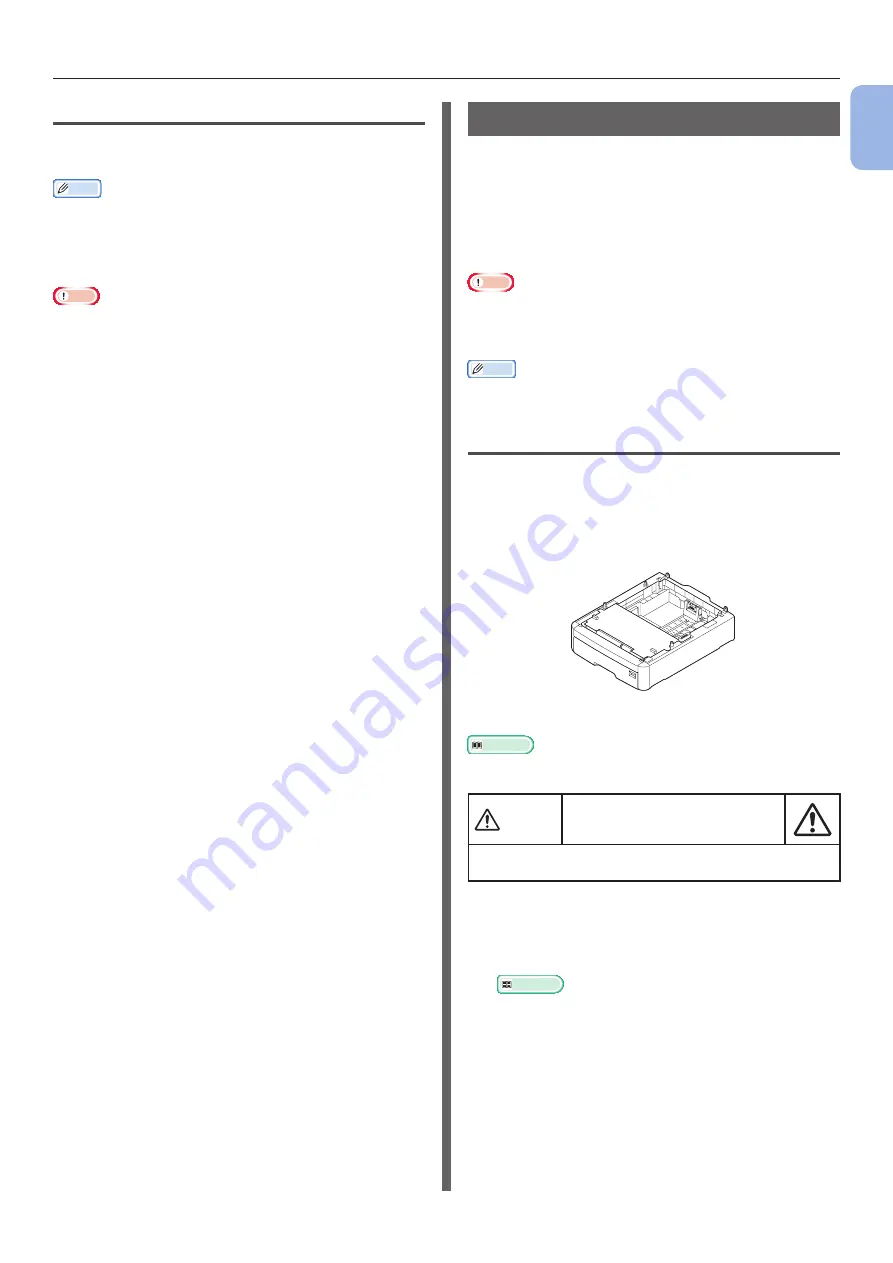
Installing an Additional Tray Unit

Install an optional additional tray unit when 

you want to increase the paper capacity of your 

printer. You can install up to three additional tray 

units. After installation, you need to configure 

the printer driver settings.

N35110A

Reference


● For specifications of the additional tray unit, refer to 

“Supported Paper” P.57

.

CAUTION

It may cause injury!


At least two people are needed to lift the printer 

safely because it weighs about 37 Kg or 40 Kg.

Turn off your printer, and then unplug 

the AC cord and the Ethernet or USB 

cable.

Reference


“Turning Off the Power” P.22

Содержание C834DN

Страница 1: ......

Страница 2: ...n before doing any of the above 2011 Oki Data Corporation OKI is a registered trademark of Oki Electric Industry Company Ltd Energy Star is a trademark of the United States Environmental Protection Ag...

Страница 3: ...Seek medical attention Spillages should be treated with cold water and soap to help reduce risk of staining skin or clothing Manufacturer Oki Data Corporation 4 11 22 Shibaura Minato ku Tokyo 108 855...

Страница 4: ...the printer is dropped or the cover is damaged Failure to do so may cause electric shock and or fire leading to personal injuries Unplug the power cord periodically to clean plug blades and root secti...

Страница 5: ...additional information on operations You should read sections with this mark Reference Indicates where to look when you want to know more detailed or related information WARNING A warning provides ad...

Страница 6: ...indows 7 operating system Windows 7 Microsoft Windows Vista operating system Windows Vista Microsoft Windows Server 2008 operating system Windows Server 2008 Microsoft Windows XP operating system Wind...

Страница 7: ...r Panel 12 How to Use the Ten Key Pad 12 How to Use the Function Key 13 Names of Components 14 Available Options 15 Checking the Placement Environment 16 Placement Environment 16 Placement Space 16 Pr...

Страница 8: ...g the Auto Power Off Mode 79 Setting the Buzzer 80 3 Troubleshooting 81 When an Error Message Appears on the Display Screen When the ATTENTION Indicator Lights Up Blinks 81 When Paper Jams Occurs When...

Страница 9: ...ing the Fuser Unit 121 Cleaning 124 Cleaning the Surface of the Printer 124 Cleaning Paper Feed Rollers 124 Cleaning LED Heads 126 Moving or Transporting Your Printer 128 5 Appendix 131 Menu List of t...

Страница 10: ...rning on off the power Installing options Test printing from the printer 4 Connecting to a Computer Connecting through network Connecting through USB For Windows For Macintosh For Windows For Macintos...

Страница 11: ...open the package refer to Unpacking P 17 Printer Four image drums black yellow magenta and cyan Four starter toner cartridges black yellow magenta and cyan Note The starter toner cartridges are instal...

Страница 12: ...sword can be entered only with a ten key pad 10 Fn key Displays the equipment setting menu screen with a shortcut function 11 CLEAR key Executes the following actions according to the entered items wh...

Страница 13: ...al Paper Tray 2 26 Other Size Tray 2 30 Paper Size Tray 3 31 X Dimension Tray 3 32 Y Dimension Tray 3 33 Media Type Tray 3 34 Media Weight Tray 3 35 Legal Paper Tray 3 36 Other Size Tray 3 40 Paper Si...

Страница 14: ...m K black 11 Toner cartridge Image drum Y yellow 12 Toner cartridge Image drum M magenta 13 Toner cartridge Image drum C cyan 14 Fuser unit 15 LED head four heads 16 17 No Name 16 Multipurpose tray 17...

Страница 15: ...erence For details on how to install the options refer to Installing Options P 23 An SD memory card kit is used for functions such as a storage for spooling when copying sectors saving secure print en...

Страница 16: ...small child s hand reaches Do not install in an unstable place the shaky stand leaning place etc Do not install in a place many humidity dusty and the place where direct rays hit Do not install in th...

Страница 17: ...to direct sunlight or very bright interior light approximately more than 1500 lux Even under the normal interior light do not leave it for more than 5 minutes Packaging and cushioning material are nee...

Страница 18: ...a desiccant 7 from an image drum 7 3 Pull out a protective sheet to the direction of the arrow Note Do not turn the lock lever of the toner cartridge 5 Put all four image drums back into a printer 6...

Страница 19: ...1 Install the supplied louver 1 on the air vent on the side of the printer 1 Memo Turn a louver to change a direction of air emitted from a printer Loading Paper Reference Please refer to Supported P...

Страница 20: ...en the edges of the paper stack on a level surface 5 Load paper with the print side face down and press it from above Note Do not load paper exceeding the mark 5 of the paper guide 5 6 Check if a size...

Страница 21: ...rd or printer if your hands are wet Install a power cord in the place which is not stepped on and do not place a thing on a power cord Do not use the cord tied in a bundle Please do not use the damage...

Страница 22: ...WER SAVE button on the operator panel The POWER SAVE button lights up green while in this mode Memo By factory default the time interval before entering the power save mode is set to 1 minute For how...

Страница 23: ...card kit Note Be sure to turn off your printer and unplug the AC cord and Ethernet or USB cable before installing options Installing options while your printer is turned on may damage your printer and...

Страница 24: ...the memory capacity of your printer in cases such as if memory overflow or the collate print errors occur Your printer supports 256 MB and 512 MB RAM Note Use only genuine Oki Data products The perfo...

Страница 25: ...sure to check a direction of an additional RAM The additional RAM has small dents on its connector which are fitted with a connector of a slot 4 7 Install the metal plate 2 2 Note Attach the SD memory...

Страница 26: ...the additional RAM 15 Press the ON LINE button Installing the 16 GB SD Memory Card Kit For storing print data or a secure printing install the SD memory card kit SD memory socket SD memory card Memo T...

Страница 27: ...rns off 3 6 Install the SD memory card 4 into the SD memory card socket 5 4 5 7 Install the SD memory socket to the printer with the screw 6 and tab 7 for the SD memory card socket and attach the conn...

Страница 28: ...System and press the ENTER button 14 Press the scroll button several times to select SD Card and press the ENTER button 15 Check that the value of SD Card is 16 GB Note 15 GB may be displayed in SD Ca...

Страница 29: ...inter is in the power saving mode press the POWER SAVE button to restore from the mode 1 Press the Fn key on the operator panel 2 Enter 100 using the ten key pad and press the ENTER button 3 Press the...

Страница 30: ...10 6 Note For Mac OS X 10 6 users install Rosetta before printer driver installation Types of Drivers The types of the drivers that can be installed are as follows For Windows Type Description PCL Th...

Страница 31: ...e IP address on the computer or printer If your network administrator or internet service provider specifies an unique IP address for the computer and your printer you need to set the IP addresses man...

Страница 32: ...character you input 5 Press the ENTER button 6 Check that Network Setup is selected and press the ENTER button 7 Press the to select IP Address Set and press the ENTER button 8 If setting the IP addre...

Страница 33: ...Enter the subnet mask in the same manner of IP address To move to the next box press the ENTER button 13 Press the BACK button until Network Setup is displayed Press the scroll button to select Gatewa...

Страница 34: ...lect the model of your printer and then click Next 5 Read the license agreement and then click I Agree 6 Read the Environmental advice for Users and then click Next 7 Select a check box for the driver...

Страница 35: ...are anyway 13 Click Exit to complete the installation Note If the dialog box prompting to restart the computer appears click Yes The computer automatically restarts Reference For how to configure the...

Страница 36: ...ode on the printer After doing that install the driver on the computer First enable EtherTalk and disable the sleep mode on the printer 1 Ensure that your printer and the computer are turned on and co...

Страница 37: ...he scroll button to select Disable and press the ENTER button 14 Press the ON LINE button to exit the menu mode Then install the printer driver on the computer 1 Insert the Software DVD ROM into the c...

Страница 38: ...rom Print Fax and then redo the procedure from steps 7 to 10 12 Close Print Fax 13 Remove Software DVD ROM from the computer Next enable the sleep mode on the printer Note If using the EtherTalk disab...

Страница 39: ...the scroll button to select Enable and press the ENTER button 8 Press the ON LINE button to exit the menu mode Finish by test printing from a computer 1 Start up TextEdit 2 Open an appropriate file 3...

Страница 40: ...computer are turned on and connected Reference Connecting an Ethernet Cable P 31 2 Press the ENTER button on the operator panel 3 Press the scroll button several times to select Admin Setup and press...

Страница 41: ...he ON LINE button to exit the menu mode Then install the printer driver on the computer 1 From the Apple menu select System Preferences 2 Select Network 3 Select Network Port Configurations from Show...

Страница 42: ...rint Using For Mac OS X 10 3 9 set as follows a Select AppleTalk from the pop up menu b Select the printer from the list c Select Oki from Printer Model and then select OKI C831 PS from the driver lis...

Страница 43: ...eral times to select Power Setup and press the ENTER button 6 Press the scroll button to select Sleep and press the ENTER button 7 Press the scroll button to select Enable and press the ENTER button 8...

Страница 44: ...3 Enter the administrator password using the numeric 0 9 keys The factory default password is aaaaaa Press ENTER button after each character you input 4 Press the ENTER button 5 Press the scroll butto...

Страница 45: ...S is displayed in Print Using The name of your printer is displayed in the format of OKI C831 the last six digits of the MAC address 11 Click Add 12 If the Installable Options window is displayed clic...

Страница 46: ...R button 3 Enter the administrator password using the numeric 0 9 keys The factory default password is aaaaaa Press ENTER button after each character you input 4 Press the ENTER button 5 Press the scr...

Страница 47: ...twork with Bonjour it is necessary to disable the sleep mode in the printer After doing that install the driver on the computer and set the printer as a network printer Memo The following procedure us...

Страница 48: ...e Apple menu select System Preferences 3 Select Network 4 Select Network Port Configurations from Show and then check that Built in Ethernet is selected 5 Close Network 6 Insert Software DVD ROM into...

Страница 49: ...inter driver installation configure each item and then click Continue 15 Check that the name of your printer is displayed in Printer List and then close the window 16 From the Go menu select Applicati...

Страница 50: ...tton 7 Press the scroll button to select Enable and press the ENTER button 8 Press the ON LINE button to exit the menu mode Finish by test printing from a computer 1 Start up TextEdit 2 Open an approp...

Страница 51: ...do not plug the other end of the USB cable into the computer until prompted while a printer driver installation Note Do not plug the USB cable into the network interface connection Doing so may cause...

Страница 52: ...ox appears click Install this driver software anyway 12 When connecting the printer to the computer and the instruction prompting to turn on the printer appears plug the USB cable into the computer an...

Страница 53: ...der Printers folder Installer for Mac OSX 5 Enter the administrator s password and then click OK Follow the instructions displayed on the screen to complete the installation 6 From the Apple menu sele...

Страница 54: ...or s password and then click OK Follow the instructions displayed on the screen to complete the installation 6 From the Go menu select Utilities and then double click Printer Setup Utility Note If Pri...

Страница 55: ...inter drivers select Properties OKI C831 PCL 3 Select the Device Options tab 4 If using a network connection select Get Printer Settings If using a USB connection enter the total number of trays exclu...

Страница 56: ...nd then click Setup If using a USB connection select an appropriate number of trays in Available Trays under Installable Options 5 Click OK For Mac OS X PS Driver Mac OS X 10 5 and 10 6 1 Select Syste...

Страница 57: ...er Paper Type Paper Size mm inch Paper Weight Plain paper A3 297 x 420 64 to 256 g m2 For duplex print 64 to 220 g m2 Note If the paper size is set at A6 A5 or with a paper width narrower than 148 mm...

Страница 58: ...to color paper is heat resistant 230 C Paper that has same characteristics with light paper and used for an electronic photo printer Paper Recommendations Your printer will handle a variety of print...

Страница 59: ...ar the inside of an exterior wall On an uneven surface Where static electricity may be generated In places that are excessively hot or where temperature rapidly changes Near a copier air conditioner h...

Страница 60: ...K 195 x 270 mm 16K 197 x 273 mm Custom 300 sheets when paper weight is 80 g m2 Light 64 to 82 g m2 Medium Light 83 to 90 g m2 Medium 91 to 105 g m2 Heavy 106 to 128 g m2 Ultra Heavy1 129 to 188 g m2 U...

Страница 61: ...260 x 368 mm 8K 270 x 390 mm 8K 273 x 394 mm 16K 184 x 260 mm 16K 195 x 270 mm 16K 197 x 273 mm Custom Com 10 Envelope DL Envelope C4 Envelope C5 Envelope Index Card 100 sheets when paper weight is 8...

Страница 62: ...the size of paper to be loaded 3 4 Note When loading A6 size paper move the paper stopper 4 forward and remove it once then install it on the metal part 4 4 Flex paper back and forth and then fan it S...

Страница 63: ...tacks of paper and then load them again Do not put anything other than paper for printing in the MP tray 1 Open the MP tray 1 forward by inserting your fingers into the front recesses 2 2 2 1 2 Pull o...

Страница 64: ...f paper on which other printer has printed Curling of a postcard or an envelope may cause the ink absorbing problem Use paper that is not curled Correct a paper Curling within 2 mm Printing an envelop...

Страница 65: ...16 Press the scroll button to select the weight of the loaded paper and then press the ENTER button 17 Press the ON LINE button to exit the menu mode 18 Open the file you want to print and print it by...

Страница 66: ...to the facedown or faceup stacker Paper types that can be outputted to each stacker are as follows Output Stacker Supported paper type Paper output capacity Facedown Plain paper Recycled paper 250 sh...

Страница 67: ...eration Using the Faceup Stacker Paper is delivered with the print side face up stacked opposite the order printed 1 Pull the faceup stacker 1 on the rear side of the printer and open it outward 1 2 U...

Страница 68: ...9 11 1 2 3 4 Multipie print Booklet print Poster print Duplex Printing You can print on both sides of a sheet of paper 1 2 Duplex prints Scaling to Pages You can print data formatted for one size pag...

Страница 69: ...11 7 inches Length 90 to 1321 mm 3 5 to 52 inches Note Custom is displayed only when Paper Size is set to Custom The available size range for duplex printing is the same as that for tray 2 3 4 1 Press...

Страница 70: ...width value using the ten key pad and then press the ENTER button 10 Press the BACK button 11 Press the scroll button to select Y Dimension and then press the ENTER button 12 Enter the paper length v...

Страница 71: ...stScript Custom Page Size from the drop down list 5 Enter the dimensions in the Width and Height boxes and press OK Note Offsets Relative to Paper Feed Direction is not available 6 Press OK until the...

Страница 72: ...dows PS Printer Driver 1 From the File menu select Print 2 Click Preferences or Properties 3 Select the Paper Quality tab 4 Select Multipurpose Tray from Paper Source 5 Click Advanced 6 Click Paper Si...

Страница 73: ...rinted or preparing for a print When you press the CANCEL button is pressed the following message appears To cancel printing select Yes and then press the ENTER button To proceed to printing select No...

Страница 74: ...the message Ready To Print appears If the message is not displayed press the ON LINE button 1 Press the Fn key on the operator panel 2 Enter 200 using the ten key pad and then press the ENTER button...

Страница 75: ...ck if the message Ready To Print appears If the message is not displayed press the ON LINE button 1 Press the Fn key on the operator panel 2 Enter 201 using the ten key pad and then press the ENTER bu...

Страница 76: ...o Print is displayed the following constraints do not apply OS Software Name Constraints When in the Sleep Mode Method of resolving other than to press the POWER SAVE button Windows Configuration Tool...

Страница 77: ...sleep mode with an IP Print connection Cannot Search Cannot Specify Settings In the sleep mode you cannot search or specify settings with the following functions or protocols PnP X UPnP Bonjour Rende...

Страница 78: ...TER button on the operator panel 2 Press the scroll button several times to select Admin Setup and press the ENTER button 3 Enter the administrator password using the numeric 0 9 keys The factory defa...

Страница 79: ...the mode Check if the message Ready To Print appears If the message is not displayed press the ON LINE button 1 Press the Fn key on the operator panel 2 Enter 202 using the ten key pad and then press...

Страница 80: ...n 3 Enter the administrator password using the numeric 0 9 keys The factory default password is aaaaaa Press the ENTER button whenever inputting one character 4 Press the ENTER button 5 Press the scro...

Страница 81: ...function of the ATTENTION indicator refer to Checking the Printer s Status with the Display Screen P 131 When an Error Message Appears on the Display Screen When the ATTENTION Indicator Lights Up Blin...

Страница 82: ...the HELP button is pressed Scroll display upward Scroll display downward Press the HELP button to display a remedy Message on the display screen first line Message on the display screen second line Pl...

Страница 83: ...ppear 1st Line Open Cassette 631 632 633 634 2nd Line Paper Remain 3rd Line TRAY 1st Line Open Cover 637 2nd Line Paper Remain 3rd Line Front Cover 1st Line Open Cover 638 2nd Line Paper Remain 3rd Li...

Страница 84: ...your finger into the recess on the right side of the printer and pull the front cover open lever 1 to open the front cover 2 forward 1 2 2 Remove the jammed paper gently in the direction of the arrow...

Страница 85: ...over 4 7 Replace the duplex unit 3 to the printer 3 8 Close the front cover 2 2 Error Code 380 A paper jam has occurred around the front cover 1 Insert your finger into the recess on the right side of...

Страница 86: ...sible to get burned The fuser unit is extremely hot Do not touch it 3 4 3 Remove all four image drums and place them on a flat surface 4 Cover the removed image drums with paper so that the image drum...

Страница 87: ...cannot be closed if the top cover is not closed securely 2 Task is complete Error Code 382 383 385 A paper jam has occurred around the fuser unit 1 Insert your finger into the recess on the right side...

Страница 88: ...rums are not exposed to light 5 Remove the jammed paper remaining inside of the unit 6 Lift the left lock lever 5 of the fuser unit forward 5 7 Hold the fuser unit handle 6 and lift the fuser unit out...

Страница 89: ...shing the both sides of the cover firmly 4 13 Close the front cover 2 Note Cannot close the front cover securely if the top cover is not closed 2 Task is complete Error Code 390 A paper jam has occurr...

Страница 90: ...paper on MP tray lift the paper set cover 1 and set the paper with the print side face up 1 6 Lower the paper set cover 1 1 Task is complete Error Code 391 392 393 394 A paper jam has occurred while...

Страница 91: ...the tray 1 to the printer 1 4 Insert your finger into the recess on the right side of the printer and pull the front cover open lever 2 to open the front cover 3 forward 2 3 5 Close the front cover 3...

Страница 92: ...ears on the display screen and the ATTENTION indicator on the operator panel lights up or blinks Check the message and replace consumables and maintenance unit Display Screen when the HELP button is p...

Страница 93: ...toner cartridge soon after it runs out Otherwise it may cause the damage to an image drum 2nd Line COLOR Image Drums 1st Line xxx Prepare new image drums and replace the old image drums with new ones...

Страница 94: ...Near Life 1st Line xxx page 121 2nd Line Change Fuser Unit 1st Line Install New Fuser Unit 354 page 121 You can continue to print by opening or closing the front cover for a while However replace the...

Страница 95: ...lay screen first line Message on the display screen third line Message on the display screen fourth line Please see HELP for details ATTENTION indicator HELP button Message on the display screen secon...

Страница 96: ...ner Not Installed COLOR Please see HELP for details Blinks The toner cartridge of the indicated color is not installed correctly Install the toner cartridge correctly 610 Yellow Y 611 Magenta M 612 Cy...

Страница 97: ...full 491 492 493 494 Install Paper TRAY MEDIA_SIZE Please see HELP for details Blinks The indicated tray is empty Load the indicated size paper 491 Tray1 492 Tray2 493 Tray3 494 Tray4 File Erasing Lig...

Страница 98: ...p An error of file system for a printer has occurred Power Off and Wait for a while 126 Condensing Error Blinks A condensation has occurred inside a printer Turn the printer off and turn on again afte...

Страница 99: ...ou Cannot Print from the MP Tray If you print from the MP tray without moving down the paper set cover the message Install Paper MPTray appears on the display screen Check the message and deal with th...

Страница 100: ...the ON LINE button An error message is displayed on the display screen of the operator panel Error Messages or press the HELP button on the operator panel page 96 The interface setting is disabled Che...

Страница 101: ...er If using LPR Utility check the IP address setting in LPR Utility USB Connection Problems Common to Windows and Mac OS X Cause Remedy Reference Unsupported USB cable is being used Use a USB 2 0 cabl...

Страница 102: ...on screen instructions 3 Select Custom Installation Printer from Driver Installation 4 Click Next 5 Select Local Printer and then click Next 6 On the Select printer port screen select FILE and then c...

Страница 103: ...u click No the installer or utility does not start The Program Capability Assistant dialog appears If the Program Capability Assistant dialog appears after an installation including if you stop an ins...

Страница 104: ...ft tissue paper The image drum is not installed properly Install the image drum properly page 116 Printed images are fading vertically The LED heads are dirty Wipe the LED heads with soft tissue paper...

Страница 105: ...ce the image drum back into the printer and leave it for a few hours If that does not solve the problem replace the image drum page 116 The paper feed path is dirty Print a few test copies White area...

Страница 106: ...and close the top cover Or press the ENTER button and select Calibration and then Adjust Registration Advanced Solid printing of CMY 100 is too light CMY100 Density is set to Disable Press the ENTER...

Страница 107: ...edges and load the paper with the old paper on top page 62 page 63 The paper is loaded at an angle For tray 1 2 3 4 adjust the paper width guide and stopper to the paper For the MP tray adjust the pap...

Страница 108: ...econds to turn off the printer forcibly The printer does not start printing An error is displayed on the panel Check the error code and follow the on screen instructions page 96 The Ethernet or USB ca...

Страница 109: ...y for a long time the temperature in the printer inside has become too high The printer is cooling off Wait for a while When the printer becomes cooler printing restarts automatically When the print p...

Страница 110: ...d gargle with large amounts of water and move the person to the open area for fresh air Follow the doctor s direction if necessary If the toner powder sticks to your skin like your hands wash with soa...

Страница 111: ...oner cartridges is as follows for A4 simplex printing with default density according to ISO IEC 19798 The starter toner cartridge is the toner cartridge that comes with the product at the time of purc...

Страница 112: ...e of the printer and pull the front cover open lever 1 to open the front cover 2 forward 1 2 3 Turn the blue lever 3 of the toner cartridge 3 4 Lift the toner cartridge 4 from the right side and remov...

Страница 113: ...a toner cartridge without removing the tape 6 8 7 8 Turn the blue lever 3 of the toner cartridge in the direction of the arrow fully while pressing the top of the toner cartridge 3 9 Close the front...

Страница 114: ...er 1 to open the front cover 2 forward 1 2 3 Press the top cover open button 3 and open the top cover 4 CAUTION Possible to get burned The fuser unit is extremely hot Do not touch it 3 4 4 Identify an...

Страница 115: ...y into place Note Do not insert a toner cartridge without removing the tape 10 11 9 10 Turn the blue lever 6 of the toner cartridge in the direction of the arrow fully while pressing the top of the to...

Страница 116: ...Setup System Setup Near Life Status is set to Disable the COLOR Image Drum Near Life message does not appear Procedure for Replacement Note If you use a new image drum with the toner cartridges curren...

Страница 117: ...the right side and remove it from the image drum WARNING Possible to get burned Do not throw a used image drum and toner cartridge in the fire They may explode and the toner inside may fly off and cau...

Страница 118: ...losed if the top cover is not closed securely 2 15 Please recycle image drums Memo If you must dispose of an image drum put it in a plastic bag or similar container and dispose of it in accordance wit...

Страница 119: ...it and install and use another one before its usable life has expired the use life will not be correctly displayed When the ENTER button Admin Setup System Setup Near Life Status is set to Disable the...

Страница 120: ...ht 7 Turn the blue locks 5 on each side of the belt unit in direction of the arrow to unlock 5 5 8 Remove the belt unit by holding the blue lever 6 6 9 Hold the handle of a new belt unit with one hand...

Страница 121: ...he fuser unit is up to 100 000 pages for A4 simplex printing Note The actual number of pages you can print with the fuser unit depends on how you use it Note Though opening and closing the top cover m...

Страница 122: ...ce the fuser unit gets hot carry out the operation carefully and when lifting it up you must hold it by the handle Do not try to hold it whilst it is hot Wait until it has cooled down and then carry o...

Страница 123: ...e cover firmly 4 10 Close the front cover 2 Note The front cover cannot be closed if the top cover is not closed securely 2 11 Please recycle fuser unit Memo If you must dispose of a fuser unit put it...

Страница 124: ...Cleaning Paper Feed Rollers Clean the paper feed rollers if paper jams occur frequently Note You should replace the paper feed rollers if paper jams keep occurring even after cleaning the paper feed r...

Страница 125: ...lease the tab 3 of the paper feed roller cover 1 4 3 4 Open the paper set cover 5 until touching the printer 5 5 Wipe the two paper feed rollers 6 with a wet cloth that has been wrung out well 6 6 Ope...

Страница 126: ...tion by pressing the paper loading part on the MP tray downward 1 Cleaning LED Heads Clean the LED heads if vertical lines appear images are fading vertically or the periphery of letters is smudged in...

Страница 127: ...wipe the lenses 5 of the LED heads with soft tissue paper 5 5 Close the top cover 4 by pushing the both sides of the cover firmly 4 6 Close the front cover 2 Note The front cover cannot be closed if...

Страница 128: ...use it weighs about 37 Kg or 40 Kg CAUTION Possible to get burned The fuser unit is extremely hot Do not touch it Note The image drum the green tube is very delicate Handle it carefully Do not expose...

Страница 129: ...lat surface 7 Secure each toner cartridge to each image drum with vinyl tape 5 5 8 Return all the toner cartridges and image drums to the printer 9 Close the top cover 4 by pushing the both sides of t...

Страница 130: ...t your printer with packing materials 13 Lift your printer and put it in a box Note Use the packing materials attached to your printer when purchased After transporting or when setting up again remove...

Страница 131: ...on on the operator panel you can check the status of your printer Checking the Device Status You can check the residual life of the consumables counter information network settings and system informat...

Страница 132: ...Printer Name IPv4 Address Subnet Mask Gateway Address MAC Address Network FW Version Web Remote Version IPv6 Address Local IPv6 Address Global System Serial Number Asset Number Lot Number CU Version P...

Страница 133: ...pe Plain Fn33 Media Weight Light Fn34 Legal Paper Legal14 Fn35 Other Size 16K 184x260mm Fn36 Tray4 Config Paper Size Cassette Size Fn40 X Dimension 210mm or 8 5inch Fn41 Y Dimension 297mm or 11inch Fn...

Страница 134: ...ge Media Check Enable Resolution 600dpi Toner Save Toner Save Level Off Mono Print Mode Auto Color All Default Orientation Portrait Form Length 64lines Edit Size Cassette Size X Dimension 210mm or 8 5...

Страница 135: ...to 20CPI Character Set SET 2 Symbol Set IBM 437 Letter O Style Disable Zero Character Normal Line Pitch 6 LPI White Page Skip Off CR Function CR LF Function LR Line Length 80 column Form Length 11 7...

Страница 136: ...en 5 Width 0 65mm Color 5 Pen 6 Width 0 70mm Color 6 Pen 7 Width 0 80mm Color 7 Pen 8 Width 0 90mm Color 8 Pen 9 Width 1 00mm Color 12 Pen 10 Width 1 40mm Color 19 Pen 11 Width 2 00mm Color 27 Pen 12...

Страница 137: ...etup Invalid Operation Volume Low Error Volume Low Power Setup Power Save Enable Sleep Enable Auto Power Off Auto Config Change Password New Password Verify Password Settings Reset Settings Save Setti...

Страница 138: ...her Key Storage Setup Check File System Check All Sectors Enable SD Card Yes Erase SD Card Enable Initialization No Process Setup Custom Process Full Color Check C Drum Yes Check M Drum Yes Check Y Dr...

Страница 139: ...Windows Server 2008 1 Click Start and select Control Panel Printer 2 Right click on the OKI C831 icon and select Properties For Windows XP Windows Server 2003 1 Click Start and select Printers and Fax...

Страница 140: ...5102A N35101A N35103A 110 127 VAC Range 99 140 VAC 50 60 Hz 2 N35100B N35102B N35103B 220 240 VAC Range 198 264 VAC 50 60 Hz 2 Power consumption Typical operation 700 W Idle 100 W Peak 1400 W Sleep mo...

Страница 141: ...mm 16K 197 x 273 mm 195 x 270 mm 184 x 260 mm custom size 148 297 mm W x 182 431 8 mm L Custom size Tray 1 105 297 mm W 148 182 431 8 mm L 4 1 11 7 inches W 5 8 7 2 17 0 inches L Tray 2 3 4 option 148...

Страница 142: ...80 RH Temperature 32 C humidity 20 to 60 RH Humidity 20 RH temperature 10 to 32 C Humidity 80 RH temperature 10 to 27 C Full color Print Quality Assured Range Temperature 17 to 27 C humidity 50 to 70...

Страница 143: ...143 Specifications 5 5 Appendix Printer Dimensions 449 mm 360 mm 760 mm 400 mm 498 mm 774 mm 138 mm 138 mm 138 mm 1107 mm 255 mm 552 mm 300 mm 420 mm TOP VIEW SIDE VIEW OPTION INSTALLED VIEW TRAY2 3 4...

Страница 144: ...l Printer Driver Mac OS X 36 53 Printer Driver Windows 31 51 IP Address 31 L Label 58 M Mac OS X 30 MP Tray 63 O Other Error Messages 96 P Paper Jams 82 Paper Size 57 60 69 Paper Tray 60 69 Paper Weig...

Страница 145: ...ed Liebermannstrasse A02 603 22345 Brun am Gebirge Tel 43 223 6677 110 Drucker Support 43 0 2236 677110 501 Fax Support 43 0 2236 677110 502 Website www oki at OKI Systems Czech and Slovak s r o IBC P...

Страница 146: ...h cara Santo Antonio 04717 004 S o Paulo SP Brasil Tel 55 11 3444 6747 Grande S o Paulo 0800 11 5577 Demais localidades Fax 5511 3444 3501 e mail okidata okidata com br http WWW OKIPRINTINGSOLUTIONS C...

Страница 147: ...44902802EE Rev2...

Отзывы: