


ROB 4600
51
EN
17.04.23
18
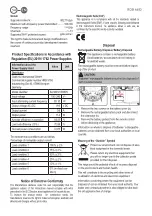
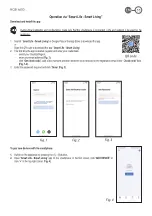
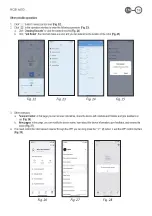
The appliance operates in “Spot”
mode. Place the appliance in the area
to be cleaned. It moves from the cen-
tre of the area in an ever-widening
circle.
The appliance operates in “Corner“
mode. Place the appliance against a
wall. After you activate the appliance,
the appliance moves along the walls.
- If, after selecting a cleaning mode, the appliance de-
tects that another mode would achieve a better clean-
ing effect, the appliance automatically switches to it.
- You can end the started cleaning mode at any time
with the
button.
•
(3)
Start or stop the appliance from sleep mode. Confirm
the entry when setting the time or creating the cleaning
schedule.
•
(4)
To set the time. See chapter “Putting Into Operation”
“Setting the Weekday and the Time”.
•
(5)
When you press this button, the appliance stops op-
erating and searches for the charging station. The two
control lamps in the buttons on the appliance flash.
•
(Scheduled Cleaning) (6)
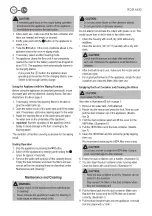
CAUTION:
Do
not
use this function with the mopping function, as
the escaping water could damage the floor covering!
With this button, you can set a schedule for the appli-
ance. You can set the appliance to switch on at a certain
time on selected days. To do this, proceed as follows:
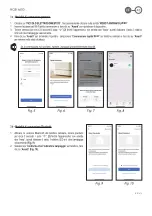
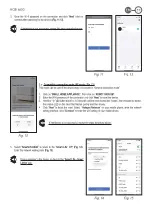
Set Scheduled Cleaning
1. Press the button.
SUN
or the first previously
activated weekday starts flashing on the display.
2. Press the button repeatedly until the weekday you
want to set flashes. Confirm your selection with the
button. The next weekday starts flashing.
3. Select all the desired weekdays as just described.
Then switch to entering the time by pressing the
button. The hour entry starts flashing.
4. Now set the hour with the / buttons and then
change to the minute input with the button.
5. Also set the minutes with the / buttons.
6.
Confirm your entry with the
button.
7. Now transmit the schedule to the appliance. To do
this, the appliance must be in standby (control lamp in
the
button flashes). Point the remote control at the
appliance and press the button. A beep from the
appliance confirms the transmission.
8. In order for the appliance to execute the plan, it must
be connected to the charging station at the time.
- If you do not press any button within approx. 14 sec-
onds, the setting will be discarded.
- The symbol appears on the display to indicate that
a schedule has been set.
-
Delete schedule:
To reset and delete the set sched-
ule from the appliance, press and hold the button
for about 3 seconds while pointing the remote control
at the appliance. A beep is heard and the symbol
disappears.
•
/ / /
(7)
The appliance moves forward, to the right, backward, to
the left.
•
(8)
Here you can increase the suction power of the appli-
ance. The selected suction power is displayed in the
remote control display.
= normal suction power
= increased suction power
- Please note that the increased power results in a
shorter battery life. To keep the increased battery
consumption as low as possible, the power increase is
only approx. 10 – 15 %.
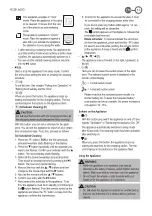
Buttons on the Appliance
•
(1)
With this button you switch the appliance on and off. See
chapter “Operation” “Switching the Appliance On / Off”.
The appliance automatically switches to sleep mode
after 60 seconds if no cleaning mode has been activated
after switching on.
•
(2)
When you press this button, the appliance stops op-
erating and searches for the charging station. The two
control lamps in the buttons on the appliance flash.
Using the Appliance
WARNING:
• While the appliance is in operation, pay special
attention to the safety of babies, small children and the
elderly. Make sure that no one trips over the appliance.
• Do not touch the wheels or side brushes with your
hands while the appliance is in operation.
CAUTION:
• Do
not
leave the appliance switched on unattended so
that you can intervene if it is obstructed by furniture /
objects.


