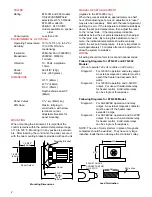
The ETR-901 and ETR-902 must be used with the line
voltage specified. They are not interchangeable from
one line voltage to another. The ETR-905 has
universal line voltage capabilities from 90-264VAC.
When wiring the thermocouple, check the thermocou-
ple and extension wire (compensating cable) to make
sure they conform to the appropriate thermocouple
type specified by the instrument. Extension wires must
be the same alloy and polarity as the thermocouple.
The total lead resistance should not exceed 100 ohms
for accurate measurements. One hundred ohms of
lead resistance will introduce a 1°F (0.5°C) error.
For wiring 3 wire RTD (Resistance Temperature
Detectors), all leads connecting to the controller must
be the same gauge and composition to assure effective
lead resistance compensation. If the RTD is a 3-wire
device, install the two common wires of the RTD to
terminals 4 and 5. If a two wire RTD is to be used,
install a jumper between terminals 4 and 5.
Dangerous voltages are sometimes present in this
instrument. Before installation or beginning any trouble
shooting procedures, the power to all equipment must
be switched off and locked out. Units suspected of
being faulty must be disconnected and removed to a
properly equipped workshop for testing and repair.
Component replacement and internal adjustments must
be made by qualified maintenance personnel only.
To help minimize the possibility of fire or shock haz-
ards, do not expose this instrument to rain or excessive
moisture. This control cannot be used in hazardous
locations as defined in Articles 500 and 505 of the
National Electric Code.
Do not use this instrument in areas subject to
hazardous conditions such as excessive shock,
vibration, dirt, moisture, corrosive gases or oil. The
ambient temperature of the areas should not exceed
the maximum rating.
Wiring Precautions:
•
Before wiring, verify the label for control model
number and options. Switch off the power when
checking.
•
Care must be taken to ensure that maximum voltage
ratings are not exceeded.
•
It is recommended that power to these instruments
be protected by fuses or circuit breakers rated at the
minimum value possible.
•
All units should be installed inside a suitably
grounded metal enclosure to prevent live parts being
accessible to human hands and metal tools.
•
All wiring must conform to appropriate standards of
good practice and local and national codes and
regulations. Wiring must be suitable for voltage,
current and temperature ratings of the system.
•
Both solderless terminals or “stripped” leads as
specified below can be used for power leads. Only
“stripped” leads should be used for thermocouple
connections to prevent compensation and resistance
errors.
•
Take care not to over-tighten the terminal screws.
•
Unused control terminals should not be used as
jumper points as they may be internally connected,
causing damage to the unit.
GENERAL OPERATION
“OUT” Pilot Lamp Indication:
Adjust the set point to the desired temperature. The
“OUT” lamp will display a red color. This indicates the
relay (or SSR) is closed and the control is calling for
heat. When the process is within the control’s propor-
tional band (20°), the lamp will cycle from red to green
with the heater(s). The relay (or SSR) is in the “open”
position when the lamp indicates a green color. The
digital display on the ETR-905 indicates the actual
process temperature as measured at the location of the
thermocouple or RTD sensor. Note: The control will
not cycle if it is configured as “on-off”.
Operation of HI and LO indication lamps on Model
ETR-902:
These lamps compare the actual process temperature
to the control set point. The lamps blink on and off if
the process temperature is more than 10% of the scale
from the set point. Since the standard temperature
range is 50-850°F, 10% equals 40° below (LO lamp) or
40° above (HI lamp) the set point. If the lamps are
solid, then the process termperature is within 10%
(+ - 40°). Both lamps are off if the temperature is
within 1% (+ - 4°) of the set point. Also note the
diagram below:
CALIBRATION INSTRUCTIONS
Calibration is accomplished by using the four poten-
tiometers located on the bottom of the right-hand circuit
board. The control is opened by unlatching the clamps
located on the top and bottom of the control. The
control should be allowed to warm up for at least 1/2
hour before checking the calibration. The purpose of
the potentiometers is as follows:
VR1 . . . . .Low scale calibration
VR4 . . . . .High scale calibration (ETR-905 only)
VR2 . . . . .Low scale switching point
VR3 . . . . .High scale switching point
The “reset” adjustment must be set to 0 before calibra-
tion. VR1 and VR4 have a slight effect on each other
so you should calibrate low scale and high scale at
least three times each.
WARNING!
WARNING!
3
CAUTION!
LO-
Blinking
HI-
Blinking
LO-
Solid
HI-
Solid
4
°
4
°
OFF
8
°
80
°
SET POINT
50
°
F
850
°
F


