background image


                                                                     Launch Box User Guide     


 April 2020

             P.5 

Deployment 

1.


Secure Launch Box to vessel or dock prior to deploying hydrophone(s) on the cable 
attached, so the Launch Box can not be pulled into the water.   

2.


If deploying on a vessel, the vessel should be stopped during deployment.  

3.


Use Launch Box Wi-Fi to ensure the hydrophone is recording and streaming. 

4.


Slowly feed the hydrophone and cable into the water. 

5.


Collect Data. 

a.


While collecting data the Wi-Fi connection can continue streaming 
hydrophone data to the PC while the Launch Box is within range. 
 

Recovery 

1.


Retrieve hydrophone and cable from water.  

If the Launch Box has power: 

2.


Connect to Wi-Fi on Launch Box.  

3.


Turn off hydrophone recording.  

4.


Place Hydrophones into Standby Mode.  

5.


Turn off Power to hydrophones  

6.


Toggle icListen Power switch to STOP position. 

7.


Turn off remaining switches on Launch Box.   

8.


Rinse hydrophone and cable with fresh water. 

If the Launch Box does not have power use the test cable instead of the Launch Box for 
shutting off hydrophone.  

Hydrophone internal batteries can be disconnected using the power down / hardware reset 
tool to retain battery at 100%:  

a.


Attach test cable. 

b.


Put hydrophone is standby mode. 

c.


Insert -9v battery hardware reset tool into the power barrel connector on the 
test cable.   

Charging the Battery 

1.


Ensure the Launch Box is in a secure, dry location for charging. 

2.


Insert the power cord into a wall outlet. 

3.


Mate the charger cable to charging socket on the Launch Box.  

4.


Charging should take approximately 6 hours, depending on the discharge state of 
the battery.  


Содержание Launch Box

Страница 1: ...Launch Box User Guide September 2020 Version 2 4...

Страница 2: ...n Data Retrieval 6 From Web Browser IP 192 168 1 1 6 FTP Client FileZilla 6 Clearing Log Files 6 Contact Ocean Sonics Ltd 7 Appendix A Troubleshooting the Wi Fi Connection 8 Appendix B Wi fi Network S...

Страница 3: ...ing of NMEA data from the GPS signal used to synchronise hydrophones This gives users the ability to track the coordinates of the Launch Box during their deployments extremely useful for vessel deploy...

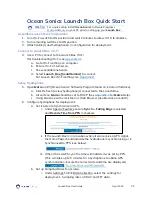
Страница 4: ...C Ocean Sonics Software Program found on icListen USB drive a Click Refresh to view hydrophone s connected to the Launch Box b All units on Marco should be set to DHCP See Appendix C for Marco Help c...

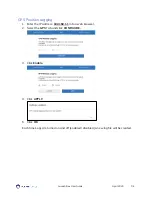
Страница 5: ...S Position Logging 1 Enter the IP address 192 168 1 1 into a web browser 2 Select the GPS Tab and click CONFIGURE 3 Click Enable 4 Click APPLY 5 Click OK Each time Logs are turned on and off enabled d...

Страница 6: ...e recording 4 Place Hydrophones into Standby Mode 5 Turn off Power to hydrophones 6 Toggle icListen Power switch to STOP position 7 Turn off remaining switches on Launch Box 8 Rinse hydrophone and cab...

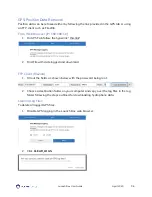
Страница 7: ...follow the hyperlink this link 2 Find File with date logged and download FTP Client FileZilla 1 Fill out the fields as shown below with the password being root 2 Choose a destination folder on your co...

Страница 8: ...nsonics com ocean sonics resource site Service To request an RMA or technical support Email support oceansonics com Phone 1 902 655 3000 Sales For general sales inquiries Email sales oceansonics com P...

Страница 9: ...t may be necessary to turn on Automatic DHCP Windows 10 1 Go to Network Connections Control Panel Network and Sharing Centre and click on the Launch Box Wi Fi 2 Choose Properties 3 Click on Internet P...

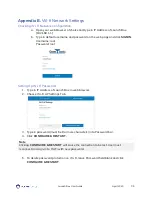
Страница 10: ...IGN IN Username root Password root Setting Up Wi Fi Password 1 Type in IP Address of Launch Box in web browser 2 Choose Wi Fi AP Settings Tab 3 Type in password must be 8 or more characters into Passw...

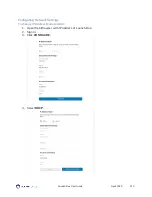
Страница 11: ...Launch Box User Guide April 2020 P 10 Configuring Network Settings To change IP Address Mode to DHCP 1 Open Web Browser with IP address of Launch Box 2 Sign In 3 Click CONFIGURE 4 Select DHCP...

Страница 12: ...ng the Network Connection Settings for the Wi Fi Changing Static IP Address 1 Open Web Browser with IP address of Launch Box 2 Sign In 3 Click CONFIGURE 4 Type in New IP address and Netmask Gateway an...

Страница 13: ...Fi reset can be done to recover the Wi Fi network settings to the original configuration that was provided for the Launch Box All Wi Fi settings will be lost and restored to default A Reset would be n...

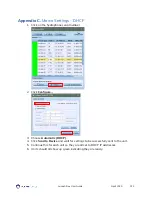
Страница 14: ...he hydrophone serial number 2 Click Configure 3 Choose Automatic DHCP 4 Click Send to Device and wait for settings to be successfully sent to the unit 5 Continue this for each unit so they are all set...

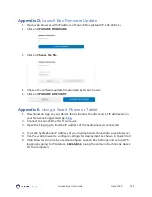
Страница 15: ...on your device that will allow the discovery of IP addresses on your Network Suggested App Fing 2 Connect to Launch Box Wi Fi on device 3 Open the Fing App to find the IP address of the hydrophone s...

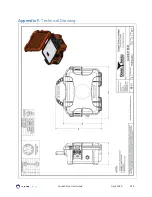
Страница 16: ...Launch Box User Guide April 2020 P 15 Appendix F Technical Drawing...

Отзывы: