Connecting the OMX-SW8x8NT
6
6 Connecting the OMX-SW8x8NT
To connect a single
1
OMX-SW8x8NT
switcher, do the following
2
:
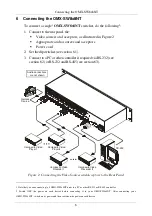
1. Connect to the rear panel, the:
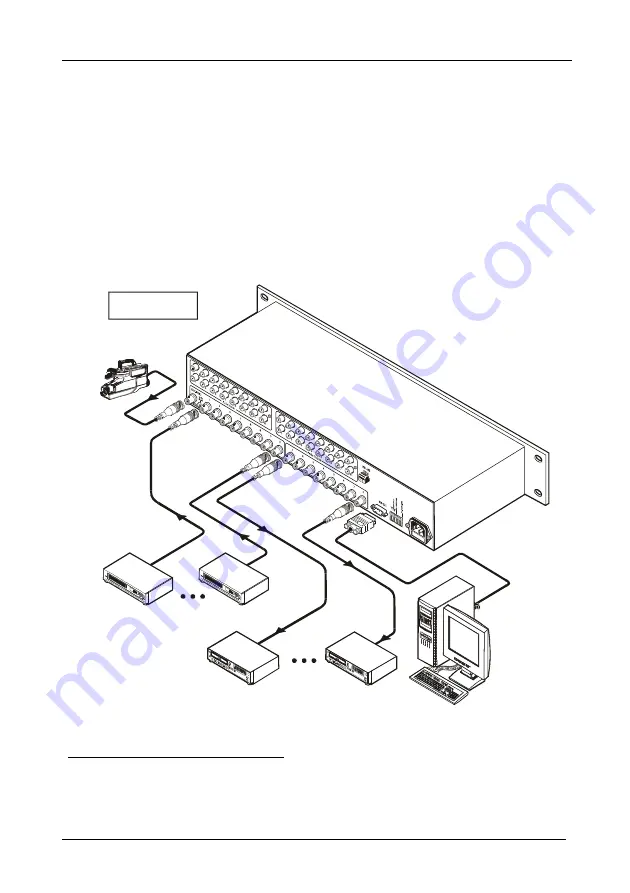
Video sources and acceptors, as illustrated in Figure 2
Appropriate audio sources and acceptors
Power cord
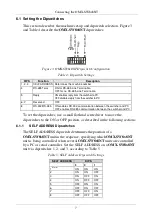
2. Set the dipswitches (see section 6.1).
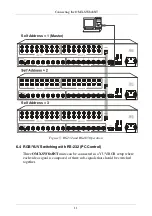
3. Connect to a PC or other controller if required via RS-232 (see
section 6.2) or RS-232 and RS-485 (see section 6.3).
RS-232
Composite Video
Recorder 8
Composite Video
Recorder 1
Composite Video
Player 8
Composite Video
Player 1
Genlock
Source
Audio connections
are not shown
Figure 2: Connecting the Video Sources and Acceptors to the Rear Panel
1 Note that you can connect up to 8 OMX-SW8x8NT units to a PC or other RS-232 or RS-485 controller
2 Switch OFF the power on each device before connecting it to your OMX-SW8x8NT. After connecting your
OMX-SW8x8NT, switch on its power and then switch on the power on each device
Содержание OMX-SW8X8NT
Страница 1: ...OMX SW8x8NT ...


