background image

Problem solving

223

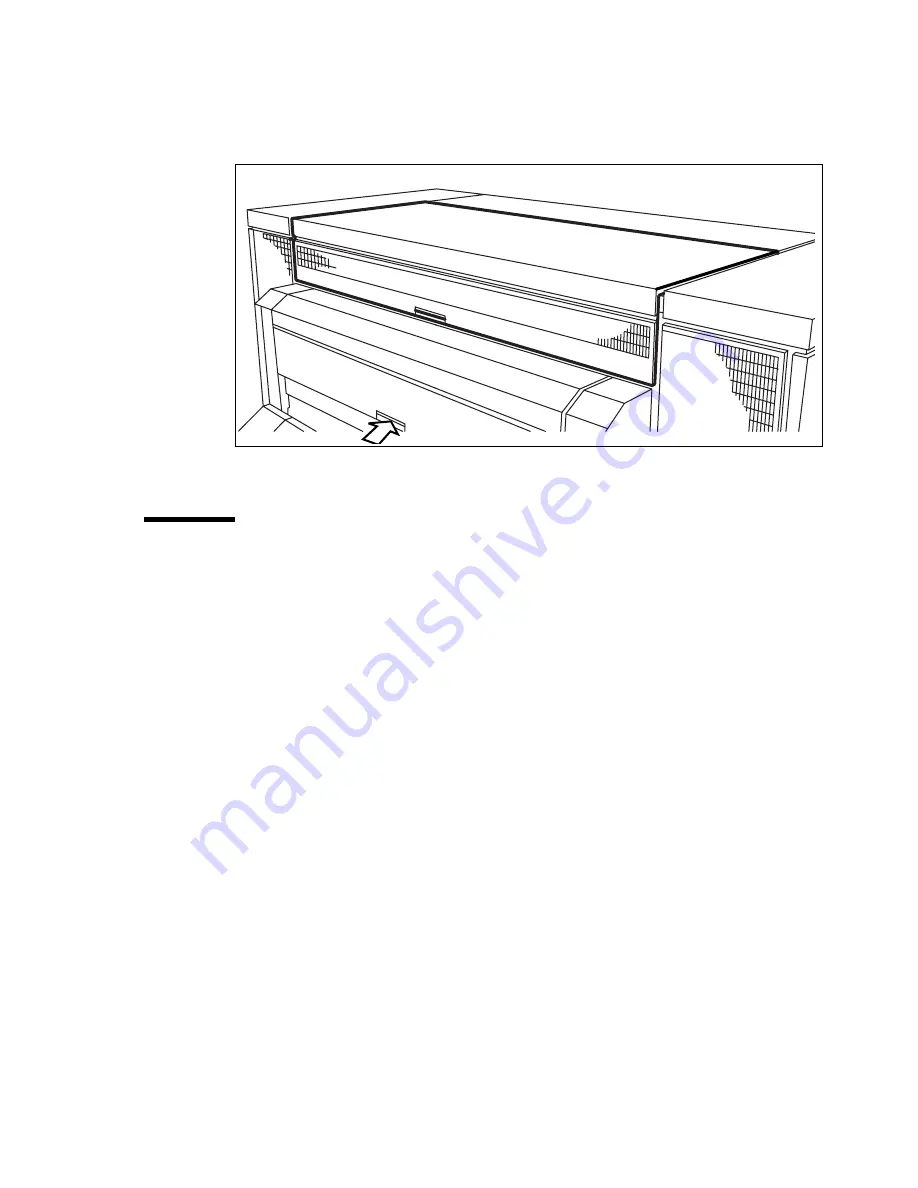
If you can not correct the problem, you can open the output transport unit and 
remove the paper (see Figure 136 on page 223). If the fuser-section covers 
remain to flash on the display, check the fuser section again.

[136] Open the transport output unit

Paper jam in the paper roll compartments

How to clear a paper jam in the paper roll compartments

Note:

Make sure that you corrected all the problems in the fuser section, 

before you correct the problem in the roll feed section.

1

Completely open the correct paper roll compartment. 

2

Remove any jammed paper:

Behind the chip tray

Underneath the plate

Underneath the roll 2, the roll 4 or the roll 6 feed plate

3

Reload the roll if necessary.

4

Close the paper roll compartment.

Содержание Oce TDS800

Страница 1: ...Oc TDS800 User Manual...

Страница 2: ...US This manual contains a functional and task oriented description of the Oc TDS800 multifunctional digital system release 1 3 Trademarks Products in this manual are referred to by their trade names...

Страница 3: ...800 23 Timers 25 Chapter 2 Using the Oc TDS800 to print Before you begin 30 How to print 31 Printer operator panel 32 Select a language 32 Display 33 Counter 34 Keys 34 Printer operator panel actions...

Страница 4: ...nel 53 Perform basic copy jobs 55 Make copies 55 Select the required media 56 Select the input mode 58 Specify the zoom factor 60 Define settings for the next original 61 Account logging 61 Using the...

Страница 5: ...nals 98 The scan width 98 The copy size 99 Scanning originals with filing strip 100 The image quality 103 Brightness 103 Automatic background compensation 104 Editing functions 106 Auto align 106 Shif...

Страница 6: ...35 Start the Oc Settings Editor 136 Define the contents of the custom card 136 Define the job templates 137 Manage different system adjustments with save and load 138 Find system settings in the Setti...

Страница 7: ...166 Command line parameters 166 How to use the remote system 169 Chapter 10 Oc Account Center Introduction 172 Oc Account Logic 173 Introduction to Oc Account Logic 173 Oc Power Logic controller setup...

Страница 8: ...the vertical transport unit 225 Paper jam underneath the roll 1 roll 3 and roll 5 triangular feed unit 226 Paper jam in the first fold section of the folder 227 Clear a paper jam in the high capacity...

Страница 9: ...t Oc TDS800 printer 261 Safety data sheet Oc TDS800 scanner 262 Safety data sheet Oc E1 toner 263 Safety data sheet Oc Cleaner A 265 Safety data sheet Oc OPC drum 267 EPA Energy Star 269 Appendix C Mi...

Страница 10: ...10 Oc TDS800 User Manual...

Страница 11: ...11 Oc TDS800 User Manual Chapter 1 Introduction This chapter contains a description of the main features delivery options and software applications provided with the TDS800...

Страница 12: ...iginals to a file Chapter 5 Special copy and scan jobs contains a detailed description of special copy functions to be performed on the Oc TDS800 Chapter 6 Oc Power Logic Settings Editor contains info...

Страница 13: ...n of the problems that may occur while using the Oc TDS800 Appendix A Overview and tables contains an overview of the system the operator panels the product specifications for the Oc TDS800 a list of...

Страница 14: ...me multifunctional system The Oc TDS800 offers a broad range of print copy and scan to file functions The printer prints at a resolution of 400 dpi and is highly productive because of its Oc Copy Pres...

Страница 15: ...ivity The Oc TDS800 supports a number of popular network protocols This means that it can be used in multiple networking environments such as TCP IP NetBEUI and Novell Pserver IPX SPX Print and copy j...

Страница 16: ...nly if you want to perform more complex copy jobs you have to change the default copy settings with the help of the other settings on the scanner operator panel User interaction The user can communica...

Страница 17: ...0 You can send jobs from your workstation using your web browser See also Print with Oc Print Exec Workgroup on page 40 Oc Repro Desk Oc Repro Desk is a print management solution for the reprographer...

Страница 18: ...o the key operator defines all time settings such as panel time out and sleep mode time out See Oc Power Logic Settings Editor on page 125 for more information Repro operator The repro operator is res...

Страница 19: ...or more details about network settings for the Oc TDS800 printer You find more information about installing configuring and using drivers in the documentation provided with the drivers Note All driver...

Страница 20: ...orkstation which connects to the Oc Power Logic Controller Oc Scan Manager and Oc View Station LT do not run on Oc Remote Logic Oc Queue Manager The Oc TDS800 Oc Queue Manager QM application provides...

Страница 21: ...ttings the key operator settings and the system administrator settings The key operator settings allow the key operator to configure and set up job printer system and scanner specific settings These s...

Страница 22: ...bs For each job the job info and the paper usage is stored Job templates The job templates on the scanner operator panel give you direct access to five different sets of settings You define the templa...

Страница 23: ...ff the Oc TDS800 printer scanner and the Oc Power Logic Controller Use the key switch on the printer and scanner to turn on and off the printer and scanner Use the On off button on the Oc Power Logic...

Страница 24: ...age Ready to print appears on the scanner operator panel 2 Turn the key to the off position see Figure 3 Start up the Oc Power Logic Controller 1 Turn on the controller and the screen After the initia...

Страница 25: ...see Find system settings in the Settings Editor on page 139 Sleep mode timer This timer works for both the printer and the scanner After the time defined in the Oc Settings Editor the system receives...

Страница 26: ...up timer only Under these conditions the timers work in a circular way When you use this automatic flow of the Oc TDS800 timers the system will be warmed up and ready for operation when you need it a...

Страница 27: ...off 2 Turn the key to the timer position See figure 2 on page 23 and figure 3 on page 23 The Oc TDS800 turns on at the time and day defined in the Oc Settings Editor Note The timers must be enabled se...

Страница 28: ...til the systems starts warming up Press any key on the operator panel to start warm up 4 Turn the key to the off position See figure 2 on page 23 and figure 3 on page 23 The Oc TDS800 turns off 5 Turn...

Страница 29: ...29 Oc TDS800 User Manual Chapter 2 Using the Oc TDS800 to print This chapter contains a description of the Oc TDS800 printer function...

Страница 30: ...30 Oc TDS800 User Manual Before you begin You must turn on both the Oc TDS800 printer and the Oc Power Logic Controller before you can print See Turn on and off the Oc TDS800 on page 23...

Страница 31: ...Using the Oc TDS800 to print 31 How to print See User interaction on page 16 for information about how to print to the Oc TDS800...

Страница 32: ...rmation such as status and error messages By default you can choose between two languages which have been defined for your system by the key operator see Find system settings in the Settings Editor on...

Страница 33: ...alternative language is 6 Put the printer On line again by pressing the On line key The printer now uses the selected language Display The graphical display offers feedback about the current printer...

Страница 34: ...nt page e g Set 3 of 5 Page 10 At the beginning of a job when the system does not know the total number of sets yet only the current set and page may be displayed e g Set 2 Page 5 With set input multi...

Страница 35: ...dimmed These selection triangles indicate that you can select an option from a predefined list with the help of the arrow keys Arrow keys These two triangular keys to the right of the graphical displ...

Страница 36: ...Oc TDS800 printer is the automatic media change function This function enables the printer to switch to another roll of the same media when there is not enough media on the current roll to finish the...

Страница 37: ...gain The printer now knows which material is used for the specified roll or manual feed Set media type for manual feed 1 Press the On line key on the printer operator panel to put the printer Off line...

Страница 38: ...inter you can attach a Special indication exclamation mark to a roll or manual feed which uses special media for instance colored paper This indication is used to identify the roll or manual feed to t...

Страница 39: ...displayed informing you that you can press On line to continue or press the Stop key to cancel the job 2 Press the Stop key again to cancel the current job Note Printing is stopped at the end of a pa...

Страница 40: ...ion status Options Oc Print Exec Workgroup has the following options View status information about the printer configuration and available media View status information of submitted print jobs in the...

Страница 41: ...p in the Oc settings editor see Find system settings in the Settings Editor on page 139 2 Enter the following link URL in you browser http printer name When you enter the URL for the first time the re...

Страница 42: ...tronic submission of drawing files and print request from the clients to their reprographers Oc Repro Desk Server which provides the reprographers with extensive print management and accounting functi...

Страница 43: ...43 Oc TDS800 User Manual Chapter 3 Using the Oc TDS800 to Copy This chapter contains a description of the interface of the Oc TDS800 scanner and the copy function on its operator panel...

Страница 44: ...44 Oc TDS800 User Manual Before you begin You must turn on both the Oc TDS800 scanner and the Oc Power Logic Controller before you can perform copy jobs See Turn on and off the Oc TDS800 on page 23...

Страница 45: ...e panel consists of a display in the center surrounded by a number of function section and Arrow keys To the left of the display you can find the Stop and Job interrupt keys and below the display you...

Страница 46: ...he required format and media type The Manual feed key If you want to copy on a material type or size that is not available in one of the roll compartments press the manual feed key The key is located...

Страница 47: ...rom your copy job Determine the priority of your copy job with the Job interrupt key before you scan your originals The job is placed on top of the printing queue in the queue manager The interrupt jo...

Страница 48: ...he left most Function key The five Function keys below the display allow you to select functions or subfunctions within a card Finally the Arrow keys can be used like the Numeric keys to define numeri...

Страница 49: ...the following sections with an active Custom section see Figure 10 on page 50 The Custom section which provides direct access to frequently used settings defined by the customer The Original section...

Страница 50: ...on page 136 The key operator can change the contents dependent on your configuration for example into the following settings Folding Language Exposure Original section The Original section contains al...

Страница 51: ...t 12 The cards of the Print section at the left side with an active Finishing card File section The File section contains all settings for the scan to file output the file see Figure 13 on page 51 The...

Страница 52: ...r do the same job again The Last used job template does not display when you turn on the scanner After you select a template the sections display The sections provide access to the settings for the sc...

Страница 53: ...card You can switch cards from bottom to top by pressing the key again Note Here too the active card is visually separated from the other cards and given a shadow highlighting effect for extra highlig...

Страница 54: ...or the top layer shows the job templates When job templates are not enabled in the Oc Settings Editor the top layer shows the Custom section When Automatic feed is selected for a single sheet job this...

Страница 55: ...l feed for copy jobs Define delivery of copies Stop a job Interrupt a job Stamping Make copies 1 Place your original face up left aligned along the original guide Keep the legend at your left hand sid...

Страница 56: ...e Folding settings to get a neatly folded copy 8 Press the green start key to start the copy job Your original will be fed into the scanner The printer starts 9 Collect your output Your copy will be d...

Страница 57: ...iginal section 2 Select the required paper series with the Paper series function key 15 Select the required paper series Selecting the required media 1 Select the one of the six rolls on the scanner o...

Страница 58: ...or each sheet in a set and then continues with the next copy of the entire set as follows 17 The principle of Set See Make a set copy on page 111 The input mode Matrix copy enables you to create sever...

Страница 59: ...Using the Oc TDS800 to Copy 59 18 Select the input mode Note You can also select the input mode from the Custom section if this setting has been defined for this...

Страница 60: ...right of the display see Figure 8 on page 45 If you press one of the vertical keys the zoom factor will increase or decrease with steps of 0 1 If you press one of the horizontal keys the zoom factor...

Страница 61: ...al in place on the scanner feed table Define settings for the next copy job 1 Select all settings required for the next original 2 Insert the next original If Automatic feed is off press the start key...

Страница 62: ...ge 253 Copying on pre cut sheets 1 Press the Manual feed key on the Scanner 2 Select any required other settings 3 Enter the number of copies using the numeric keys 4 Feed the original The printer dis...

Страница 63: ...Close the cover You are now ready to start the next copy job Interrupt a job Press the Job interrupt key on the scanner operator panel to give extra priority to a copy job When you press the Job inter...

Страница 64: ...ton at the Oc Queue Manager to continue with the interrupted job and collect the output at a later time Collect the output and press the Exit interrupt button at the Oc Queue Manager to continue with...

Страница 65: ...per original and you can select a colour font size or position A stamp can consist of the following parts predefined text date time How to select a stamp 1 Open the Stamping card in the Print section...

Страница 66: ...66 Oc TDS800 User Manual...

Страница 67: ...00 to scan to file This chapter describes the scan to file function of the TDS800 This chapter contains a description of the interface of the Oc TDS800 scanner and of Oc Scan Manager and Oc View Stati...

Страница 68: ...68 Oc TDS800 User Manual Before you begin You must switch on both the Oc TDS800 printer and the Oc Power Logic Controller before you can scan to file See Turn on and off the Oc TDS800 on page 23...

Страница 69: ...g the Oc TDS800 to scan to file 69 Scanner operator panel For a description of the scanner operator panel and how to perform actions on the scanner operator panel see the Scanner operator panel on pag...

Страница 70: ...tion documents contain in another applications A scan to file is made at the Oc TDS800 scanner On the scanner operator panel you can select at which resolution you want to scan and where you want to s...

Страница 71: ...w the scan click count in the bottom right corner of Oc Scan Manager see Figure 23 on page 71 The scan click count is measured in square feet or square meters see Find system settings in the Settings...

Страница 72: ...in the File section 24 Destination card in the file section 4 Select File mode On The status message displays Ready to scan to file 5 Select a Destination see Destinations on page 82 6 Set the correc...

Страница 73: ...ing the Oc TDS800 to scan to file 73 8 When System Auto view is enabled on the Oc Scan Manager Oc View Station LT starts automatically showing the result of the scan see Figure 26 26 Oc View Station L...

Страница 74: ...e on the scanner operator panel are divided into two cards Destination and Image Destination card Destination File type TIFF sub format PDF compression 27 Scanner operator panel Destination card Image...

Страница 75: ...ready to scan to file with checkprint Note The Oc TDS800 system does not allow you to change the File mode setting during a set from On to Off and the other way round However changing from On to On w...

Страница 76: ...FF is a rich format it can easily be used for simple scanners and applications as well because the number of required fields is small CALS is an industry strategy for transition of paper intensive pro...

Страница 77: ...es these compressions can result in a negative compression the file size increases instead of decreases So use these compressions with care PDF compress Within the PDF compress option you can define t...

Страница 78: ...n 1 1 With this option selected scan to file will result in an image that is exactly the same size as the original Zoom displays 100 Automatic Selecting Automatic always results in a 1 1 scan to file...

Страница 79: ...e file generation process When the scan is completed a view of the scanned image is automatically displayed on the controller Figure 29 on page 79 shows the Oc Scan Manager application The left part d...

Страница 80: ...stination that destination is displayed bold and the corresponding icon changes The destination you scanned last to is displayed bold If you select a destination to view it s content in the right tabl...

Страница 81: ...ion than the one you are scanning to then the scanned to destination is displayed bold It is possible that there are more files in the table than fit on screen The most recent scanned file appear at t...

Страница 82: ...ired names A destination can also be a file server or a PC of an end user It is better to select remote destinations instead of the local ones The local destinations are temporary and can only contain...

Страница 83: ...Scan 2 On the Oc Scan Manager Open the File menu and select New or click on the New button on the toolbar see Figure 31 The Destination Properties dialog box appears see Figure 32 3 Select SMB from t...

Страница 84: ...Network Identification System name 6 Enter the path name This is the name of the shared folder on your workstation For Windows NT Windows 2000 and XP use the DOS name of the shared folder For Windows...

Страница 85: ...on page 163 Delete a destination 1 Select a destination 2 Open the File menu and select Delete or click the Delete button on the toolbar see Figure 33 33 Delete button on the toolbar The selected des...

Страница 86: ...eld 6 Click OK to accept the destination properties 7 Scan the originals You can scan now with automatic file name numbering Select the above destination on the scanner operator panel and set all scan...

Страница 87: ...e file When you enable Automatic view on the Oc Scan Manager Oc View Station LT starts up automatically after scan to file Note When you scan to file the controller Oc View Station LT starts automatic...

Страница 88: ...cted file will be deleted View properties of a scanned file 1 Select a file in the right pane 2 Open the File menu and select Properties or click the Properties button on the toolbar see Figure 38 38...

Страница 89: ...When you regularly scan originals to a file many files are created in the temporary store You can clean up the temporary store manually or automatically To manually delete the files in the temporary...

Страница 90: ...ser 2 an FTP application or 3 via a command line prompt 40 How to retrieve scan files Retrieve files via an FTP command line prompt 1 Launch an FTP client 2 Enter the ftp command A DOS box now appears...

Страница 91: ...transmission mode to binary by entering binary 6 Go to the tempstore directory using the following command cd tempstore 7 Go to the scan directory if you want to retrieve a file from a destination on...

Страница 92: ...w your scanned files This can be automatic see Automatically view a file after scanning on page 89 after scanning or via Oc Scan Manager see Print a scanned file on page 87 Oc View Station LT has the...

Страница 93: ...rees clockwise Rotate 180 Rotates the image 180 degrees Sample When active displays only a sample of bilevel raster pixels Negate Reverses the raster image pixels on display and changes which are domi...

Страница 94: ...10 Measurement When active allows you to measure lines and areas on the image 11 Reference This small floating window displays the entire current page in miniature for reference 12 Displays or remove...

Страница 95: ...to scan to file 95 View error When the memory is almost full it can occur that the viewer does not show the scanned file Instead it shows a red border with a red cross see Figure 44 44 Error view in...

Страница 96: ...96 Oc TDS800 User Manual...

Страница 97: ...97 Oc TDS800 User Manual Chapter 5 Special copy and scan jobs This chapter contains a description of special jobs and describes how to improve the output quality...

Страница 98: ...er to ensure correct delivery see Define settings for the next original on page 61 The scan width To prevent the loss of information when you scan a non standard original you can select the non standa...

Страница 99: ...Figure 46 3 Press the Cut length function key to select the required cut option Standard the print length corresponds to a standard format depending on the media width When you use Standard cut inform...

Страница 100: ...underneath the original guide and move it to the right 48 Adjusting the original guide to add or remove a filing strip along the left hand side 2 Make all required settings 3 Insert the original face...

Страница 101: ...4 Make other settings as required Feed the original Leading and trailing strip It is possible to adjust the length of both the leading and trailing strip to eliminate or add a filing strip Leading and...

Страница 102: ...lues for the leading strip using the numeric or arrow keys 6 Make other settings as required 7 Feed the original Copy with added filing strips along the leading and trailing strip 1 Open the Layout ca...

Страница 103: ...ion or setting the type of image you want to copy Brightness You can change the brightness of a print or copy by modifying the exposure of the scanner The exposure can be set to lighter and darker Set...

Страница 104: ...in the Original section 2 Press the Background compensation function key if this function is disabled When you scan extremely light or dark originals or originals with uneven background density the re...

Страница 105: ...s and lines Use Greys lines for GIS originals and maps Note Background compensation is turned off for Photo and Greys lines Press the Original type function key to select Printed matter Use Printed ma...

Страница 106: ...e edit function at a time Auto align To align the image automatically to a side of the print you can use the alignment functions of the Oc TDS800 scanner Alignment is possible in the following ways se...

Страница 107: ...ddle or Right with the Arrow keys 3 Press the Align function key again and select a vertical alignment value Top Middle or Bottom with the Arrow keys Note If you select Middle make sure the original w...

Страница 108: ...r image on the page Shift the image In some cases the margin may be too narrow to accommodate filing strips without loss of information To avoid this you can shift the image in horizontal or vertical...

Страница 109: ...eft or to the right 3 Press the Shift function key again and select a vertical shift value by pressing the numeric or arrow keys until the required distance is set to shift the image upwards or downwa...

Страница 110: ...0 User Manual Make mirror image copy 1 Open the Image card in the Print section 60 Mirror image 2 Press the Mirror function key to enable the Mirror function Make other settings as required and feed t...

Страница 111: ...ut mode function key to select Set 3 Make other settings as required and feed the original 4 Press the green Start key to start the copy job Your original is fed into the scanner The printer starts 5...

Страница 112: ...at set The result is that the output from the one set of scanned originals can be printed out up to 30 different ways Enable matrix copying with a password in the Oc Settings Editor see Find system se...

Страница 113: ...and scan jobs 113 61 Workflow of Oc Matrix Logic One scan job is scanned in on the scanner Configurations are applied to the scan job The matrix copy jobs are sent to the printer The printer prints th...

Страница 114: ...0 User Manual Access Oc Matrix Logic Oc Matrix Logic can be accessed from the Launcher window on the Oc Power Logic Controller graphical user interface Note Oc Matrix Logic can not be accessed via Oc...

Страница 115: ...nals up to 100 originals per job remove originals from the job add delete and manage pre defined Copy configurations to apply to the Matrix job change settings to applied Copy configurations select ba...

Страница 116: ...e all the originals from the matrix job click Remove all Scan your Matrix Job originals 1 Open the Original section on the scanner operating panel 2 Select Feeding card 3 Once the feeding card is open...

Страница 117: ...copy configuration window appears 2 Select one or several configurations to apply to the job up to 50 3 Click OK The Matrix composition window now contains the configurations selected for the matrix j...

Страница 118: ...modify Note When editing a configuration the change is not permanent The original settings for that configuration are not changed They are only changed for the Matrix job being printed at that time 5...

Страница 119: ...ey are pending or submitted 4 Click Move up or Move down in the Pending Jobs queue if you want to change the print order Reprint Reprint the Matrix job 1 From the Submitted jobs queue select the Matri...

Страница 120: ...figurations may be edited when applied to a particular matrix job The right side of the screen shows the settings list These are the available settings that can be stored in a configuration Using the...

Страница 121: ...Rename the configuration 3 Type Enter to validate 4 Define the settings to apply to the configuration see Edit settings on page 122 5 Click Save Successful saving is confirmed with a message Note If...

Страница 122: ...Select the value to apply to the setting from the scrolling list 4 Repeat steps 2 3 with all the settings to edit 5 Click Save Delete a configuration 1 Select a configuration in the list 2 Click Remov...

Страница 123: ...ayed 2 Check the Enable banner option 3 Define the banner settings Template name Select a banner template Media source select Automatic or Roll or Tray Note When you select roll or tray an extra field...

Страница 124: ...124 Oc TDS800 User Manual...

Страница 125: ...Oc TDS800 User Manual Chapter 6 Oc Power Logic Settings Editor This chapter gives information about the Oc Settings Editor For details about specific settings refer to the Help on the Oc Settings Edi...

Страница 126: ...c TDS800 according to your companies requirements 2 types of users can determine settings in the Oc Settings Editor Key Operators and System Administrators You can log on as either Key Operator or Sys...

Страница 127: ...Queue Manager and the Oc System Control Panel the repro operator has the same user rights as the Key Operator and System Administrator See User modes on page 163 System Administrator settings SA setti...

Страница 128: ...128 Oc TDS800 User Manual 63 Oc Settings Editor General structure The Oc Settings Editor is structured as follows Menu bar Top toolbar Left toolbar Settings area Status bar...

Страница 129: ...lication The Automatic logon option allows you to start the Oc Settings Editor application automatically in the specified user mode View The View menu allows you to switch between the display language...

Страница 130: ...ime the settings were applied and not back to the factory default Initially the Undo button is disabled This button is enabled the moment the first setting is changed It is disabled after an apply act...

Страница 131: ...igurations result in different tree structures Note When a tree item has been changed this item will be marked with a bullet Update area Select a setting in the tree structure Edit the setting in the...

Страница 132: ...atus icon for connected or disconnected The following icons are used The Oc Settings Editor is connected to a system The Oc Settings Editor is not connected to a system System name localhost if you ar...

Страница 133: ...Key Operator a password is required to access them The service engineer will provide this password to you upon installation Note When you are finished make certain you log off from the Key Operator mo...

Страница 134: ...pretation of the host language in which the data from the scanner or in the job ticket is encoded Poker makes sure that the quality between the input from the printer driver or scanner and the output...

Страница 135: ...tree structure 5 Update the setting in the update area as required Note A few settings such as the default pen settings are made directly from the tree structure area 6 Click on the Apply button The n...

Страница 136: ...Oc Settings Editor starts Define the contents of the custom card Use the custom card to provide direct access to the frequently used settings How to open the custom card editor 1 Click the Jobs butto...

Страница 137: ...to define frequently used jobs How to define the template name and description 1 Click the Jobs button in the left toolbar 2 Click the Copy File tab in the settings area 3 Open a template in the tree...

Страница 138: ...erent system adjustments with save and load Use the save and load button to manage the different system adjustments for the customers departments or other situations Save stores all settings the custo...

Страница 139: ...settings from a file Note this is only possible if the user is logged in as a Key Operator or System Administrator Find system settings in the Settings Editor The following table displays all referenc...

Страница 140: ...ge 70 page 112 KO System Enabling passwords Scan clicks page 71 KO System Localisation Measurement unit Scan memory reservation page 82 SA Scan memory reservation Manage temporary store page 89 KO Sys...

Страница 141: ...141 Oc TDS800 User Manual Chapter 7 Oc Power Logic System Control Panel This chapter describes how to view the status of the Oc TDS800 system on the Oc System Control Panel...

Страница 142: ...e Logon Logoff Connect to and Exit Edit If you select this option a window is displayed in which you can view your default system for the Oc System Control Panel application The Automatic logon option...

Страница 143: ...ed by the text disabled see Icons on page 144 Note Special media are excluded from the automatic behavior of the Oc Power Logic Controller The Scanner status display Displays the current status of the...

Страница 144: ...w Icons The Oc TDS800 Oc System Control Panel uses a number of icons to display information about the media available on the printer The following icons are used The material is available and the roll...

Страница 145: ...nu A list is printed of the current settings on the Oc Power Logic Controller Clear the system 1 Select the Clear system option in the System menu to delete all jobs You can use this option in case of...

Страница 146: ...146 Oc TDS800 User Manual...

Страница 147: ...ual Chapter 8 Oc Power Logic Queue Manager This chapter describes how to view the Oc TDS800 System print queue history queue and inbox queue This chapter contains a description of how to manage jobs i...

Страница 148: ...ation procedure for Microsoft Windows systems on page 157 1 Select Oc Remote Logic via the Start menu or 2 Select the Launcher application 3 Select Queue Manager Oc Queue Manager starts Note To start...

Страница 149: ...e these jobs You can set how long and how many jobs are kept in the history queue in the Oc Settings Editor see Find system settings in the Settings Editor on page 139 Note You can not view the histor...

Страница 150: ...r separators It is also possible to change the order of the columns by dragging a specific column to a new position Note You can sort the inbox queue and history queue You can not sort the printer que...

Страница 151: ...epro operator the key operator and the system administrator have the same user rights In the Oc Settings Editor however the user modes offer different rights see Find system settings in the Settings E...

Страница 152: ...g icons are used 71 Receiving the job 72 Received the job 73 Processing processed the job 74 The job in progress 75 Printing the job 76 Delivering the job 77 The delivered job 78 The deleted job 79 A...

Страница 153: ...d to get the required access See User modes on page 163 Deleting print jobs 1 Select the desired jobs by clicking on them You can select a consecutive list of jobs to be deleted by clicking on the fir...

Страница 154: ...ere behind the job on hold in the queue The active job and the jobs in printing state can not be put on hold by the Oc Queue Manager Restart jobs that are put on hold 1 Select the desired jobs by clic...

Страница 155: ...155 Oc TDS800 User Manual Chapter 9 Oc Power Logic Remote Logic This chapter describes how to install and use Oc Remote Logic...

Страница 156: ...es Change the display language to operate the Oc Remote Logic in your language Use the help system if you do not know how to work with the applications Oc Remote Logic is available on the local host a...

Страница 157: ...Oc Settings Editor are on the Oc TDS800 CD ROM and on the Oc Power Logic Controller CD ROM provided with the system The installation procedure for Oc Remote Logic is quite simple and self explanatory...

Страница 158: ...programs are now installed Each application is installed separately and as part of a combined version called Application Launcher When the installation is complete you can start the Application Launch...

Страница 159: ...1 Check if a Java runtime environment JRE is installed on the system The preferred version is JRE 1 1 8 Below you can find some links to JRE s for various UNIX platforms 2 Unpack the contents of the f...

Страница 160: ...clientstart IBM AIX For the various versions of IBM AIX Java runtime engines can be downloaded from http www ibm com java The preferred version of the Java runtime engine for use with Oc Remote Logic...

Страница 161: ...ion procedure for Apple Macintosh Apple also has a Java runtime environment for the Macintosh The Mac OS Runtime for Java MRJ can be obtained at http www apple com Installation instructions for Apple...

Страница 162: ...y Log in to get access to one of the user modes Change the display language to operate Oc TDS800 in the language of your selection Use the on line help system if you do not know how to go on with the...

Страница 163: ...the queue with the help of the Abort Delete Resume and Hold buttons In the Oc Settings Editor however the user modes offer different rights In repro operator mode the operator is allowed to only view...

Страница 164: ...fter your first logon How to log on 1 From the File menu select Log on 2 Select the correct user name 3 Enter the Password 4 Click OK Note Log on to all Oc TDS800 programs to operate with all the appl...

Страница 165: ...assword in the New password text box 6 Enter he new password in the Confirm new password text box and click OK to confirm the new password Automatic logon If you do not want to log on each time you st...

Страница 166: ...all applications and functions of the Oc TDS800 applications Command line parameters In order to start the remote applications faster there are 6 command line parameters available configfile config_f...

Страница 167: ...ogic Bin The easiest way to do this is by creating a short cut of an application and then add the command line properties Example command line parameter Below is an example of how to start the Oc TDS8...

Страница 168: ...onnected to the MyTDS800 server The first language is set to US English and the second to French C Program Files Remote Logic Bin AL exe configFile Myconfig cfg server MyTDS800 language1 en country1 U...

Страница 169: ...systems dialog box appears 3 Enter the IP address or the name of the Oc TDS800 system you want to connect to in the Systems text box 4 Click Add The system is added to the list You can add as many sys...

Страница 170: ...170 Oc TDS800 User Manual...

Страница 171: ...171 Oc TDS800 User Manual Chapter 10 Oc Account Center This chapter describes what Account Center is and how to use it...

Страница 172: ...ount information at the workstation for the print jobs Oc Account Logic runs on the Oc Power Logic controller and is available through your Internet browser see Oc Account Logic on page 173 Oc Account...

Страница 173: ...ner Administer Oc Account Logic administrators only Oc Power Logic controller setup Before you begin to use Oc Account Logic you must define the correct settings in the Oc Settings Editor System setti...

Страница 174: ...ion on the Print tab of Oc Account Logic KO System Job management Rights for printing Select Special user Oc Account Logic is a special user on the Oc Power Logic controller KO Scanner Settings Timers...

Страница 175: ...count Console Oc Account Console has the following three sections The Account fields tab Use this tab to create manage preview and publish the Account information dialog for Oc Account Logic The Accou...

Страница 176: ...176 Oc TDS800 User Manual...

Страница 177: ...177 Oc TDS800 User Manual Chapter 11 The folder This chapter describes The folder The reinforcement unit The belt unit The punch unit...

Страница 178: ...c TDS800 User Manual Introduction If you have a folder installed on your Oc TDS800 system the following other optional features are available Reinforcement unit First belt unit Second belt unit Punch...

Страница 179: ...e available Set the folded copy delivery 1 Press the Finishing card in the Print section 2 Press the function key Folded copy delivery 3 Select Stacker or Belt Set folding legend 1 Press the Feeding c...

Страница 180: ...disabled Note Reinforcement is only possible with the Standard folding method You can overrule the standard folding program with settings from the printer driver or the scanner operator panel Find mo...

Страница 181: ...ed by using the arrow keys or the numeric keys 6 If required press the Binding function key Set the required binding strip using the arrow keys or the numeric keys 7 Make other settings as required 8...

Страница 182: ...fold mm inch 2 folds mm inch 3 folds mm inch 2folds mm inch 60 1220 48 1220 48 1220 48 1220 48 75 6000 236 2500 98 2000 79 1220 48 110 2500 98 1220 48 not possible 1220 48 Folding settings 110 grams O...

Страница 183: ...trip see Figure 86 86 Example a of reinforcement strip With this strip the output can be stored in a binder without running the risk that the punching holes tear out You can unfold a folded map in a b...

Страница 184: ...on page 183 for more information about inserting a new tape roll and other maintenance issues Enable reinforcement 1 Click on the Jobs key in the Oc Settings Editor 2 Select the Copy tab if you want...

Страница 185: ...elivery on scanner operator panel 1 Open the Finishing card in the Print section of the scanner operator panel 2 Press the Folding function key to select full folding 3 Press the Folded copy delivery...

Страница 186: ...ng width in the punch unit 3 Loosen the screw and place the plate according to the folding length see Figure 90 90 Nut to adjust the folding length in the punch unit 4 Tighten the screw Belt full dete...

Страница 187: ...187 Oc TDS800 User Manual Chapter 12 Media and supplies This chapter describes how to Load paper Add toner Change tape in the reinforcement unit...

Страница 188: ...each roll If you load new media you must indicate to the system which type of media you have loaded paper transparent vellum or polyester The roll width is detected automatically The definition of th...

Страница 189: ...the holder Note You can place the new roll in the groove on the manual feed of the printer See the arrow on picture 91 on page 188 5 Press the locking mechanism down and slide the roll holder from the...

Страница 190: ...t it manually 9 Press the correct button inside the paper roll compartment and feed the paper between the input guide plates as indicated by the arrow see Figure 95 The material is fed into the machin...

Страница 191: ...printer See the arrow on picture 91 on page 188 6 Slide the roll holder in the new roll of material while you press the green knob 7 Align the roll with the correct size indicator on the roll holder...

Страница 192: ...o select roll 1 to 6 see Figure 97 4 Press the right selection key to select the setting you want to define 5 Use the arrow keys to define the settings Note The system detects the media size Media siz...

Страница 193: ...ar the chip tray If the chip tray is full you must clear the paper chips How to clear the chip tray 1 Open the upper paper roll compartment 2 Take out the chips see Figure 98 98 The chip tray 3 Close...

Страница 194: ...e How to add toner 1 Shake the toner bottle 2 Loosen the cap 3 Open the front top cover Note Only use E1 toner 4 Open the toner refill opening Note Do not remove the seal of the bottle opening 5 Put t...

Страница 195: ...ift top cover and pull the hinge towards you to close the top cover see Figure 101 101 Close the top cover 10 Fasten the cap on the empty toner bottle The Oc service engineer takes the empty toner bot...

Страница 196: ...play Reinforcing not possible out of tape for copy jobs Load reinforcement tape for print jobs No tape in reinforcement unit for copy and print jobs while the printer was running when the roll ran out...

Страница 197: ...ape roll 1 Open the side door of the reinforcement unit see Figure 103 103 Open the side door off the reinforcement unit 2 Turn the two guide plates away from the pin roller into their fixed opened po...

Страница 198: ...crew of the front side plate of the roll holder with the green nut and remove the old kernel Note Clean the reinforcement knives before you put in a new roll How to insert a new tape roll 1 Put the ne...

Страница 199: ...roll and lead the tape over the large guide roller see Figure 107 107 Guide the tape around the guide roller 3 Lead the tape between the upper and lower knife and over the pin roller see Figure 108 1...

Страница 200: ...09 tape past the knife section 4 Align the holes in the tape to the hole pattern on the label on the frame plate of the reinforcement unit see Figure 110 If the alignment is not correct lift the tape...

Страница 201: ...01 5 Close the guide plates of the pin roller see Figure 111 111 Close the guide plates How to prepare the tape roll for operation 1 Peel the protection sheet off the tape see Figure 112 112 Peel off...

Страница 202: ...and lower knife see Figure 113 113 Lead the protection sheet between upper and lower knife 3 Lift the guide and lead the protection sheet between the protection sheet rollers pulling the protection s...

Страница 203: ...igure 115 115 Insert the tape into the closed section of the slide 5 Hold the upper guide plate down and cut the tape at the knife section and pull the strip up so that the tape is cut by the upper kn...

Страница 204: ...204 Oc TDS800 User Manual...

Страница 205: ...205 Oc TDS800 User Manual Chapter 13 Maintenance This chapter describes The maintenance of the reference roller The maintenance of the reinforcement unit...

Страница 206: ...lean the reference roller be careful not to damage the sensors on the scanner How to clean the reference roller 1 Turn off the scanner 2 Press the grip at the right hand side below the original feed t...

Страница 207: ...nce with a soft cloth with a small quantity of Cleaner A For safety information see Safety data sheets on page 260 4 Press at the left and right side of the scanner to close the top cover of the scann...

Страница 208: ...ent Strips from Oc to prevent the damage to the Reinforcement Unit Clear the waste box If a reinforcement unit is installed the protective sheet from the reinforcement tape is stored in a waste box No...

Страница 209: ...clean the reinforcement knives 1 Press the on line key on the printer operator panel to put the printer off line The message Off line is displayed in the status window 2 Press the left selection key...

Страница 210: ...th Fixing Unit Cleaning Oil silicon oil 122 Oil the felt 10 Close the side door of the reinforcement unit The knives are placed back in its home position The picture on the display disappears The mess...

Страница 211: ...waste tray to remove the tray see Figure 124 3 Empty the waste basket 4 Put the waste basket back in it s original position Make sure you feel the magnetic click 123 Open the front door of the folder...

Страница 212: ...212 Oc TDS800 User Manual...

Страница 213: ...213 Oc TDS800 User Manual Chapter 14 Problem solving This chapter describes how to solve problems which can occur when you use the Oc TDS800...

Страница 214: ...h the system without problems On the graphic display a cover or door indicates in which part of the system the paper has stopped Stickers on some parts of the system indicate which green handles green...

Страница 215: ...message Original jam appears on the scanner display You must remove the original from the scanner Remove a jammed original 1 Press the handle under the original feed table to open the top cover of th...

Страница 216: ...cover of the scanner see Figure 126 126 Close the top cover of the scanner 4 Make the original smooth and feed the original If an original jam occurs often Check if you use the correct type of origina...

Страница 217: ...the data loss and correct the paper jam as described in the equivalent chapter Remove all the pieces of paper from the machine If a paper jam occurs often check if The paper is refilled correctly see...

Страница 218: ...jam in the manual feed 1 Pull the manual feed table toward you to open see Figure 128 Note Make sure that you open the manual feed table complete 128 Open the manual feed table B roll feed section see...

Страница 219: ...ck in the original position Paper jam in the fuser section How to clear a paper jam in the fuser section Caution When you remove the paper in the fuser section always wear the heat resistant gloves Th...

Страница 220: ...rear side see Figure 131 131 The top cover at the rear side 3 Pull the green lever toward you to open the output transport unit see Figure 132 Note If you can not open the transport unit you have to c...

Страница 221: ...n to the right The paper is delivered from the paper output unit 134 The crank 7 If the paper keeps coming it is not cut and you have to cut it manually 8 Cut the paper and turn the crank to the right...

Страница 222: ...he handle 1 downwards 15 Press the handle 2 back 16 Close the bar of the fuser section 17 Close the lower cover of the output unit Caution Do not hold your hand between the green lever and the lower c...

Страница 223: ...per jam in the paper roll compartments How to clear a paper jam in the paper roll compartments Note Make sure that you corrected all the problems in the fuser section before you correct the problem in...

Страница 224: ...artment or the vertical transport unit lower compartment see Figure 137 137 Knob of the chip tray or vertical transport unit 2 Remove all the pieces of material or 3 Lift the chip tray and pull the tr...

Страница 225: ...al transport unit 1 Open the vertical transport in the lower and middle paper roll compartment see Figure 139 139 The vertical transport in the lower and middle compartment 2 Turn the green knob to re...

Страница 226: ...compartment or roll 3 middle compartment or roll 5 in the lower compartment 2 Pull the feed unit underneath the roll holder toward you to remove the unit see Figure 140 140 The triangular feed unit 3...

Страница 227: ...he first fold section of the folder 1 Open the cover of the first fold section see Figure 141 141 The cover of the first fold section 2 Pull the green lever of the guide plate A to the first fold sect...

Страница 228: ...de plate A to the first fold section with the green lever 8 Close the cover of the first fold section How to clear a paper jam in the folder transport section 1 Open the cover of the transport section...

Страница 229: ...door of the second fold section see Figure 145 145 The front door of the second fold section 2 Remove all the pieces of material at the bottom of the second fold section 3 Close the front door of the...

Страница 230: ...147 The guide plate with the green lever 6 Remove all the pieces of material 7 Open the vertical transport with the green lever see Figure 148 148 The vertical transport 8 Remove all pieces of materi...

Страница 231: ...of the folder 1 Open the top and lower door of the output unit 2 Press the two knobs and open the plate see Figure 149 149 Open the plate 3 Remove all pieces of material 4 Fasten the plate 5 Close the...

Страница 232: ...mmed media 9 Loosen the nuts and remove the plate 151 Loosen the nuts and remove the plate 10 Remove all pieces of material 11 Replace the plate and tighten the nuts 12 Close the lower door 13 Open th...

Страница 233: ...ve all pieces of material 17 Open the cover behind the delivery tray for the second fold see Figure 154 154 Open the cover behind the delivery tray for the 2nd fold 18 Remove all pieces of material 19...

Страница 234: ...jams Tape jams No reinforcement strips on the output This section explains how you can correct these errors Clear paper jams in the Reinforcement Unit When a paper error occurs the following message...

Страница 235: ...rst Fold delivery and remove all paper inside the first fold delivery see Figure 156 156 The cover of the folder transport section 2 Close the cover of the folder transport section 3 Open the front do...

Страница 236: ...rcement Unit When a tape jam occurs one of the following messages appears on the display Reinforcing not possible tape jam for copy jobs Re feed reinforcement tape for print jobs Tape jammed in reinfo...

Страница 237: ...m 1 Open the front door of the Reinforcement Unit see Figure 160 160 Open the front door of the reinforcement unit 2 Turn the two guide plates away from the pin roller into their locked opened positio...

Страница 238: ...orcement strips on the output without an error message This error occurs when there are no reinforcement strips on the output although reinforcement is selected This can happen when the file header Re...

Страница 239: ...cement strip see situation A in figure 204 there is no mechanical error and you should insert a new tape roll as described in Inserting a new tape roll on page 143 If this error frequently occurs you...

Страница 240: ...0 Oc TDS800 User Manual Other problems If you have a problem that you can not correct call the Oc service organisation In this case turn off the system with the main switch and leave the system as it...

Страница 241: ...241 Oc TDS800 User Manual Appendix A Overview and tables...

Страница 242: ...TDS800 system 1 The monitor 2 The scanner 3 The scanner operator panel 4 The printer operator panel 5 The printer 6 The folder and stacker unit 7 The output delivery tray 8 The first fold unit 9 The...

Страница 243: ...243 Printer operator panel Ready to print On line key Stop key Selection keys Arrow keys The display...

Страница 244: ...lay 3 The Section keys 4 The Arrow keys 5 The Media selection keys 6 The Manual feed key 7 The Auto roll key 8 The Correction key 9 The Stop key 10 The Job interrupt key 11 The numeric keys 12 The Fun...

Страница 245: ...245 Product specifications Oc TDS800 The Oc TDS800 is a wide format black and white high volume multifunctional system The Oc TDS800 offers a broad range of print copy and scan to file function...

Страница 246: ...up to 200 meters long Media types Plain transparent fluorescent and colored papers films and vellums Output reception Output Delivery Tray ODT for 150 prints Warm up time 17 minutes Electrical requir...

Страница 247: ...pacity to store up to 250 A0s and create identical sets sorted by page or by set Concurrent receiving processing printing and finishing of digital jobs Sophisticated local and remote user communicatio...

Страница 248: ...stored in a ASCII or UTF 16 file for later re use Job templates optional Gives direct access to five different sets of settings on the scanner operator panel Oc Remote Logic Applications Model Local a...

Страница 249: ...and printing Multi copy mode 1 999 copies scan once print many Pre programming of next job Programmable default settings Programmable custom card Automatic roll selection Automatic reduction enlargeme...

Страница 250: ...panese fonts for Adobe PostScript 3 are available as an option Scan modes Single scan stream feed productive batch scanning File naming Automatically generate unique file names for each scan Determine...

Страница 251: ...seat job submission and back channel communication software using standard web browsers Internet Explorer 4 02 SP2 or higher and Netscape 4 08 or higher Oc Repro Desk A print management solution for t...

Страница 252: ...media Plain paper transparent paper film vellum and polyester Dimensions 1160 mm W x 1880 1340 mm H x 1020 mm D Weight 44 kg Optional Delivery Belt Unit Single belt unit Delivery belt with offset stac...

Страница 253: ...00 including plain paper transparent paper colored papers and various polyester films is available from your Oc representative Material types The following material types are available for the Oc TDS8...

Страница 254: ...range A4 portrait via manual sheet feed 210 mm 297 mm A portrait 8 5 11 A3 297 mm 420 mm B 11 17 A2 420 mm 594 mm C 17 22 A1 594 mm 841 mm D 22 34 A0 841 mm 1 189 mm E 34 44 Format Width Length Format...

Страница 255: ...cement strips Information about the different reinforcement strips is available from your Oc representative Attention Only use the original reinforcement strips from Oc to avoid damage to the reinforc...

Страница 256: ...256 Oc TDS800 User Manual...

Страница 257: ...257 Oc TDS800 User Manual Appendix B Safety information...

Страница 258: ...yourself but contact your Customer Service If for some reason you have to move the machine yourself please make sure that the mains power point has the right fuse capacity See the Oc TDS800 safety dat...

Страница 259: ...hine in rooms which are too small or insufficiently ventilated See the Oc TDS800 safety data sheet in this appendix for information about space and ventilation requirements General Always use material...

Страница 260: ...to the best of our knowledge as a compact guide to safe handling of this product We reserve the right to revise safety data sheets as new information becomes available It is the user s responsibility...

Страница 261: ...ective 89 336 EEC and FCC rules and regulations part 15 Class A Radiation Below the Threshold Limit Values for UV Visible and IR radiation TLV list of ACGIH Heat emission Standby 820 W at continuous o...

Страница 262: ...ower consumption low power 7 W Mains connection Cable with plug Safety class I IEC 536 Protective earth connection Protection class IP 20 IEC 529 Sound pressure level at operator position Stand byIn o...

Страница 263: ...h water If large quantity swallowed seek medical advice For any medical advice take along this material safety data sheet 5 Fire fighting measures Extinguishing media Dry chemical carbon dioxide water...

Страница 264: ...cal laws and regulations dispose of by burial in a sanitary landfill or incineration Do not throw in open fire in order to prevent the risk of a dust explosion 14 Transport information This product is...

Страница 265: ...265 Safety data sheet Oc Cleaner A continued on the next page...

Страница 266: ...266 Oc TDS800 User Manual The content of this safety data sheet is subject to the disclaimer on page 260 of this manual...

Страница 267: ...in normal use 4 First aid measures Eyes contact Not Applicable N A Skin contact N A Inhalation N A Ingestion N A For any medical advice take along this material safety data sheet 5 Fire fighting measu...

Страница 268: ...information 12 Ecological information This product is not biodegradable The ing redients are not classified as ecologically hazardous No adverse environmental aspects are expected 13 Disposal conside...

Страница 269: ...isting of Oc TDS800 Scanner and Oc TDS800 Printer including controller and monitor has the same efficiency features but does not meet the ENERGY STAR specification for the sleep mode of a multifunctio...

Страница 270: ...d products is a functionally integrated computer Note 1 Without controller as defined for Tier 1 in the Printer Fax MOU Version 3 0 Note 2 MDS Multifunctional Digital System consisting of printer scan...

Страница 271: ...271 Oc TDS800 User Manual Appendix C Miscellaneous...

Страница 272: ...step through all phases of performing the operation Figures and tables Figures and tables are titled and numbered sequentially throughout this manual Figures include pictures of product components scr...

Страница 273: ...ze readability and arrangement page layout chapter order etc Yes No Could you find the information you were looking for Always Most of the times Sometimes Not at all What did you use to find the requi...

Страница 274: ...ase fill in your occupation Name Occupation Company Phone Address City Country Please return this sheet to Oc Technologies B V For the attention of ITC User Documentation P O Box 101 5900 MA Venlo The...

Страница 275: ...ajie T1 719 Sun Dong An Plaza Beijing 100006 China Oc esk republika s r o Hanusova 18 14021 Praha 4 Pankr c Czech Republic Oc Danmark A S Vallensbaekvej 45 DK 2605 Br ndby Denmark Oc France S A 32 Ave...

Страница 276: ...Gulab 190 MacPherson Road Singapore 348548 Oc Espa a SA Business Park MAS BLAU C Osona 2 2 3a Planta 08820 El Prat del Llobregat Barcelona Spain Oc Svenska AB P O box 754 S 191 27 Sollentuna Sweden O...

Страница 277: ...arameters 166 connect to a controller 169 continue a print job 39 controller start up 24 copy jobs 55 define settings 61 next original 61 non standard size originals 98 special originals 98 copy size...

Страница 278: ...py jobs 62 manual feed 62 matrix logic 112 media display 143 media selection 46 56 mirror image 109 move a job to top 154 N non standard size 98 non standard sized originals 98 O oc account center 171...

Страница 279: ...jobs that are put on hold 154 restart paused print job 154 structure 148 user modes 151 view print queue 153 window 150 R reference roller 206 reinforcement unit 178 183 insert a new tape roll 196 mai...

Страница 280: ...le format 76 cals 76 pdf 76 tiff 76 file properties 81 local destination retrieve files via ftp 90 optimisation 78 file size 78 scan quality 78 resolution 77 settings 74 zoom 78 section keys 48 set co...

Страница 281: ...er interaction 16 user modes 135 163 users 18 anonymous user 18 key operator 18 21 repro operator 18 service operator 18 system administrator 18 21 V view a scanned file 87 automatically 89 view stati...

Отзывы: