2
1
1
Roll media
2
Scroller
No.
No.
Name
Name
Océ - Technologies B.V.
St. Urbanusweg 43
Venlo, The Netherlands,
P.O. Box 101, NL 5900 MA Venlo
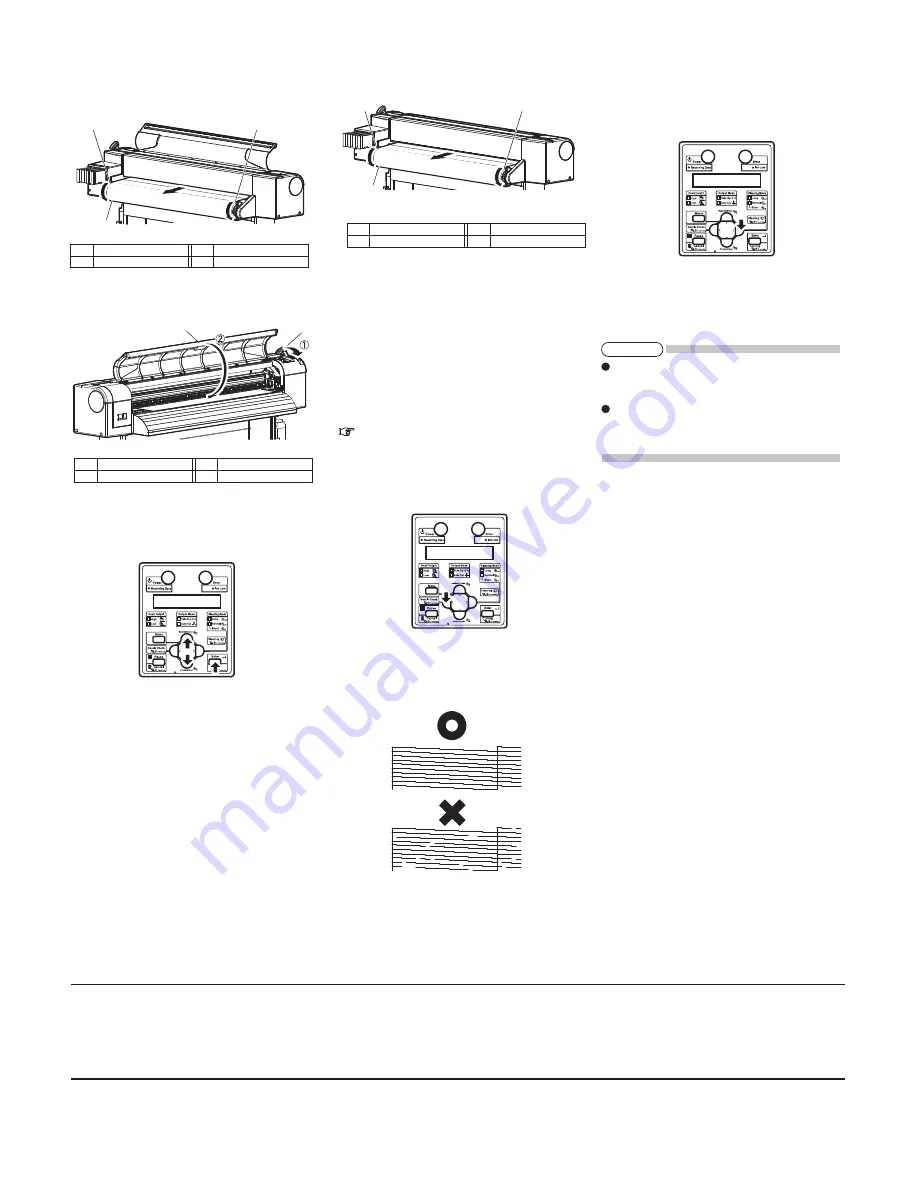
9. Press and hold the front edge of the roll media and
wind it back with the scroller to remove a media bend
or slant.
10. Return the media loading lever to the front and
close the front cover.
11. Press the [+] key or [-] key on the operation panel to
select the type of the loaded media and press the
[Enter] key.
This confirms the media type.
The operation panel displays "Media Initial", and
media initial operation starts.
After the media initial operation is completed, the
operation panel displays "Ready to Print", and the
display enters normal status.
12. Wind back the roll media with the scroller to remove
a media bend.
The media loading is complete.
11 Checking printing conditions
Check the condition of the print head after the ink
replenishment.
1. Turn ON the printer and load the roll media.
8 Loading the roll media
2. Confirm that the printer functions normally.
3. Press the [<] key on the operation panel for two
seconds or more.
Nozzle check printing starts.
4. Check the sample print for blurred or missing
parts in the check pattern.
5. If the nozzle check result indicates that there is a
problem such as mentioned above in the check
pattern, clean the head.
Press and hold the [Cleaning] key on the operation
panel for two seconds or more.
The operation panel displays "Cleaning **%".
Head cleaning starts.
6. Perform nozzle check again and check the
condition of the print head.
7. Perform nozzle check again and check the
condition of the print head.
2
2
1
1
2
2
No.
Name
No.
Name
1
Media loading lever
2
Front cover
No.
Name
No.
Name
1
Roll media
2
Scroller
NOTE
If one time of head cleaning was not enough to
remove blurred or missing parts in the check
pattern, perform powerful cleaning.
If those problems above were not improved after a
few times of head cleaning, refer to the Operation
Manual "7 Troubleshooting" and perform required
procedures.


