CS9350
INSTALLATION MANUAL
7
AP-40800 - 1.0
1
2
2
1
No.
Name
1
Movable flange
No.
Name
2
Roll media
No.
Name
1
Scroller
2
Fixed flange
No.
Name
3
Ink cartridge slot
4
Scroller receiver
No.
Name
1
Media loading lever
No.
Name
1
Front cover
No.
Name
2
Roll media
No.
Name
No.
Name
Ink cartridge slot K
Ink cartridge slot M
Ink cartridge slot Y
Ink cartridge slot C
High capacity pack adapter
3
4
1
2
5
No.
Name
1 High capacity pack adapter
1
2
1
2
1
7. Remove all the high capacity pack adapters.
・
"Busy-Washing" is displayed on the operation pan-
el and the printer starts head cleaning.
・
When head cleaning is complete, "Wash retry? No"
is displayed on the operation panel.
8. Press the [Enter] key on the operation panel.
・
"Insert InkCartridges" is displayed on the operation
panel.
9. Remove the cleaning fluid pack and smart chip card
from the high capacity pack adapter.
10. Install the ink pack and smart chip card to high ca-
pacity pack adapter.
11.Shake the high capacity pack adapter gently two to
three times and insert it to the slot.
・
Insert the high capacity pack adapter all the way to
the end of the slot.
・
When a high capacity pack adapter is installed, "Ink
Refill **%" is displayed on the operation panel and
ink replenishment starts.
・
The ink replenishment takes about four minutes.
・
Ink filling operation and pause operation are repeat
ed during the ink replenishment.
・
When "100%" is displayed, the ink replenishment is
complete.
・
After the ink replenishment is complete, "Media
End" is displayed on the operation panel.
9
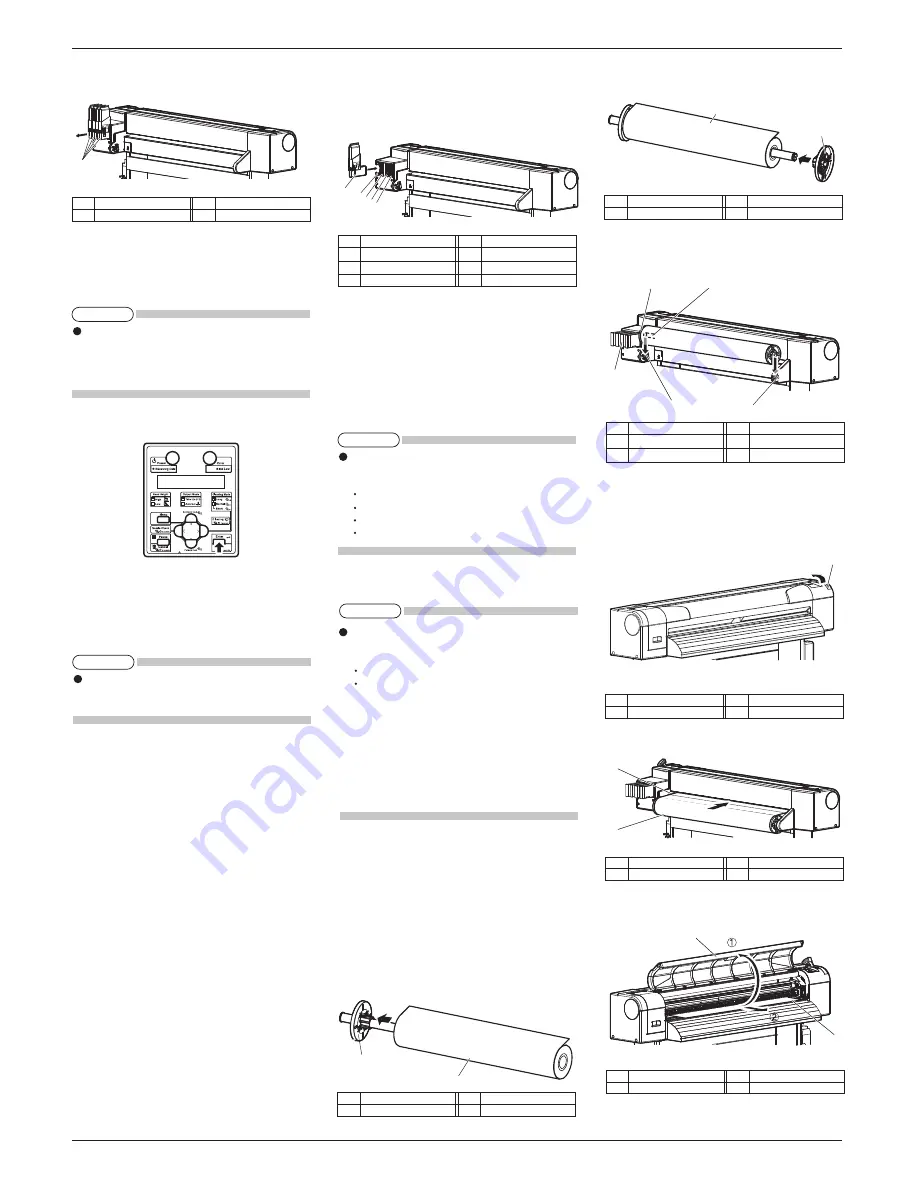
Loading roll media
This section explains how to load roll media.
Follow the steps below to load roll media.
1. Set roll media in the scroller so that the roll media
gets winded up in the direction of anti-clockwise
when viewed from the fixed flange side.
2. Push the roll media until its core hits the right
edge of the fixed flange.
3. Attach the movable flange so that it is firmly at-
tached to the roll media core.
4. Set the scroller onto the scroll receiver with the
fixed flange side facing the ink cartridge slots.
5. Turn ON the product.
・
The product starts the initial operation.
・
The operation panel displays "Media End".
6. Push the media loading lever backward.
・
The operation panel displays "Lever Up".
7. Feed the roll media into the media feed slot.
8. Open the front cover, and pull out the roll media.
2
3
4
4
1
No.
Name
1
Fixed flange
No.
Name
2
Roll media
No.
Name
1
Roll media
No.
Name
2
Media feed slot
NOTE
If the Nozzle check printing is performed immediately
after the ink replenishment is complete, the following
results may occur.
Printed line becomes blurred.
The data is partially not printed.
In such cases, follow the Operation Manual "6.2.3
Head cleaning" and charge a small amount of ink.
Then, check the printing result.
If there is no improvement in the print result even
after refilling a small amount of ink, leave the printer
for one hour or more, and refill a small amount of
ink again.
If there is still no improvement, contact
your
local
Océ
dealer.
NOTE
Do not remove only cleaning fluid pack while high
capacity pack adapter is installed on the printer. The
information of the remaining smart chip card will be
rewritten and the cleaning fluid pack will not be usa-
ble.
NOTE
Do not perform the following operations during ink
filling. If filling is interrupted, ink will be lost when
filling is resumed.
Do not turn OFF the power of the printer.
Do not unplug the power cable of the printer.
Do not open the front cover.
Do not raise the media loading lever.
1
5
4
3
2
NOTE
When there is remaining cleaning fluid pack and
smart chip card, clarify the corresponding pack and
card, and store it as a set.
1


