Scanning Documents
2
cm2520
2-23
Scan
nin
g
Do
cu
men
ts
Chapter 2
4
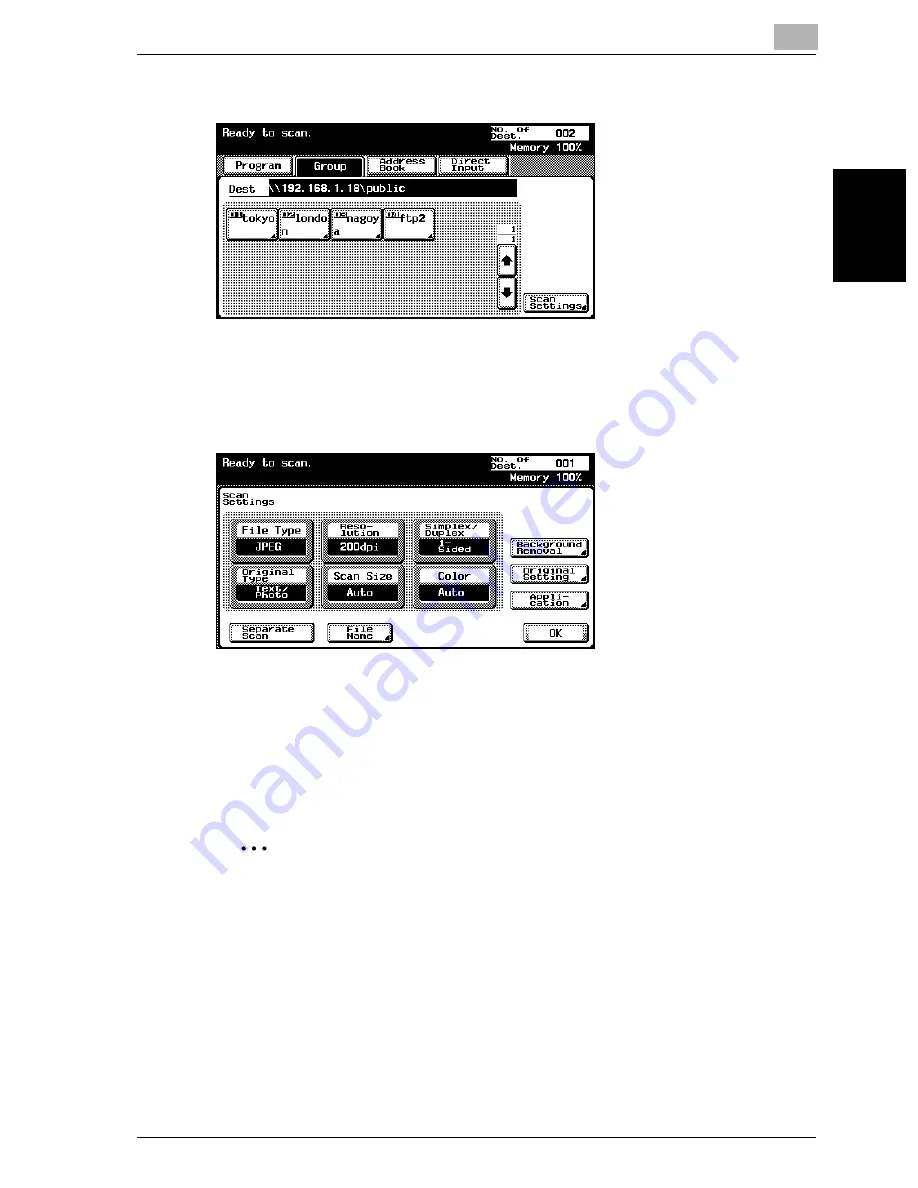
Touch [Scan Settings], and then specify the scan settings.
–
For details on the scan settings, refer to “Specifying the Scan Set-
tings” on page 2-42.
5
After specifying the settings, touch [OK].
6
Load the document into the ADF (optional) or position it on the original
glass of the machine.
7
Press the [Start] key on the control panel.
The document is scanned, and the data is sent.
2
Note
Do not turn off the machine until the scanned jobs disappear from the job
list.
Содержание cm2520
Страница 1: ......
Страница 19: ...Introduction x 18 cm2520...
Страница 20: ...1 Before Using the Scan Functions Chapter 1 Before Using the Scan Functions...
Страница 33: ...1 Before Using the Scan Functions 1 14 cm2520 Before Using the Scan Functions Chapter 1...
Страница 34: ...2 Scanning Documents Chapter 2 Scanning Documents...
Страница 106: ...Scanning Documents 2 cm2520 2 73 Scanning Documents Chapter 2 4 Touch Yes to delete the job 5 Touch Close...
Страница 112: ...3 Specifying Settings From the Control Panel Chapter 3 Specifying Settings From the Control Panel...
Страница 259: ...3 Specifying Settings From the Control Panel 3 148 cm2520 Specifying Settings From the Control Panel Chapter 3...
Страница 260: ...4 Specifying Settings Using Web Connection Chapter 4 Specifying Settings Using Web Connection...
Страница 332: ...Specifying Settings Using Web Connection 4 cm2520 4 73 Specifying Settings Using Web Connection Chapter 4...
Страница 375: ...4 Specifying Settings Using Web Connection 4 116 cm2520 Specifying Settings Using Web Connection Chapter 4...
Страница 376: ...5 Scan Function Troubleshooting Chapter 5 Scan Function Troubleshooting...
Страница 378: ...6 Appendix Chapter 6 Appendix...
Страница 383: ...6 Appendix 6 6 cm2520 Appendix Chapter 6...
Страница 395: ...6 Appendix 6 18 cm2520 Appendix Chapter 6...
Страница 396: ......


