


3. Camera connecting and setting
3.1 Insert USB cable into the micro USB port of camera, wait for 90 seconds until the indicator
light begins to flash blue slowly. (blinking one time per second)
Note:
Format your memory card before first time using (see 6.1.g), and insert a Micro SD card (TF
card) into the slot before camera power on.
Camera will automatically start recording after insert memory card.
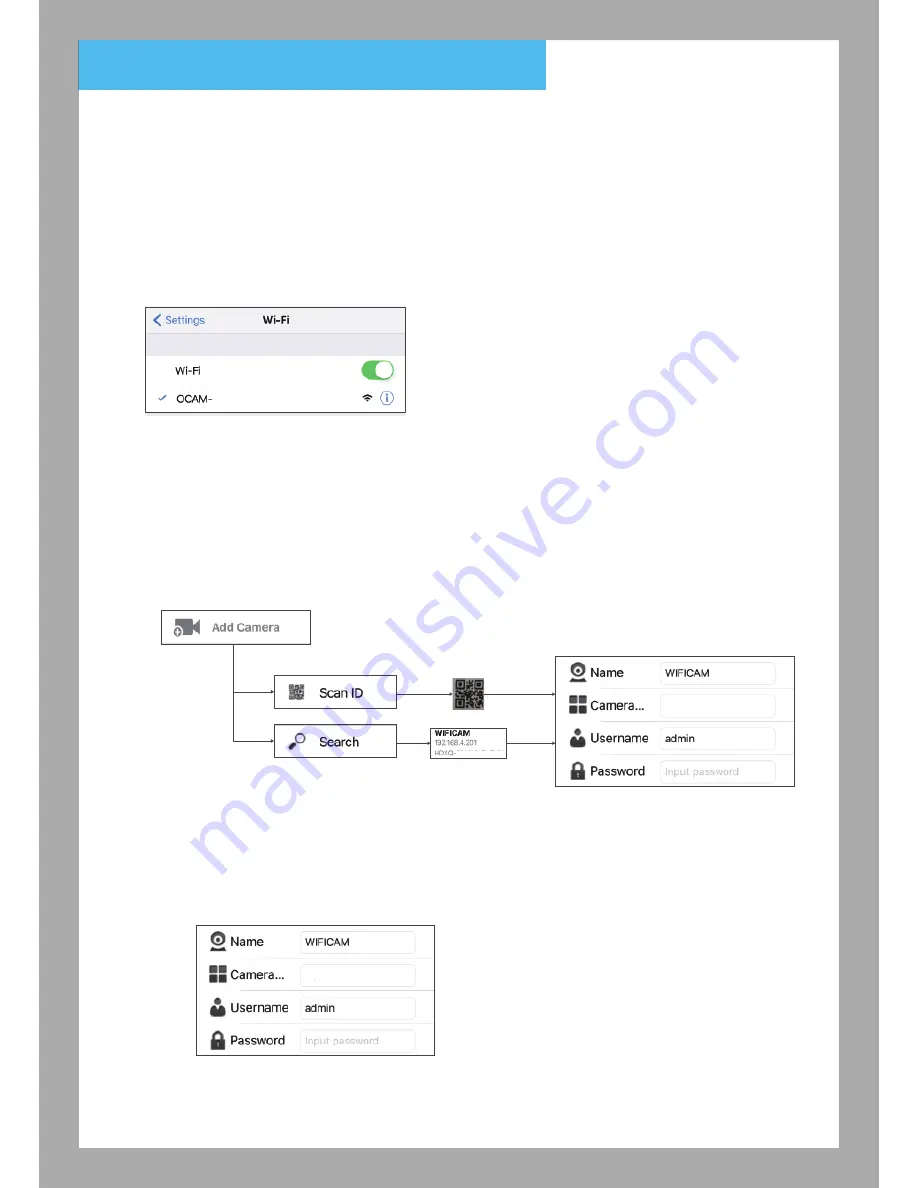
3.2 Turn on the Wi-Fi on your devices and choose “OCAM-XXXXXX” on Wi-Fi list for connecting
(no password is required). Wait until connection is completed.
3.3 Opwn OCam+ APP
3.4 Add Camera (Add new camera)
3.4.1 Open the App and click on ‘Add Camera’ (‘Add New Camera’) icon
3.4.2 Select “Scan ID” or “Search”
If choose “Scan ID” - Scan the QR code sticker on the camera.
If choose “Search” - App will detect the connected camera and show the Camera UID in the list.
3.4.3 After complete the previous step, APP will appear Camera ID as below:
Name: User can define the Camera Name
User: Default user name is “admin”
Password: Enter “admin”
After enter the password and click “Done”, camera status will show “Online”
xxxxxx-xxxxx
3
HDXQ
-xxxxxx-...
xxxxxx-xx...
HDXQ
-xxxxxx-...


