background image


NEP-5000 MANUAL  


V2019-08-29 

Observator Instruments  

     Copyright 2019 

©


Page 94 


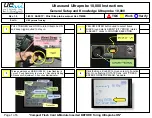
  Clean the sensor optical face using a wash solution. Move the probe up and down in the 

water. Make sure you never touch the optics. Then dry the sensor with the air duster or cloth. 


Figure 11.4.7.H: Wash and dry the sensor 


Two-point medium-range calibration has now been completed. 


Содержание Analite NEP-5000

Страница 1: ...mation Manual Version 2019 08 29 August 2019 Author Observator Instruments NEP 5000 MANUAL ABN 56 007 283 963 8 10 Keith Campbell Court PO Box 9039 Scoresby VIC 3179 AUSTRALIA Tel 61 3 8706 5000 Fax 6...

Страница 2: ...alite com au NEP 5000 Application Note NEP 5000 SDI12 option for H 522 H 500XL loggers https analite com au NEP 5000 Application Note NEP 5000 SDI12 option with Hydrospider logger https analite com au...

Страница 3: ...Integrated 2 point calibration information Compress Document Images Added additional reference documents Ludovic Grosjean V2019 03 17 Added Reference Documents Ludovic Grosjean V2019 07 02 Grammar rev...

Страница 4: ...EP 5000 CAPABILITIES 22 8 1 Features in measuring 22 8 1 1 Single range measurement 23 8 1 2 Auto range measurement 23 8 2 Features in communication 24 8 2 1 Periodic data Free flow 24 8 2 2 Data requ...

Страница 5: ...9 6 RS485 Pressure Glanded NEP cable option WD6 61 9 6 1 WD6 A RS485 Glanded 62 9 7 SDI12 Analog Subconn connector option WD7 63 9 7 1 WD7 A SDI 12 Subconn 64 9 7 2 WD7 B Analog Subconn 65 9 7 3 WD7 C...

Страница 6: ...ion Values for all ranges 84 11 4 6 Set up low range top calibration value 87 11 4 7 Set up mid range top calibration value 91 11 4 8 Set up high range top calibration value 95 12 FREQUENTLY ASKED QUE...

Страница 7: ...NEP 5000 MANUAL V2019 08 29 Observator Instruments Copyright 2019 Page 7 Page intentionally left blank...

Страница 8: ...ning water The NEP 5000 may be submerged to a depth of 100 meters approx 328 feet The NEP 5000 turbidity probes use 90 optics and employs infra red light in accordance with ISO 7027 All probes use a u...

Страница 9: ...ANALITE NEP 5000 will effectively measure the true turbidity of water when large particles are passing by the optical face it is recommended to take steps to protect the optical face from possible ab...

Страница 10: ...empt to force the wiper mechanism while operating or you may harm yourself due to the higher torque level When using calibration solutions such as AMCO Clear Stablecal or Formazyn avoid skin eye conta...

Страница 11: ...000 MANUAL V2019 08 29 Observator Instruments Copyright 2019 Page 11 4 SPECIFICATION Glanded sensor dimensions Length 321 37mm Diameter 31 7 mm don Subconn sensor dimensions Length 274 5mm Diameter 31...

Страница 12: ...ngth to be specified at time of order Per meter price applies Maximum cable length is 200m Length depends on the selected communication protocol Depth Rating 200m 660ft Non wiping 100m 330ft Wiping Op...

Страница 13: ...ower 8 30 VDC 15mA on 25mA reading and 60mA wiping Settling Time Measurement Acquisition Time Single range 2 4s Auto range 4 6s Wiping Wiping is configurable via the PC configuration tool such as wipi...

Страница 14: ...ure 5 B Blue box calibration module and USB cable Module and PC configuration and calibration software NEP CFG on your first NEP 5000 order only Figure 5 C Subconn Female Pigtail NEP CFG SF Only inclu...

Страница 15: ...Accessories Figure 6 A Case Figure 6 B Wiper replacement kit NEP WIPER KIT comprising of 4 silicon wipers and a hex fastening key Figure 6 C Shroud NEP SHRD D Delrin protective shroud NEP SHRD C Copp...

Страница 16: ...e box calibration module USB cable and a Subconn Female Pigtail Only for NEP 5000 with male Subconn connector Wiring is different for SDI 12 and RS422 RS485 Figure 6 F Calibration solutions NEP CAL GS...

Страница 17: ...fault settings or pre ordered configurations from the factory the user does not need to use the calibration software nor do they require to do any changes to the settings SUB RS232 Analog SUB RS485 RS...

Страница 18: ...nsor The NEP 5000 offers easy configuration methodology using single wire one wire communication to the configuration software Using this configuration the user only requires to connect 3 wires during...

Страница 19: ...Subconn options only 1 Connect your NEP 5000 Subconn option to the Subconn Female Pigtail provided in your NEP 5000 kit Figure 7 4 1 A Figure 7 4 1 A Probe connection to Subconn Female Pigtail 2 Conne...

Страница 20: ...only 1 Connect the Subconn Female Pigtail to the blue box calibration module refer to Section 7 5 Connect the calibration module Figure 7 4 2 A Example of Configuration for Glanded SDI 12 Probes Note...

Страница 21: ...6 COMMS Calibration Wiper 2 Power the calibration module using 12VDC plug pack if your USB port cannot provide more than 200mA off power otherwise plug pack is not required 7 5 A 5 3 Connect the prov...

Страница 22: ...he user may select wiper operation mode and their relevant parameters When ordered with secondary sensors the user may configure and calibrate their parameters according to instructions provided below...

Страница 23: ...e measurement procedure by selecting the highest range and taking one single measurement Then according to the first measurement the sensor will decide the appropriate range to capture series of measu...

Страница 24: ...n Glanded RS232 Refer to WD1 A not with multiple sensors Refer to WD2 A not with multiple sensors RS422 Refer to WD3 D not with multiple sensors Refer to WD4 D not with multiple sensors TTL Special ca...

Страница 25: ...seconds from start up to receive the first accurate result After 40 seconds pass the sensor will output running statistical measurement as it occurs Figure 8 2 1 B Free Flow mode address The built in...

Страница 26: ...t with multiple sensors Refer to WD2 A not with multiple sensors RS485 Refer to WD3 A for single sensor Refer to WD4 A for single sensor RS485 with Pressure Refer to WD5 A with multiple sensor Refer t...

Страница 27: ...software please refer to Figure 8 2 2 B Figure 8 2 2 B Polled mode address Perform a wipe To carry out an optical wipe via Polled mode the logger needs to send Sensor ID and wipe followed by carriage...

Страница 28: ...ding to the application The User can customize the measurement period and statistical length of the analysis by changing following parameters 1 The measurement period 8 2 2 C1 Note When using Auto ran...

Страница 29: ...o read the temperature as a secondary measurement when the option is selected Figure 8 2 3 A SDI12 configuration pages For further information regarding customization and SDI 12 use with loggers pleas...

Страница 30: ...t typed by the user Start statistical measurement aM6 Return 20066 CR LF aM6 atttn CR LF a the sensor address a the sensor address M6 the start measurement ttt the specified time in seconds until the...

Страница 31: ...measurement range High Range 5000NTU Command aM2 Return a0010 CR LF Medium Range 400NTU Command aM3 Return a0010 CR LF Low Range 40NTU Command aM4 Return a0010 CR LF Note When selecting Auto range vi...

Страница 32: ...s and ranges Please refer to the calibration of the Analog output section for further information Figure 8 2 4 A Selection of the Analog option 1 Enabling Analog option 8 2 4 A1 When this option is en...

Страница 33: ...t up the desired limits of the current e g 4 20mA or 0 20mA 1 Select the option Set 0NTU Offset 8 2 4 D1 2 Measure and adjust the Current output of the sensor using a multi meter Adjust the Raw Analog...

Страница 34: ...desired limits of the voltage e g 2 5V to 2 5V 0 to 2 5V and 0 to 1V 1 Select the option Set 0NTU Offset 8 2 4 H1 2 Measure and adjust the Current output of the sensor using a multi meter Adjust the R...

Страница 35: ...rations Application Note Note 3 Maintenance and replacement instructions regarding the optical wiper can be found from Wiper Replacement Application Note document 8 3 1 Basic optical wiper configurati...

Страница 36: ...elect Set once the wiper configuration is completed 7 Test functions for the Optical wiper system 8 3 1 A7 This Option allows the user to test the optical wiper operation when attached to the calibrat...

Страница 37: ...ation 2 Available optical wiping options for Polled mode On request using command sensor address wipe CR Power on optical wiper activation 3 Available optical wiping options for SDI 12 mode Optical wi...

Страница 38: ...NEP 5000 MANUAL V2019 08 29 Observator Instruments Copyright 2019 Page 38 9 PINOUT WIRING DIAGRAM WD1 WD3 WD5 WD7 WD2 WD4 WD6 WD8...

Страница 39: ...tion Subconn color Calibration Module Pin 1 Power 12V to 24V Ve Black 1 2 GND RS232 GND White 2 3 RS232 TX Red N A 4 RS232 RX Green N A 5 Calibration Wiper Orange 6 6 Voltage out reference to GND or 4...

Страница 40: ...Data request mode RS232 Polled mode where the control unit sends commands to NEP 5000 to operate In data streaming RS232 Free flow mode user may select single range free flow 2 RS232 Free flow select...

Страница 41: ...selection being used with Polled mode the user must select 9 1 1 C2 as Polled Digital then select 9 1 1 C3 COM type as RS232 Then press selection 9 1 1 C4 and 9 1 1 C5 to save settings permanently to...

Страница 42: ...optical wiper using a control wire or periodic control 2 4 20mA selection Figure 9 1 2 B Analog 4 20mA selection To select current option please follow steps below Select Output Stage option 9 1 2 B1...

Страница 43: ...optical wiper using a control wire or periodic control 2 Voltage selection Figure 9 1 3 B Analog Voltage selection To select voltage option please follow steps below Select Output Stage option 9 1 3...

Страница 44: ...0V to 24V DC Ve 1 Green GND RS232 GND 2 White Voltage out reference to GND or 4 20mA Loop driver out to GND N A Blue RS232 RX N A Pink RS232 TX N A Yellow Analog GND N A Grey Calibration Wiper 6 Figur...

Страница 45: ...ons Data request mode RS232 Polled mode where the control unit sends commands to the NEP 5000 to operate In data streaming RS232 Free flow mode the user may select single range free flow 2 RS232 Free...

Страница 46: ...RS232 selection is being used with Polled mode the user must select 9 2 1 C2 as Polled Digital then select 9 2 1 C3 COM type as RS232 Then press 9 2 1 C4 and 9 2 1 C5 to save settings permanently to t...

Страница 47: ...in optical wiper using a control wire or periodic control 2 4 20mA selection Figure 9 2 2 B Analog 4 20mA selection To select current option please follow steps below Select Output Stage option 9 2 2...

Страница 48: ...n optical wiper using a control wire or periodic control 2 Voltage selection Figure 9 2 3 B Analog Voltage selection To select voltage option please follow the steps below Select Output Stage option 9...

Страница 49: ...Number Voltage option Subconn color Calibration Module Pin 1 Power 12V to 24V Ve Black 1 2 GND White 2 3 RS485 Red N A 4 RS485 Green N A 5 Calibration Wiper Orange 6 6 Voltage out reference to GND or...

Страница 50: ...ontrol multiple sensors using the same RS485 bus e g extra turbidity sensors in various heights 2 RS485 Polled mode selection Figure 9 3 1 B RS485 Polled mode selection When the RS485 has been selecte...

Страница 51: ...in optical wiper using a control wire or periodic control 2 4 20mA selection Figure 9 3 2 B Analog 4 20mA selection To select current option please follow steps below Select Output Stage option 9 3 2...

Страница 52: ...optical wiper using a control wire or periodic control 2 Voltage selection Figure 9 3 3 B Analog Voltage selection To select voltage option please follow steps below Select Output Stage option 9 3 3...

Страница 53: ...ntage of this communication type is that it offers up to 1km cable length In data streaming in RS422 Free flow mode the user may select a single range measurement or an auto range measurement 2 RS422...

Страница 54: ...n Brown Power 10V to 24V DC Ve 1 Green GND 2 White Voltage out reference to GND or 4 20mA Loop driver out to GND N A Blue RS485 N A Pink RS485 N A Yellow N A N A Grey Calibration Wiper 6 Figure 9 4 A...

Страница 55: ...ows to control multiple sensors using the same RS485 bus e g extra turbidity sensors in various heights 2 RS485 Polled mode selection Figure 9 4 1 B RS485 Polled mode selection When RS485 selection is...

Страница 56: ...ptical wiper using a control wire or periodic control 2 4 20mA selection Figure 9 4 2 B Analog 4 20mA selection To select current option please follow steps below Select Output Stage option 9 4 2 B1 S...

Страница 57: ...lt in optical wiper using a control wire or periodic control 2 Voltage selection Figure 9 4 3 B Analog Voltage selection To select voltage option please follow the steps below Select Output Stage opti...

Страница 58: ...main advantage of this communication type is that it offers up to 1km of cable length In data streaming in RS422 Free flow mode the user may select single range measurement or auto range measurement 2...

Страница 59: ...ion Module Pin 1 Power 12V to 24V Ve Black 1 2 GND White 2 3 RS485 Red N A 4 RS485 Green N A 5 Turbidity Calibration Orange 6 6 Pressure Calibration Blue 6 OEM Calibration Software 12VDC POWER SUPPLY...

Страница 60: ...r or controller that manages the RS485 bus must be aware of each sensor address in order to retrieve data from appropriate sensors e g the built in pressure sensor in the same body probe must have a d...

Страница 61: ...e Not used 1K to GND N A Blue RS485 N A Pink RS485 N A Yellow Pressure Calibration 6 Grey Turbidity Calibration Wiper 6 Figure 9 6 A RS485 Pressure Glanded Pinout Configuration WD6 OEM Calibration Sof...

Страница 62: ...ger or controller that manages the RS485 bus must be aware of each sensor address in order to retrieve data from the appropriate sensor e g the built in pressure sensor in the same body probe must hav...

Страница 63: ...lor Calibration Module Pin 1 Power GND SDI12 GND and Voltage Output GND Ve Black 2 2 SDI 12 Data White N A 3 Power 10V to 24V DC Ve Red 1 4 4 20mA loop to power GND via 100 ohms Green N A 5 Voltage Ou...

Страница 64: ...of these options are initiating and reading turbidity measurements statistical measurements changing measurement ranges and operating the optical wiper The user must select appropriate SDI 12 addresse...

Страница 65: ...ptical wiper using a control wire or periodic control 2 4 20mA selection Figure 9 7 2 B Analog 4 20mA selection To select current option please follow the steps below Select Output Stage option 9 7 2...

Страница 66: ...n optical wiper using a control wire or periodic control 2 Voltage selection Figure 9 7 3 B Analog Voltage selection To select voltage option please follow the steps below Select Output Stage option 9...

Страница 67: ...24V DC Ve 1 Green Power GND SDI12 GND and Analog GND 2 White SDI12 Data N A Blue 4 20mA loop to power GND via 100 ohms N A Pink N A N A Yellow Voltage Out pin 1 as GND ref N A Grey Calibration Wiper...

Страница 68: ...options are initiating and reading turbidity measurements statistical measurements changing measurement ranges and operating the optical wiper The user must select appropriate SDI 12 addresses from t...

Страница 69: ...r using a control wire or periodic control 2 4 20mA selection Figure 9 8 2 B Analog 4 20mA selection To select current option please follow the steps below Select Output Stage option 9 8 2 B1 Select t...

Страница 70: ...al wiper using a control wire or periodic control 3 Voltage selection Figure 9 8 3 B Analog Voltage selection To select voltage option please follow the steps below Select Output Stage option 9 8 3 B1...

Страница 71: ...ftware download Figure 10 1 1 A Nephlometer OEM software icon Note Alternatively run the software directly from the USB provided or copy the folder to a local drive make sure you include all the suppo...

Страница 72: ...e software then choose driver software from your computer option b Using the Browse button select optic diver when prompted and OK c Wait for the completion of the driver installation d After successf...

Страница 73: ...re 10 1 2 B Selection of the communication port 3 The output window should show the following when the correct communications port is selected Figure 10 1 2 C Output window overview 4 Make sure you ha...

Страница 74: ...rbidity Figure 10 2 A Select OEM Calibration Turbidity option 2 Press Connect Button on the software and establish the connection Make sure you have connected your sensor to the calibration module If...

Страница 75: ...few seconds until the calibration window is ready Figure 10 2 D Access to the Calibration window Note 1 The Output Window should show Figure 10 2 D when successful In this stage the calibration config...

Страница 76: ...to the running probe during manufacturing Serial numbers cannot be changed 2 Password Factory usage only 3 Sensor ID Current ID of the running sensor Sensor ID can range from 0 to 9 Sensor ID is used...

Страница 77: ...calibration and this includes profiling of the optics multi point calibration and calibration of all 3 ranges 2 point calibration When the optical data profile is already available from the factory ca...

Страница 78: ...and its batch number are also mentioned in the calibration sheet of the sensor The user may also find the original factory calibration data including optical profiling multi point calibration from at...

Страница 79: ...sure you have the following items 1 Prepare AMCO CLEAR Turbidity standard solutions for all three ranges Low range Mid range High range Low calibration point bottom 0NTU Turbidity standard High calibr...

Страница 80: ...to minimize the light bouncing effect caused by the container s wall It important that the user also isolates external UV light UV present in ambient light entering to the sensor during the calibrati...

Страница 81: ...he calibration procedure by cleaning the sensor optical face using a wash solution Move the probe up and down in the water Make sure you never touch the optics Figure 11 4 1 A Wash the sensor 11 4 2 D...

Страница 82: ...au NEP 5000 CFG URL and apply it to the sensor Download the CFG file to your local drive Figure 11 4 4 A Load the optical profile Go to the calibration software and press button import from file Figur...

Страница 83: ...ion data to the attached sensor Figure 11 4 4 D Apply calibration data file to the sensor Please wait until the process is fully completed It may take up to a minute Figure 11 4 4 E Applying changes S...

Страница 84: ...the sensor a few times into the washed solution dry and then submerge the sensor into the 0NTU solution as shown below Figure 11 4 5 A Submerge the sensor into the 0NTU solution Important note It is...

Страница 85: ...ow NTU Tick Get live data tick box to read current measurement from the sensor the NTU RAW should display un calibrated 0 NTU solution values Figure 11 4 5 D Get live data Please observe the Raw value...

Страница 86: ...te you may need to repeat a couple of times to get the correct reading 0 009 is a typical value for 0NTU reading Figure 11 4 5 G Improve the 0NTU Raw value Note After each alteration of the 0NTU Input...

Страница 87: ...ution e g 10NTU Figure 11 4 6 A Insert the sensor in the top calibration value Important Note The distance between the bottom of the container and sensors optical face must be a minimum of 5cm Now pre...

Страница 88: ...10NTU Figure 11 4 6 C Get live data Please observe the Raw value and when stable untick the Get live data button and type the Raw value into the TopEnd NTU Input Raw box e g 3516 Figure 11 4 6 D Reco...

Страница 89: ...til the reading is close enough to the high top range NTU value Figure 11 4 6 F Set the low range top calibration value Press Save calibration to commit your new calibration data to the permanent memo...

Страница 90: ...Clean the sensor optical face using a wash solution Move the probe up and down in the water Make sure you never touch the optics Then dry the sensor with the air duster or cloth Figure 11 4 6 H Wash...

Страница 91: ...tion e g 400NTU Figure 11 4 7 A Insert the sensor in the top calibration value Important Note The distance between the bottom of the container and sensors optical face must be a minimum of 5cm Now pre...

Страница 92: ...of 400NTU Figure 11 4 7 C Get live data Please observe the Raw value and when stable untick the Get live data button and type the Raw value into the TopEnd NTU Input Raw box e g 197 Figure 11 4 7 D Re...

Страница 93: ...til the reading is close enough to the high top range NTU value Figure 11 4 7 F Set the mid range top calibration value Press Save calibration to commit your new calibration data to the permanent memo...

Страница 94: ...lean the sensor optical face using a wash solution Move the probe up and down in the water Make sure you never touch the optics Then dry the sensor with the air duster or cloth Figure 11 4 7 H Wash an...

Страница 95: ...tion e g 3 000NTU Figure 11 4 8 A Insert the sensor in the top calibration value Important Note The distance between the bottom of the container and sensors optical face must be a minimum of 5cm Now p...

Страница 96: ...TU Figure 11 4 8 C Get live data Please observe the Raw value and when stable untick the Get live data button and type the Raw value into the TopEnd NTU Input Raw box e g 1061 Figure 11 4 8 D Record t...

Страница 97: ...il the reading is close enough to the high top range NTU value Figure 11 4 8 F Set the high range top calibration value Press Save calibration to commit your new calibration data to the permanent memo...

Страница 98: ...ter Make sure you never touch the optics Then dry the sensor with the air duster or cloth Figure 11 4 8 H Wash and dry the sensor Two point high range calibration has now been completed Note Please fo...

Страница 99: ...alue such as 100NTU 400NTU 5 000 NEP 5000 family sensors consist of 3 ranges hence the user requires up to 4 solutions to complete the calibration Can I read data via calibration software Yes to obtai...

Страница 100: ...te document Where can I find the technical support contact details Observator Instruments Tel 61 3 8706 5000 Fax 61 3 8706 5049 Email sales au observator com Software Should I install the latest softw...

Страница 101: ...es are in conformity with the protection requirements of Council Directives 2004 108 EC on the approximation of the laws relating to Electromagnetic compatibility This Declaration of Conformity is bas...

Страница 102: ...ndition for details Telephone Technical Support You can contact us any time about Technical Support Repair and Service Coverage Please enquire about a maintenance program If warranty or repair is requ...

Страница 103: ...ontact your Observator Instruments distributor from whom you purchased the probe or our Service Centre If the probe is being returned for service under warranty please supply proof of purchase and the...

Отзывы: