


OBO Bettermann
40 | EN
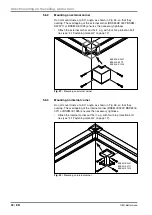
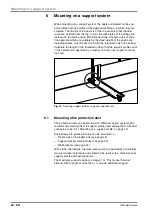
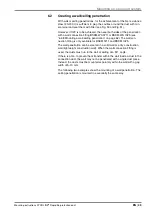
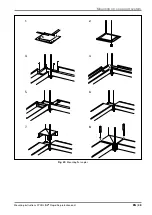
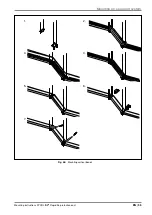
Mounting on a support system
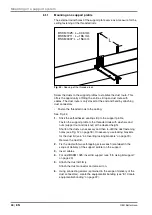
6 1 1
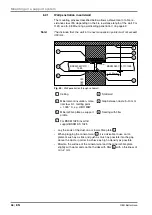
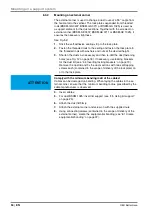
Mounting on a support profile
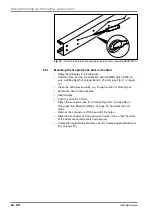
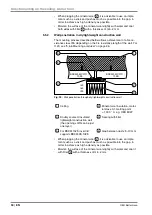
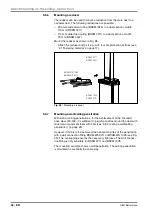
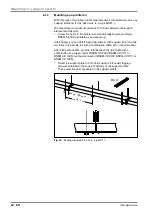
The external round holes of the support plate serve as a measure for the
ceiling fastening of the threaded rods.
BSKM 1025: L = 336 mm
BSKM 0711: L = 196 mm
BSKM 0407: L = 156 mm
Fig 43:
Spacing of the threaded rods
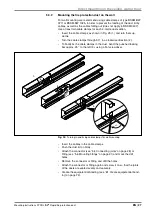
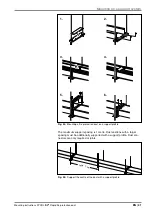
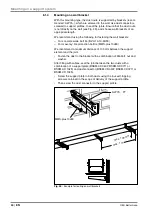
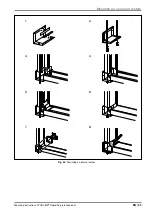
Screw the ducts to the support profiles to stabilise the duct route. This
offers the opportunity of filling the entire, still open duct route with
cables. The duct route is only closed at the end and fixed by attaching
duct connectors.
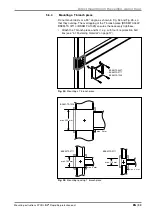
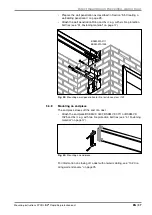
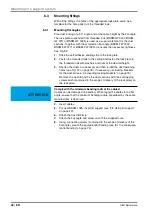
• Fasten the threaded rods to the ceiling.
See Fig. 44:
1
Stick the self-adhesive sealing strip to the support profile.
Fasten the support profile to the threaded rods with washers and
nuts (support nut and lock nut) at the desired height.
Shorten the ducts as necessary and then re-drill the duct fastening
holes (see Fig. 12 on page 18). If necessary, use locking brackets
for the duct lid (see “4.4 Inserting locking brackets” on page 19).
Remove the duct lid.
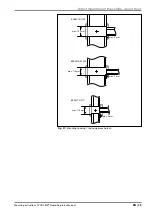
2
Fix the duct with two self-tapping screws each (contained in the
scope of delivery of the support profile) on the support.
3
Insert cables.
4
For duct BSKM 1025: insert lid support (see “4.5 Using lid support”
on page 20).
5
Attach the duct lid firmly.
Attach the duct connector and screw it on.
6
Using connecting screws (contained in the scope of delivery of the
duct connectors), create the equipotential bonding (see “8.1 Create
equipotential bonding” on page 72).


