background image


20


1. Read these instructions.

2. Keep these instructions. Instructions are also

available for download at www.oakcastle.co.uk

3.

 Heed all Warnings

.

4.

 Follow all instructions

.

5.

 Do not clean the apparatus near or with water

6.

 Do not block any ventilation openings. Install 

in

accordance with the manufacturer’s instructions

7. Do not install near any heat sources such as

radiators, heat registers, stoves, or other apparatus

(including amplifiers) that produce heat.

8. Protect the power from being walked on or pinched

particularly at plugs, convenience receptacles, and

the point where they exit from the apparatus.

9. Only use attachments/accessories specified by the

manufacturer.

10. Unplug this apparatus during light storms or when

unused for long periods of time.

11. Refer all servicing to qualified service personnel.

Servicing is required when the apparatus has been

damaged in a way, such as power-supply cord or

plug is damaged, liquid has been spilled or objects

have fallen into the apparatus, the apparatus has

been exposed to the rain or moisture, does not

operate normally or has been dropped.

12. No naked flame sources, such as lit candles, should

be placed on the apparatus.

13. Dispose of used electrical products and batteries

safely according to your local authority and

regulations.

ADDITIONAL WARNINGS

The apparatus shall not be exposed to dripping or

splashing and no objects filled with liquid, such as

vases, shall be places on the apparatus.

Main plug is used to disconnect device and it should

remain readily operable during intended use. In order

to disconnect the apparatus from the main mains

completely, the mains plug should be disconnected

from the main socket outlet completely.

Battery shall not be exposed to excessive heat such as

sunshine, fire or the like.

RECYCLING ELECTRICAL PRODUCTS

You should now recycle your waste electrical

goods and in doing so help the environment.

This symbol means an electrical product should

not be disposed of with normal household waste.

Please ensure it is taken to a suitable facility for

disposal when finished with.

IMPORTANT: Please read all instructions carefully

before use and keep for future reference.


EN

AT T E N T I O N

R I S Q U E   D ’ E L E C T R O C U T I O N

N E   PA S   O U V R I R

!

C A U T I O N

R I S K   O F  E L E C T R I C  S H O C K

D O   N O T   O P E N

!

IMPORTANT: 

Please read all instructions carefully 

before use and keep for future reference

!

Risk of electric shock.

Do not open

 Read all instructions carefully before use

 and keep for future reference

When servicing, use only identical

replacement parts

!

Safety Information

Содержание HIFI100

Страница 1: ...EN Instruction Guide Oakcastle HIFI100 Slim Micro Hifi Stereo System...

Страница 2: ...X bass Button Sleep Operations Snooze Operations Specifications Box Contents Controls Functions Getting Started Turning The Unit On Off Setting The Clock Alarm Operation Radio Operation CD MP3 CD Ope...

Страница 3: ...1 EN What is in the Box Box Contents Oakcastle HIFI100 Power Adapter Instructions Guide Remote Control...

Страница 4: ...SKIP PREVIOUS FM TUNE BUTTON 3 13 CD BLUETOOTH SKIP NEXT FM TUNE BUTTON 4 14 AUX IN JACK 5 15 DC IN JACK 6 16 FM WIRE ANTENNA 7 8 VOLUME UP BUTTON POWER STANDBY BUTTON MODE BUTTON CLOCK BUTTON SLEEP...

Страница 5: ...3 EN Front View Controls Functions 17 17 18 19 REMOTE SENSOR LED DISPLAY RIGHT LEFT SPEAKER 17 19 18...

Страница 6: ...16 CD STOP BUTTON 4 CD REPEAT BUTTON 17 ALARM BUTTON 5 CD RANDOM BUTTON 18 BLUETOOTH PAIR BUTTON 6 CLOCK BUTTON 19 EQ BUTTON 7 SLEEP BUTTON 20 X BASS BUTTON 8 MODE BUTTON 21 TUNER PRESET UP 9 SNOOZE B...

Страница 7: ...rent and requires two AAA UM 4 battery included for the remote control Do not attempt to operate the unit from any other power source You could cause damage to the unit and void your warranty AC Power...

Страница 8: ...t is now in standby mode Turning the unit ON In O standby mode press the POWER STANDBY BUTTON on top of the main unit or on the remote control to turn the unit ON The last selected source icon will sh...

Страница 9: ...CLOCK button to confirm the hour setting the minute digits will begin flashing 6 Tap the or button on either the main unit or remote control to adjust the minutes Press and hold the or buttons for fas...

Страница 10: ...cted are for PM time The AM INDICATOR A will light when the Hour digits selected are for AM time 3 Press the button to set the minute and then press the ALARM Button again to confirm alarm wake up sou...

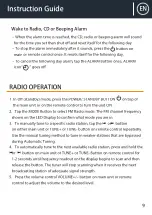
Страница 11: ...lect FM Radio mode The FM channel frequency shown on the LED Display to confirm what mode you are in 3 To manually tune to a specific radio station tap the or button on either main unit or TUNE or TUN...

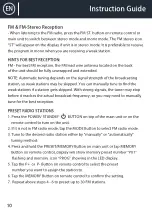
Страница 12: ...ts skipped With strong signals the tuner may stop before it reaches the actual broadcast frequency so you may need to manually tune for the best reception PRESET RADIO STATIONS 1 Press the POWER STAND...

Страница 13: ...button on remote control or button on top of the main unit to open the disc tray 4 Place the CD with the label side up into the CD compartment and then press the open close button to close the disc t...

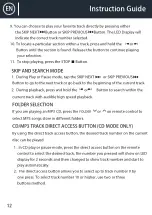
Страница 14: ...ng playback press and hold the or Button to search within the current track with audible high speed playback FOLDER SELECTION If you are playing an MP3 CD press the FOLDER or on remote control to sele...

Страница 15: ...e 0 button All 3 buttons must be pressed within 2 seconds For example to choose track 13 in the disc a Press the 1 button once b Press the 3 button within 2 seconds Notes 1 A track number higher than...

Страница 16: ...ws in display During playback press the RANDOM button to play music in random order The display will show RAN Press the RANDOM button again to resume normal playback Random Play CD PLAYBACK PROGRAMMIN...

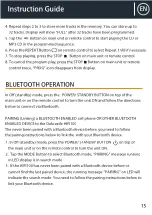
Страница 17: ...main unit or on the remote control to turn the unit ON and follow the directions below to connect via Bluetooth PAIRING Linking a BLUETOOTH ENABLED cell phone OR OTHER BLUETOOTH ENABLED DEVICE to the...

Страница 18: ...remote control to skip to previous or next song 8 If you want to pair another Bluetooth enabled device press and hold the PAIR Button for 2 seconds or turn o the Bluetooth function of device currently...

Страница 19: ...shows the current time 5 The volume level can now be controlled through the main unit Operate all other functions on the auxiliary device as usual This unit provides 4 di erent EQ modes to enhance you...

Страница 20: ...ion the unit will play for the selected length of time then automatically turn off 4 To cancel the sleep timer tap the SLEEP button repeatedly until timer shows 00 the sleep time icon disappears on th...

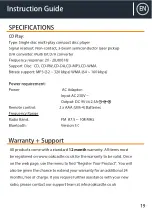
Страница 21: ...t AC 230V Output DC 9V 2 5A Remote control 2 x AAA UM 4 Batteries Frequency Range Radio Band FM 87 5 108 MHz Bluetooth Version 5 0 Warranty Support All products come with a standard 12 month warranty...

Страница 22: ...e apparatus 13 Dispose of used electrical products and batteries safely according to your local authority and regulations ADDITIONAL WARNINGS The apparatus shall not be exposed to dripping or splashin...

Страница 23: ...www oakcastle co uk...

Отзывы: