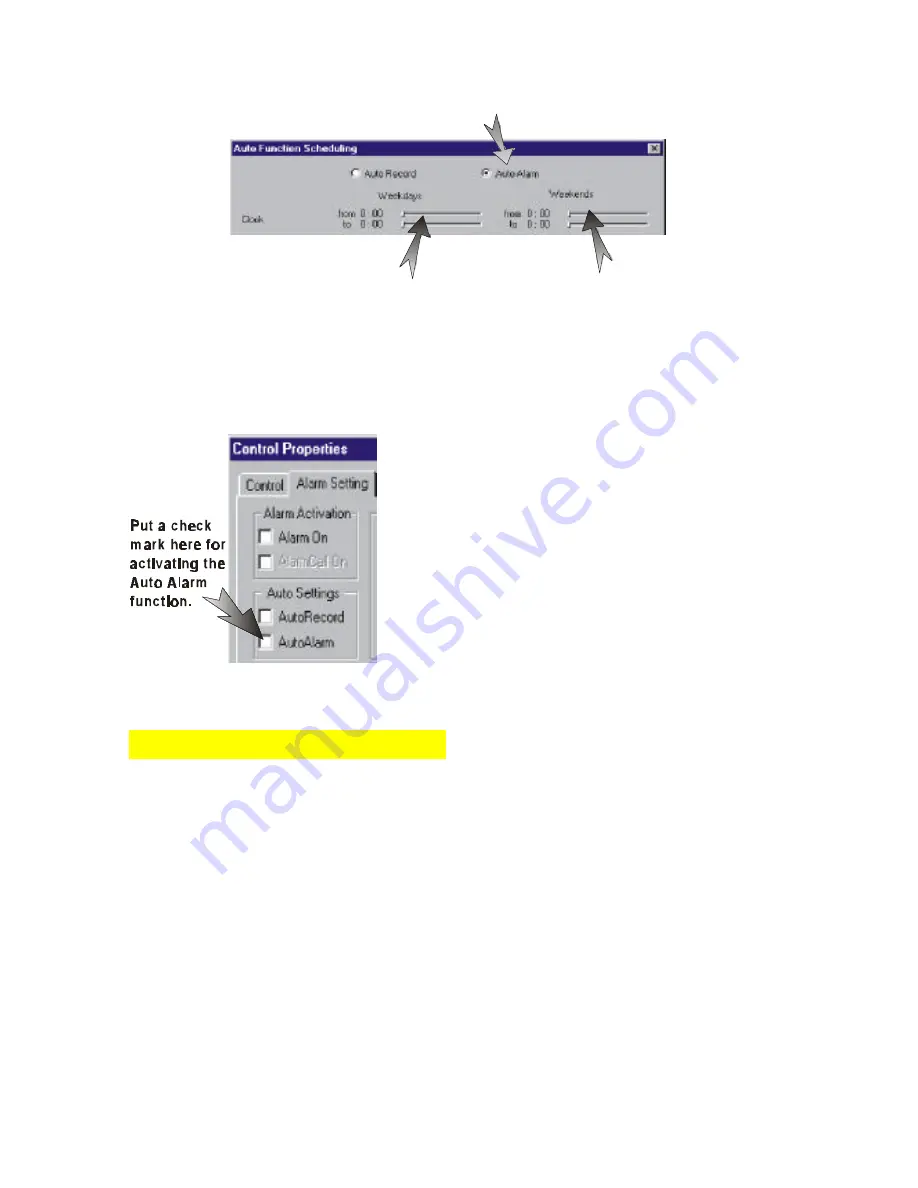
Select this if you are making
a scheduled alarm recording.
Adjust the scroll bars for weekdays
recording start and end times.
Adjust the scroll bars for weekends
recording start and end times.
22
Users are not able to control the time interval between frames during an alarm recording.
Next, click on the Control Properties button. Go to the
Alarm Setting tab. Under the Auto Setting section, put
a check mark on AutoAlarm. Click on the Apply or
OK button when you are done.
You can use the Alarm Time Limit, Alarm Call On,
and Alarm PreRecord features with this selection.
To stop Auto Alarm Recording, go through the steps
above and deselect what you have set.
Continuous Motion Detection
Motion Detection can be applied in a designated area or the whole area of an image
window. When motion is detected within that area, an alarm situation would arise. This
would in turn initiate a recording process.
To select continuous motion detection for a particular image window, go to the Alarm
Setting tab of the Control Properties window, put a check mark against the desired image
input of the Motion Detection section. Notice that at the bottom of this section, there is
sensitivity scale. This scale allows you to set the tolerance of motion within that designated
area. The “D” button, which is on the left of this scale, when depressed would reset this
scale to default setting. Select Alarm On under the Alarm Activation section. This puts
the DigiGuard PCI on alert for Motion Detection Alarm Recording. Click on the Apply
button. Then click OK.


