127
SETUP MENU
Using Mouse
Click on the different parameters and click to change its value. When finished, make sure that
you save the settings by clicking on [Save].
Using Front Panel/Remote
First, use
buttons to highlight different parameters on the screen. Then, press
↵
button to modify or to get into the sub-menu to change its parameter. When finished, make sure
that you save the settings by highlighting [Save] and press the
↵
button.
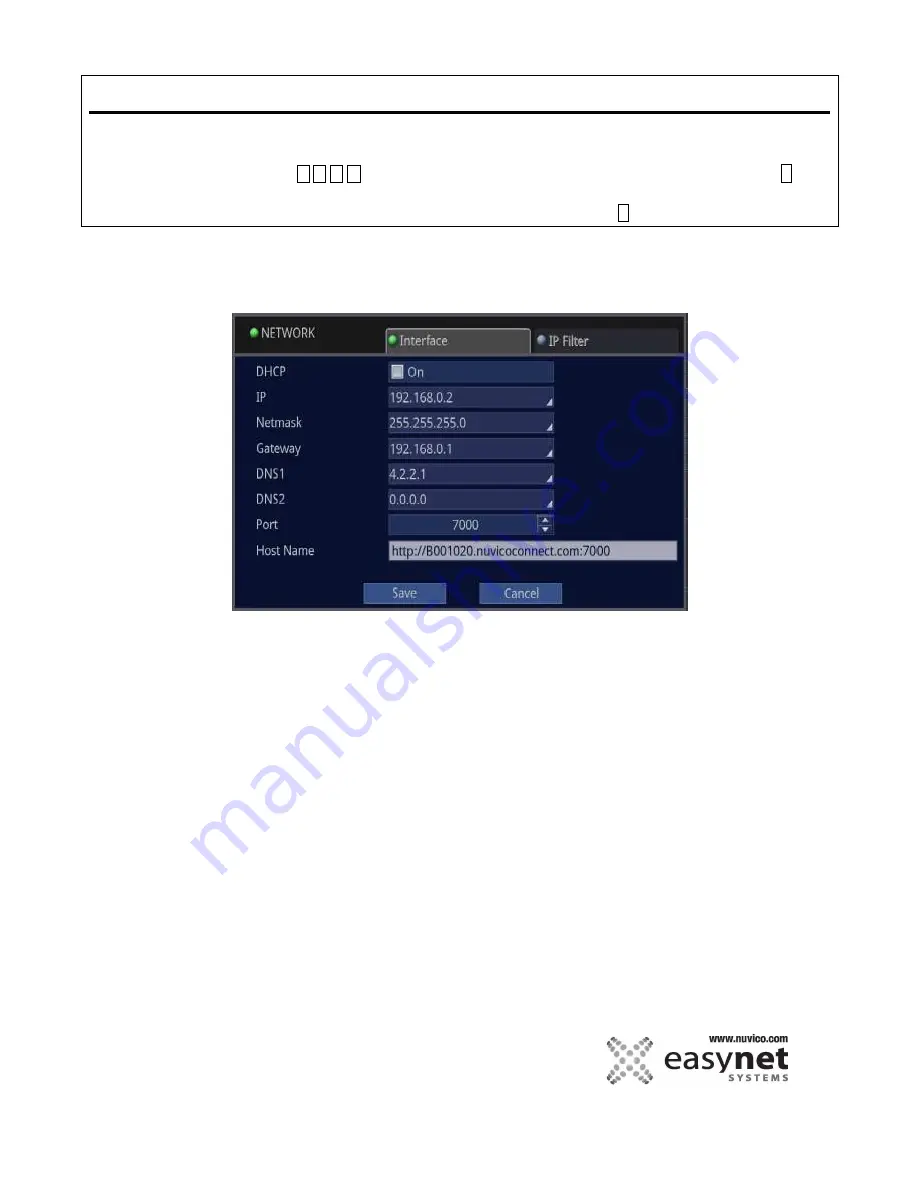
INTERFACE
Input the appropriate values for network connection.
To find out the values, please contact the network administrator or Internet Service Provider.
DHCP:
Enable this if your network has DHCP server which give out IP addresses automatically.
IP:
Specify an unique IP address that can be used on your network.
Netmask:
Specify a Subnet Mask address that can be used on your network.
Gateway:
Specify a Gateway address that can be used on your network.
DNS1:
It is recommended that you do not change this setting which is 4.2.2.1
DNS2:
It is recommended that you do not change this setting.
Port:
Default DVR port is 7000. You can change this if you wish.
Host Name:
If the DVR is communicating to our DDNS server, it will show the host name, otherwise, it will show only
the IP address.
Содержание EasyNet ED-P1600
Страница 1: ......
Страница 9: ...9 OVERVIEW Part Names and Functions Front ED C400 ED C800 ED C1600 ED P400 ED P800 ED P1600...
Страница 10: ...10 OVERVIEW ED U1600...
Страница 13: ...13 OVERVIEW Part Names and Functions Rear ED C400 ED C800 ED C1600...
Страница 14: ...14 OVERVIEW ED P400 ED P800 ED P1600...
Страница 15: ...15 OVERVIEW ED U1600...
Страница 17: ...17 OVERVIEW Remote Control...
Страница 79: ...79 SETUP MENU QUICK SETUP...
Страница 134: ...134...
Страница 135: ...135...
Страница 136: ...136...


