Section 5 - 3
www.notifierknowledge.com
997-670-000-2
Navigating the Panel Menus
Operating Manual
OR
5.1.1.1 To Disable a Zone or Device
This description is for a panel working in stand-alone mode.
Performing disablements over a network is described after this.
1
Use the
or
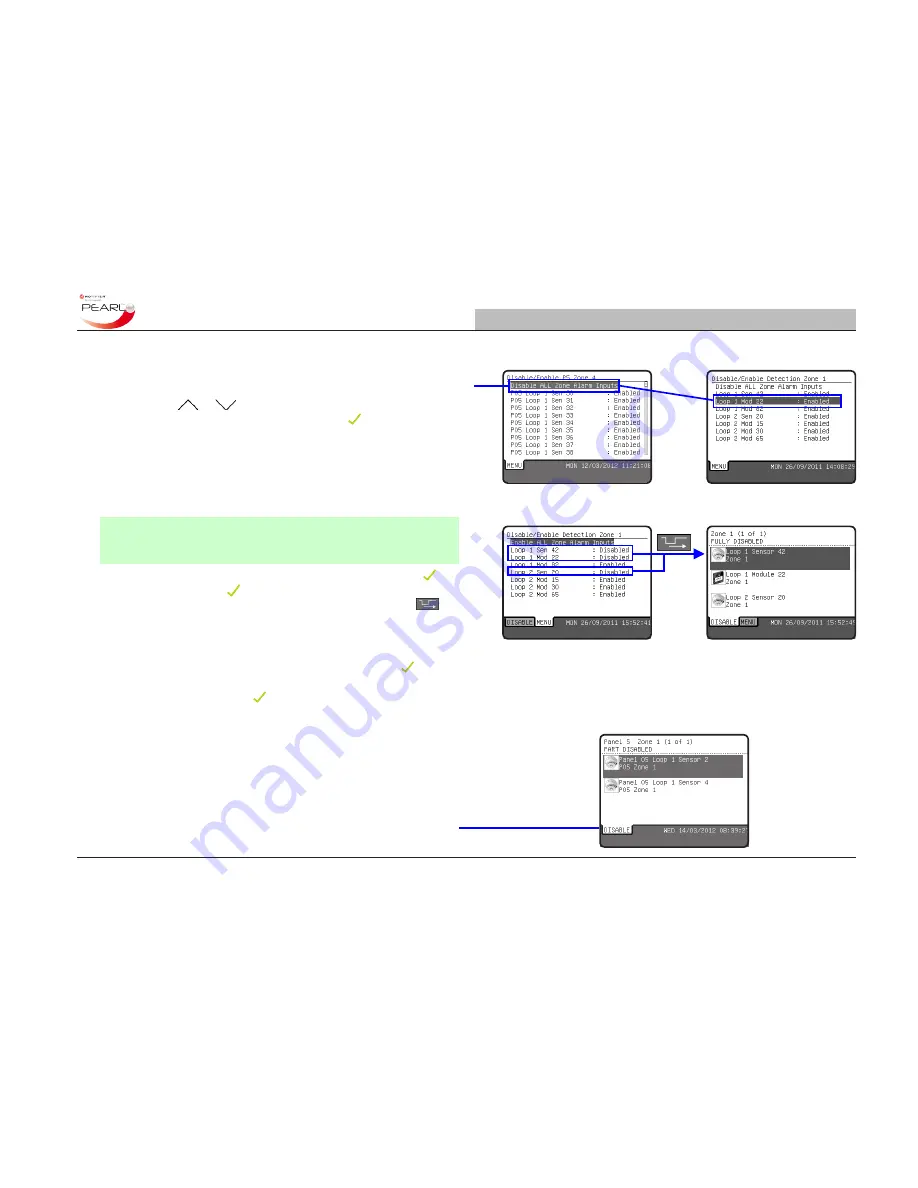
navigation buttons to highlight the zone to
be disabled/enabled and then press the key to change its
state. The user is now given the choice of disabling/enabling ALL
the
zone alarms inputs
(highlighted by default) or individual
devices for the selected zone. In the example opposite, zone 4
was selected and all the devices in that zone are listed together
with an indication of their individual current enabled/disabled
state - in this case all devices are ‘Enabled’.
Note:
Devices that are not zone alarm inputs can be disabled
individually. However, zone output devices, such as sounders,
cannot be disabled individually.
2
To disable/enable the entire zone (default selection) press the key.
Each press of the key toggles the state of the zone: disabled
or enabled. After disabling a zone or device(s), press the
key
to display the ‘DISABLE’ tab and view the disabled devices.
However, if the toggle function is used for a part-disabled zone
then, depending on whether any devices are not zone alarm inputs,
the ‘part-disabled’ state is retained, even though the key has
been pressed to toggle the state
.
Also, with any device in the list
highlighted pressing the key toggles its ‘enabled/disabled’ state.
5.1.1.2 Panel Disablements over a Network
When disabling a zone on a network you will be prompted to enter a
panel ID number before the zone selection can be made. Enter the
panel ID number and then make the zone or device selection as for
a stand-alone panel (see above).
With any active disablements all the panels on the network display
the DISABLE tab with all the disabled devices listed.


