7
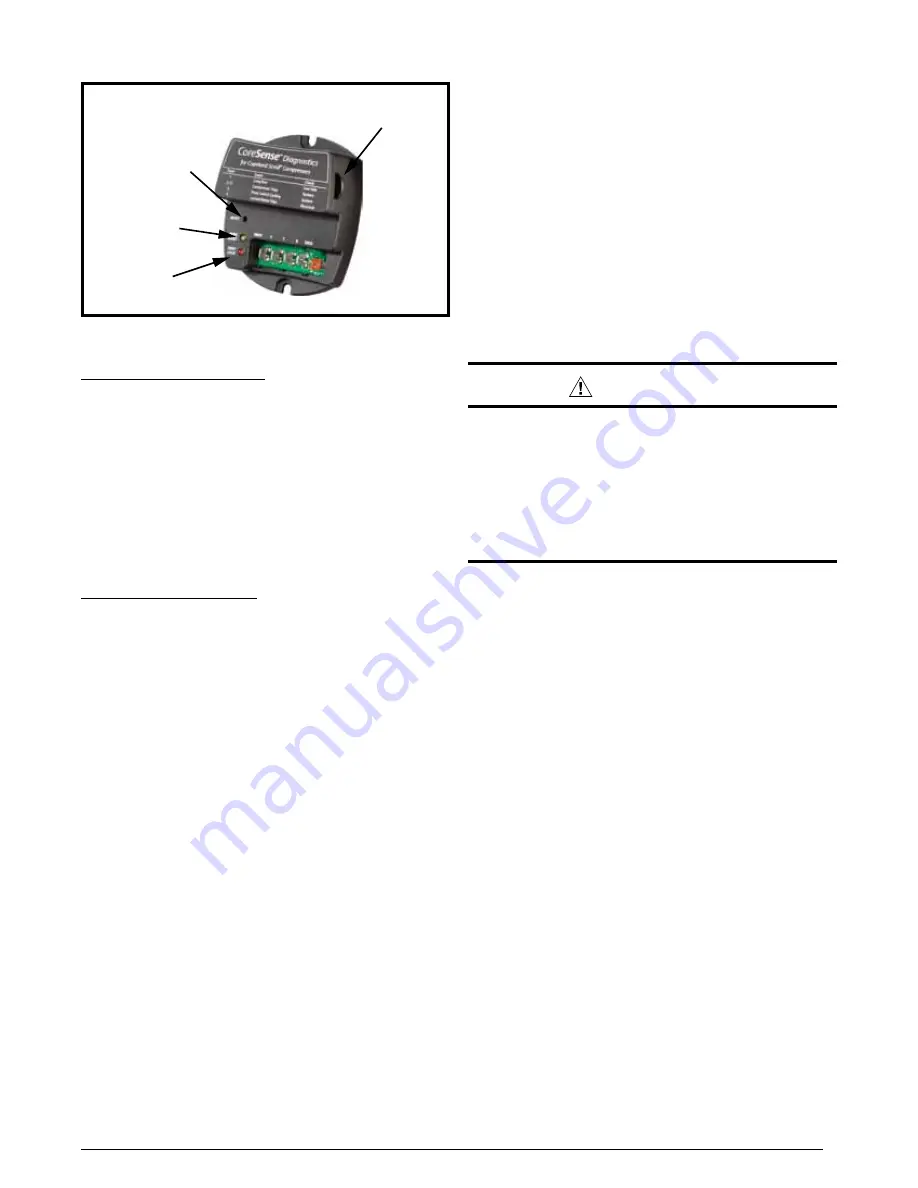
Figure 5. CoreSense
TM
Diagnostics Module
Compressor
Common Wire
Reset Button
Trip / Lock
(Red LED)
Run / Alert
(Yellow LED)
Compressor Protection
The CoreSense
TM
Diagnostics module utilizes proprietary
algorithms to protect the compressor and system from
repeated trips of system pressure controls and the
compressor internal overload. The protection terminal
of the module should be wired in series with the system
low pressure and high pressure cutouts, as well as the
compressor contactor. When the module detects a series
of trips as described below, it will activate a lockout feature
that opens the normally closed protection contacts in
the module, thereby cutting power to the contactor and
shutting off the compressor.
Resetting Alert Codes
When the CoreSense
TM
Diagnostics module has detected a
series of adverse conditions that have caused it to lockout
the compressor, and after the issue has been resolved,
it is necessary to manually reset the module in order to
clear the present alert code.
The primary way of clearing the code and resetting the
alert is to press the reset button located on the module.
NOTE: Pressing the reset will require a pin or a mini
electronics screwdriver. This button must be pressed and
held for a minimum of one second for the module to be
reset. Pressing the reset button clears the immediate lock
code and the seven day operating history. It will not clear
the permanent module history. In the case of the three-
wire module, the codes can be reset or cleared by cycling
power to the module. This can be done by disengaging
the Common (C) terminal. This will not clear the seven
day operating history.
START UP & ADJUSTMENTS
Pre-Start Check List
√
Verify the unit is level and has sufficient clearances for
unobstructed airflow.
√
Verify the outdoor coil and top of the unit are free from
obstructions and debris, and all equipment access/
control panels are in place.
√
Verify that the line voltage power leads are securely
connected and the unit is properly grounded.
√
Verify that the low voltage wires are securely connected
to the correct leads on the low voltage terminal strip.
√
Verify that the power supply branch circuit overcurrent
protection is sized properly.
√
Verify that the thermostat is wired correctly.
Start-Up Procedures
WARNING:
This unit is equipped with a crankcase heater.
Allow 24 hours prior to continuing the start up
procedures to allow for heating of the refrigerant
compressor crankcase. Failure to comply may
result in damage and could cause premature
failure of the system. This warning should be
followed at initial start up and any time the power
has been removed for 12 hours or longer.
Air Circulation - Indoor Blower
1. Set the thermostat system mode on OFF and the fan
mode to ON.
2. Verify the blower runs continuously. Check the air delivery
at the supply registers and adjust register openings for
balanced air distribution. If insufficient air is detected,
examine ductwork for leaks or obstructions.
3. Set the thermostat fan mode to AUTO and verify the
blower stops running.
Short Cycle Protection
1. Set the thermostat system mode to COOL. Observe the
temperature setting of the thermostat and gradually raise
the set-point temperature until the unit de-energizes.
2. Immediately lower the set point temperature of the
thermostat to its original setting and verify that the
indoor blower is energized and outdoor unit remains
de-energized.
3. After approximately 5 minutes, verify the outdoor unit
energizes and the temperature of the discharge air is
cooler than the room temperature.
Содержание T4BD-042 Series
Страница 19: ...19...


