background image

15

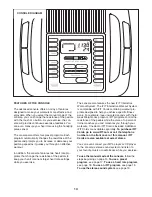
HOW TO USE THE MANUAL MODE

Note: If there is a sheet of clear plastic on the face of

the console, remove the plastic.

1. Press any button on the console or begin ped-

aling to turn on the console.

When you turn on the console, the display and the

program target pacer will light. A tone will then

sound and the console will be ready for use.  

2. Select the manual mode.

When you turn on the console, the manual mode

will be selected. If you have selected a program,

reselect the manual mode by pressing any of the

Programs buttons repeatedly until a track appears

in the left side of the display.

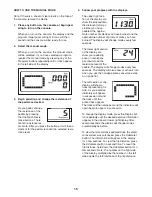
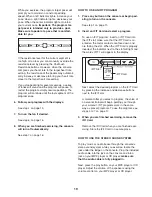
3. Begin pedaling and change the resistance of

the pedals as desired.

As you pedal, change

the resistance of the

pedals by pressing

the OneTouch Resis-

tance buttons. There

are ten resistance lev-

els. Note: After you press the buttons, it will take a

moment for the pedals to reach the selected resis-

tance level. 

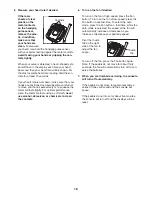
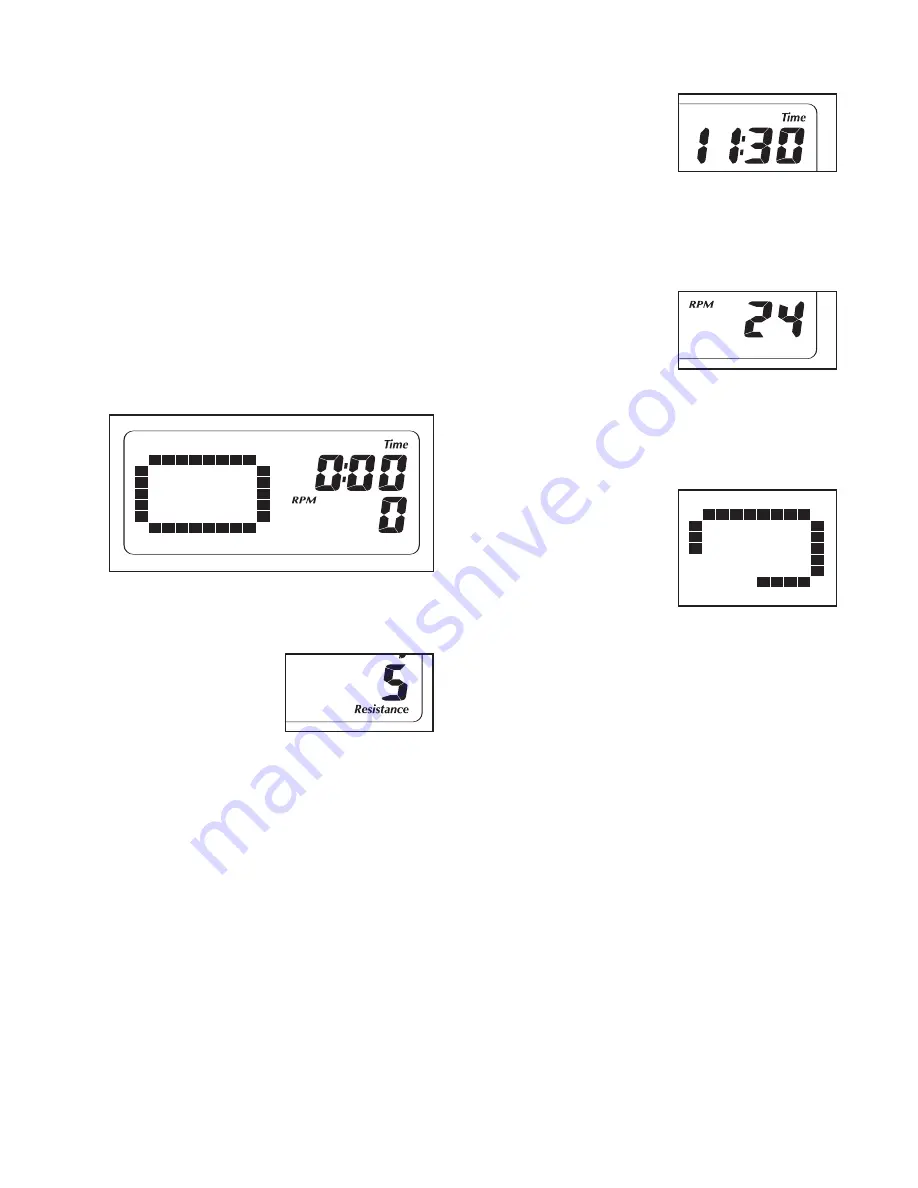
4. Follow your progress with the displays.

The upper right sec-

tion of the display can

show the elapsed time,

the distance (total rev-

olutions) you have

pedaled, the approxi-

mate number of calories you have burned, and the

approximate number of grams of carbs you have

burned. The display will change modes every few

seconds. 

The lower right section

of the display can

show your pedaling

pace (in revolutions

per minute) and the

resistance level of the

pedals. The display will change modes every few

seconds. The display will also show your heart rate

when you use the handgrip pulse sensor (see step

5 on page 16). 

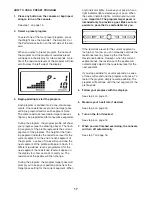
The left section of the

display will show a

track representing 1/4

mile. As you exercise,

indicators will appear

in succession around

the track until the

entire track appears.

The track will then disappear and the indicators will

again begin to appear in succession

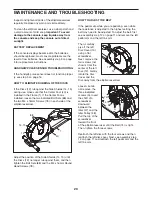
To change the display mode, press the Display but-

ton repeatedly until the desired exercise information

appears in the upper or lower right display. After

several seconds, the display will change modes

automatically as before.

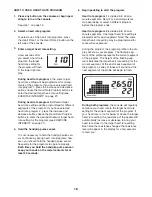
To view the total distance pedaled since the ellipti-

cal exerciser was purchased, press the Odometer

button. The information will appear in the display

for a few seconds. To view the trip distance, press

the Odometer button a second time. To reset the

trip distance, hold down the Odometer button for a

few seconds. Note: The number on the right side

of the display multiplied by the number on the left

side equals the total distance or the trip distance.

Содержание 30710.0

Страница 1: ...facturer we are com mitted to providing complete customer satisfaction If you have questions or if parts are damaged or missing PLEASE CONTACT OUR CUSTOMER SERVICE DEPARTMENT DIRECTLY CALL TOLL FREE 1...

Страница 2: ...IMITED WARRANTY Back Cover 2 NordicTrack is a registered trademark of ICON IP Inc WARNING DECAL PLACEMENT 246726 246725 246724 246723 210124 209490 246722 246721 246724 246723 210124 209490 246 246 16...

Страница 3: ...e with a mat beneath it to protect the floor or carpet Make sure that there is enough clearance around the elliptical exerciser to mount dis mount and use it 6 Inspect and properly tighten all parts r...

Страница 4: ...nual carefully before you use your elliptical exerciser If you have ques tions after reading this manual please see the front cover of this manual To help us assist you note the product model number a...

Страница 5: ...mbly Note Some small parts may have been pre assembled If a part is not in the parts bag check to see if it has been preassembled M8 x 23mm x 2mm Washer 96 8 M8 Split Washer 97 16 M4 x 16mm Round Head...

Страница 6: ...ts side Attach the Center Foot 40 to the Frame 1 with two M4 x 16mm Round Head Screws 78 Then return the elliptical exerciser to the upright posi tion Orient the Rear Stabilizer 3 as shown While anoth...

Страница 7: ...he Upright 10 near the Frame 1 connect the Upper Wire Harness 65 to the Lower Wire Harness 64 Then insert the Upright 10 into the Frame 1 Attach the Upright with four M8 x 19mm Button Screws 85 and fo...

Страница 8: ...into the Upright 10 Be careful not to damage the Upper Wire Harness 65 Apply a small amount of grease to a Wave Washer 80 Slide the Wave Washer onto the left end of the Upper Body Axle 71 Identify th...

Страница 9: ...it to warm to room temperature before inserting batteries into the Console If you do not do this the console displays or other electronic components may become damaged Remove the battery cover and in...

Страница 10: ...78 Repeat this step for the Right Pedal not shown and the other Link Arm not shown 11 34 96 96 97 97 90 30 78 39 10 While another person holds the Console 11 near the Upright 10 connect the console w...

Страница 11: ...r Body Leg Spacer is facing out ward Then slide the other Large Wave Washer onto the left Crank Arm 55 Slide the left Pedal Arm 32 onto the Left Upper Body Leg 24 while sliding the left Link Arm 30 on...

Страница 12: ...rciser first hold the handle press the latch button and then lower the frame to the floor HOW TO MOVE THE ELLIPTICAL EXERCISER To move the elliptical exerciser first fold it as described at the left N...

Страница 13: ...ction It is recommended that you turn the crank arms in the direction shown by the arrow at the right how ever for variety you can turn the crank arms in the opposite direction To dismount the ellipti...

Страница 14: ...atures the new iFIT Interactive Workout System The iFIT Interactive Workout System is compatible with iFIT Cards containing workout pro grams designed to help you achieve specific fitness goals For ex...

Страница 15: ...imate number of grams of carbs you have burned The display will change modes every few seconds The lower right section of the display can show your pedaling pace in revolutions per minute and the resi...

Страница 16: ...the metal contacts using a soft cloth never use alcohol abrasives or chemicals to clean the contacts 6 Turn on the fan if desired To turn on the fan at high speed press the Fan button To turn on the...

Страница 17: ...sh If a different resistance level is programmed for the next segment the resistance level will appear in the display for a few seconds to alert you The resistance of the pedals will then change Durin...

Страница 18: ...ver you should hold the handgrip pulse sensor frequently for the programs to operate properly Each time you hold the handgrip pulse sensor keep your hands on the metal contacts for at least 30 seconds...

Страница 19: ...1 Press any button on the console or begin ped aling to turn on the console See step 1 on page 15 2 Insert an iFIT Card and select a program To use an iFIT program insert an iFIT Card into the iFIT s...

Страница 20: ...of the Side Shields 14 15 until the Discs 12 no longer rub against them and then tighten the Bolt Sets 88 and the M4 x 16mm Round Head Screws 78 HOW TO ADJUST THE BELT If the pedals slip while you are...

Страница 21: ...ercise If your goal is to strengthen your cardiovascular system you must perform aerobic exercise which is activity that requires large amounts of oxygen for prolonged periods of time For aerobic exer...

Страница 22: ...lles Stretch With one leg in front of the other reach forward and place your hands against a wall Keep your back leg straight and your back foot flat on the floor Bend your front leg lean forward and...

Страница 23: ...23 NOTES...
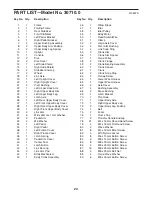
Страница 24: ...Arm Pad 44 1 Eddy Mechanism 45 1 Eddy Crank Assembly 46 1 Pillow Block 47 1 Idler 48 1 Idler Pulley 49 1 Eddy Motor 50 1 Reed Switch Wire 51 1 Clamp 52 2 Large Axle Cover 53 4 Pivot Arm Bushing 54 4...

Страница 25: ...parts are not illustrated 91 2 M10 x 60mm Button Bolt 92 2 M10 x 78mm Carriage Bolt 93 2 M10 x 80mm Button Screw 94 4 M6 Nylon Locknut 95 4 M8 Washer 96 8 M8 x 23mm x 2mm Washer 97 16 M8 Split Washer...

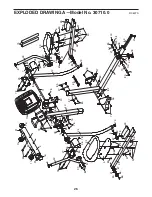
Страница 26: ...37 39 39 65 66 66 67 67 67 67 68 68 69 71 7 7 7 7 8 8 9 9 70 25 21 21 38 40 41 16 16 92 91 82 78 85 96 80 78 78 78 84 97 97 78 83 83 83 78 78 86 95 89 73 73 77 77 78 78 78 85 96 80 78 84 97 84 97 97 8...

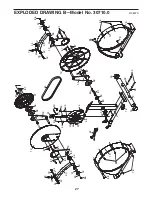
Страница 27: ...49 50 51 53 53 53 53 55 55 56 57 58 58 59 59 60 61 64 18 18 42 42 42 42 43 43 54 54 54 54 62 62 63 63 74 87 87 94 94 33 33 87 87 81 81 79 89 95 86 88 88 88 88 87 87 87 87 81 89 95 86 79 78 78 99 99 7...

Страница 28: ...abuse misuse improper or abnormal usage or repairs not provided by an ICON autho rized service center to products used for commercial or rental purposes or to products used as store dis play models N...

Отзывы: