


2
Motion Sensor - to adjust motion sensor settings select the Motion Sensor
button on the remote (labeled L below)
B
A
C
D
E
F
G H
I
J
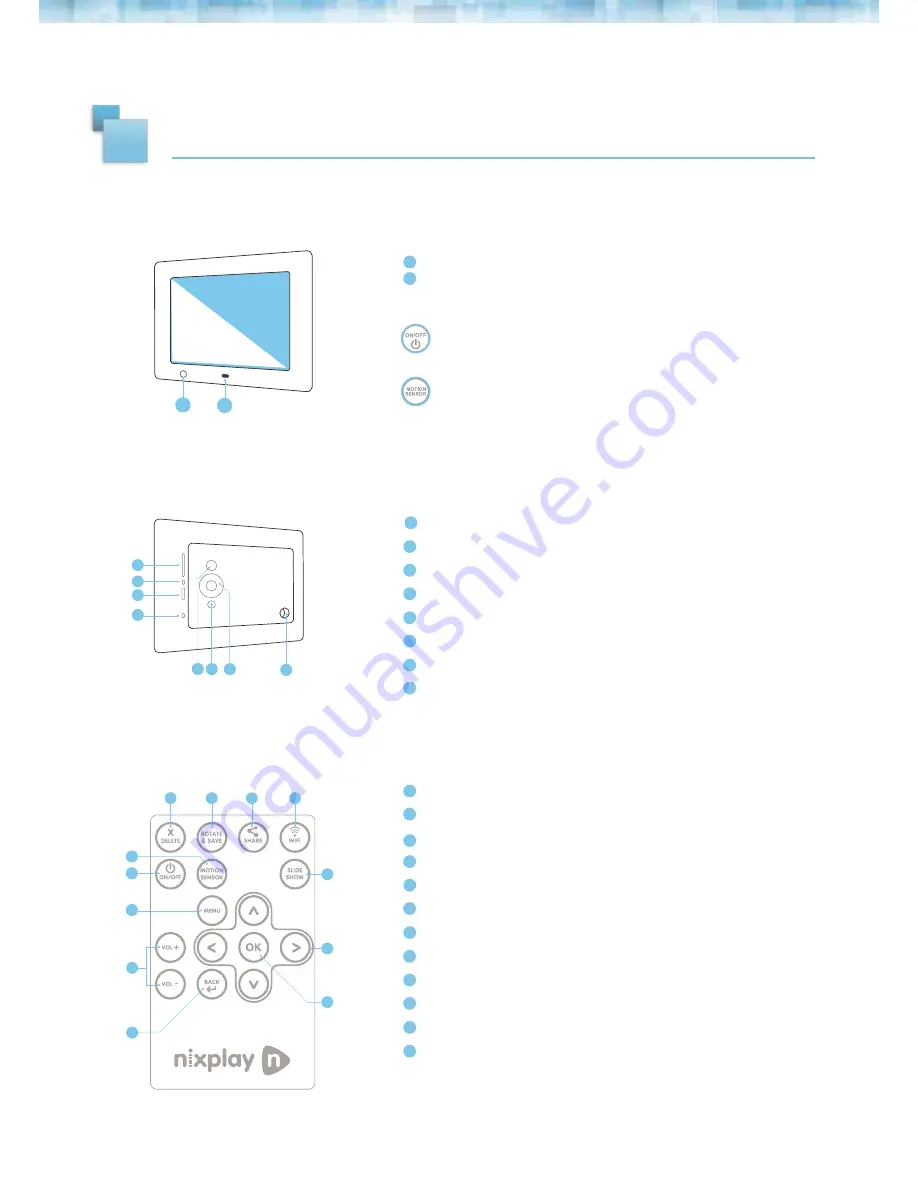
1.1 FRONT OF CLOUD FRAME
1.2 BACK OF CLOUD FRAME
1.3 REMOTE
SD/SDHC Card Slot - Connect and view external photos from the memory card
Headphone/Speaker port - Connect your headphones or speakers
USB Port - Connect your USB flash drive and view photos
Power Adapter DC-in (5V) - Plug in power cable for power
ON/OFF Button - Press and hold to power on the Cloud Frame
Menu Button - This will allow you to go back a step
4-way Menu Control and Play button - Helps you navigate and select
Stand screw hole
Delete - Delete selected photo
Rotate & Save - Rotates a selected photo 90 degrees at a time
Share - Email any photo on the Cloud Frame to your friends
WiFi Setting
Slide Show - Starts the slideshow (whenever you are in the Frames settings)
UP/DOWN/LEFT/RIGHT - Navigate through the Cloud Frame’s menus
OK / Play - (Confirms changes made on Cloud Frame)
Back - Go Back a step in any of the Cloud Frame’s menus
Vol- / Vol+ - Adjust the volume when you watch a video
Menu - Goes directly to the main menu
ON / OFF - Turns your Frame on or puts it on standby
Motion Sensor - Allows you to select the motion sensor timer or just turn the
setting OFF if you don’t want it
IR Sensor for Remote - Receives signals from the remote
To Power On - press & hold ON/OFF button for about 3 seconds
OVERVIEW
1
A
B
C
D
E
F
G
H
I
J
K
L
A
B
Motion Sensor - Senses movement and turns the Cloud Frame ON and OFF
C
D
E
F
G
H
I
J
C
D
E
F
G
A
B
H
I
J
K
L
Содержание Cloud Frame
Страница 1: ...1 Cloud Frame User Manual Version 3 0 15 01 14...
Страница 13: ...12...


