background image

3.  The minutes flash. Slowly press the “ + ” 

Button to scroll minutes up or the “ - ” 

Button to scroll minutes down. Release 

“ + ” or “ - ” Button when the correct 

minutes are displayed. Press “ S “ Button 

and release to save the minutes and go 

to the next step.

4.  The month (number) flashes. 

Slowly press and release the “ + ” 

Button to increase the month and the 

“ - ” Button to de crease the month. 

Press and release “ S ” Button to save 

the month and go to the next step.

5.  Slowly press and release the “ + ” 

Button to increase the day and the 

“ - ” Button to de crease the day. 

Press and release ” S ” Button to 

save the day and go to the next step. 

6.  Slowly press and release the “ + ” 

Button to increase the year or the “ - ” 

Button to decrease the year. Press and 

release the “ S ” Button to save the year.

Note: 

Day of the week (Mon, Tue, 

Wed, Thu, Fri, Sat, Sun) self-

adjusts when month, day or year 

are changed.

Note: 

Meter beeps every time a setting is 

confirmed (“ S ” Button is pressed).

31

Tyou_OB_Guts_E4GBY03FDr20.indd   31

11/8/13   1:43 PM

Содержание TRUEyou

Страница 1: ...l UK 0800 08 588 08 Distributed by Nipro Diagnostics UK Ltd 25 Barnes Wallis Road Segensworth East Fareham Hampshire PO15 5TT 2013 Nipro Diagnostics Inc E4GBY03FD Rev 20 LIFETIME WARRANTY 0197 Nipro E...

Страница 2: ...l L Two hours after meals 7 8 mmol L The TRUEyou Blood Glucose Monitoring System is intended for the quantitative determination of glucose in human whole blood taken from the finger or forearm capilla...

Страница 3: ...e TRUEyou System To start testing quickly please see the Quick Reference Guide found inside the front cover of this Owner s Booklet Please read complete Owner s Booklet and all product Instructions fo...

Страница 4: ...cations of diabetes NEVER change a treatment plan without consulting with a Doctor or Healthcare Professional Use of the TRUEyou Blood Glucose Monitoring System in a manner not specified in this Owner...

Страница 5: ...e from vial when testing Recap vial immediately after re moving Test Strip NEVER reuse Test Strips NEVER wipe Test Strips with water alcohol or any cleaner DO NOT attempt to clean and re use Test Stri...

Страница 6: ...infection 2 3 For cleaning and disinfecting the Meter see Care Cleaning Disinfecting For cleaning and disinfecting the lancing device see the lancing device s Instructions for Use We suggest cleaning...

Страница 7: ...sult from the following conditions for example 4 shock severe hypotension severe dehydration hyperglycaemia with hyperosmolarity with or without ketosis Do not use TRUEyou for the diagnosis of diabete...

Страница 8: ...arted 14 Quality Control Testing 15 Automatic Self Test 15 Control Test 16 How to Test Control Solution 17 Testing Blood 20 Obtaining a Blood Sample 20 How to Test Blood Glucose 22 Unusual Blood Gluco...

Страница 9: ...rol Solution Care 35 Test Strip Care 35 Changing Battery 36 Troubleshooting 37 Messages 38 Technical Information 40 Performance Characteristics 40 System Specifications 45 Operating Range 45 Chemical...

Страница 10: ...viewing results in Memory S Button Turn Meter on to view Average values to view results in Memory and to access Meter Set Up Button Decrease numbers in Time Date Set Up for Meter and Testing Reminders...

Страница 11: ...tery Door Use one non rechargeable 3V lithium battery CR2032 positive side up see Changing Battery Meter Label Contains serial number of Meter Identifies Meter when calling for assistance Docking Stat...

Страница 12: ...ult 6 Unit of Measure Note Factory set cannot be changed by user 7 Ketone Test Alert Symbol 8 Testing Reminder Symbol 9 Temperature Symbol 10 Drop Symbol Apply blood or Control Solution 11 Alternate S...

Страница 13: ...correct Do not touch Sample Tip to drop of sample unless Contact End is inserted into Meter Do not apply blood or Control Solution to top of Test Strip Do not smear or scrape drop with Test Strip Do n...

Страница 14: ...o on vial label has passed whichever comes first Use of Test Strips or Control Solution past the Use By Dates may give incorrect test results Discard out of date products and test with new products Co...

Страница 15: ...er first opening or date printed next to on bottle label has passed whichever comes first Control Solution Level 1 2 or 3 Testing at least 2 levels of Control Solution is recommended Call the number o...

Страница 16: ...cracked Display missing buttons etc If damage is seen do not use Meter Call for assistance Check Test Strip vial for damage cracked vial broken vial etc Discard damaged vial and all contents Test Str...

Страница 17: ...t Strip from the Test Strip vial and insert Test Strip into the Meter 3 Meter turns on The full Display appears and is replaced by the time and the blinking Drop Symbol The Meter is working correctly...

Страница 18: ...em is needed If results seem unusually high or low If Meter damage is suspected Meter was dropped crushed wet etc Performing Control Tests with more than one level of Control Solution is recommended t...

Страница 19: ...ntly swirl or invert Control Solution bottle to mix DO NOT SHAKE 5 Remove one Test Strip from vial Close Test Strip vial immediately Use Test Strip quickly after removal from vial Note If Test Strip h...

Страница 20: ...use Note Do not put drop on top of the Test Strip 9 With Test Strip still in Meter touch Sample Tip to top of the drop of Control Solution Allow drop to be drawn into Test Strip Remove Test Strip fro...

Страница 21: ...ver for phone number 12 After result is shown Strip Release Button ashes Hold Meter with Test Strip pointing down Press Strip Release Button to release and discard Test Strip in appropriate container...

Страница 22: ...esults wash hands before using the System to test blood especially after handling fruit or other foods containing sugar From Fingertip 1 Prepare ngertip by washing hands in warm soapy water Rinse well...

Страница 23: ...e lancet from lancing device Discard used lancet into appropriate container Important Notes Regarding Forearm Testing6 Check with your Doctor or Healthcare Professional to see if forearm testing is ri...

Страница 24: ...o Meter Meter turns on and shows the Drop Symbol in the Display Keep Test Strip in Meter until testing is nished Alternate Site Testing To mark test as alternate site forearm result press Button ALT S...

Страница 25: ...the Meter beeps and dashes appear across Meter Display Note If Meter does not beep or begin testing soon after touching blood drop to Sample Tip discard Test Strip Repeat test with new Test Strip and...

Страница 26: ...the test An error message appears and result is not stored in Memory Retest with a new Test Strip and do not remove before result is displayed 9 Meter turns off Result is stored in Memory with day dat...

Страница 27: ...glucose hyperglycaemia symptoms may be intense thirst a need to urinate often a dry mouth vomiting and headache Meter reads blood glucose levels from 1 1 33 3 mmol L If blood test result is less than...

Страница 28: ...ears in Display with glucose result see Set Ketone Test Alert When the Ketone Alert Symbol is shown it does not mean that ketones have been detected in blood Perform a ketone test per the health plan...

Страница 29: ...When comparing results between TRUEyou and a laboratory system perform a TRUEyou blood test within 30 minutes of laboratory test Diabetes experts have suggested that 95 glucose meter results should ag...

Страница 30: ...ed outside the recommended testing temperature see How to Test Control Solution the Control Solution may read as a blood test and be included in the Averages Start with Meter off Press and release S B...

Страница 31: ...ry If there are no results in Memory dashes appear with the Memory Symbol 3 Press Button and release to advance to the next result Press Button to scroll forward through blood results or Button to scr...

Страница 32: ...during Set Up all settings are saved The Meter takes you back to Step 1 1 Press and hold S Button until the full Display is shown and a tone sounds around 5 seconds Release S Button 2 The hour ashes P...

Страница 33: ...utton to save the month and go to the next step 5 Slowly press and release the Button to increase the day and the Button to de crease the day Press and release S Button to save the day and go to the n...

Страница 34: ...ne Test Alert Display shows rst Reminder setting A 1 Press Button on or Button off to turn Reminder on or off 9 If on is chosen press S Button The hour ashes Press the Button to scroll up the hour or...

Страница 35: ...t setting the time for next 3 Reminders if needed 12 Press and hold S Button when nished to turn off Meter Meter turns off after 2 minutes of non use Note If Testing Reminders are set the Testing Remi...

Страница 36: ...ecting removes infectious agents To Clean the Meter Clean the Meter when visibly dirty or if blood is on the Meter Never put Meter in liquids or allow any liquids to enter the Test Port Wipe Meter wit...

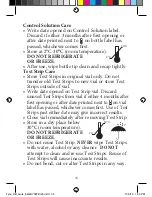
Страница 37: ...ned on Test Strip vial Discard unused Test Strips from vial if either 4 months after first opening or after date printed next to on vial label has passed whichever comes first Use of Test Strips past...

Страница 38: ...ttery Door Note Use non rechargeable 3V lithium battery CR2032 5 Press S Button to turn Meter on and check time date and Testing Alerts and Reminders see Meter Set Up If Meter does not turn on check t...

Страница 39: ...at with new Test Strip Call for assistance Reason Test Strip inserted upside down or backwards Test Strip not fully inserted Test Strip Error Dead or no battery Battery in backwards Meter Error Reason...

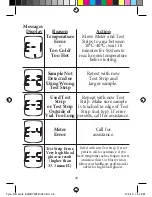
Страница 40: ...10 minutes for System to reach room temperature before testing Retest with new Test Strip and larger sample Repeat with new Test Strip Make sure sample is touched to edge of Test Strip not top If erro...

Страница 41: ...or persists call for assistance Call for assistance Low About 50 tests can be done before battery dies Dead Battery Symbol appears and beep sounds before Meter turns off Change the battery Retest with...

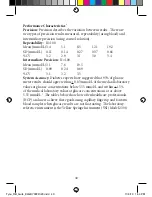
Страница 42: ...3 2 3 5 System Accuracy Diabetes experts have suggested that 95 of glucose meter results should agree within 0 83 mmol L of the medical laboratory values at glucose concentrations below 5 55 mmol L a...

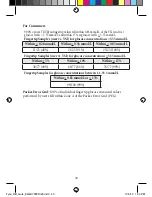
Страница 43: ...mmol L Within 0 83 mmol L 74 180 41 155 180 86 178 180 98 8 Fingertip Samples HCP vs YSI for glucose concentrations 5 55 mmol L Within 5 Within 10 Within 15 272 420 71 395 420 94 418 420 99 5 Fingert...

Страница 44: ...28 100 Forearm Samples HCP vs YSI for glucose concentrations 5 55 mmol L Within 5 Within 10 Within 15 50 72 69 64 72 89 72 72 100 Forearm Samples for glucose concentrations between 1 1 33 3 mmol L Wit...

Страница 45: ...mmol L Within 0 83 mmol L 11 23 48 21 23 91 23 23 100 Fingertip Samples user vs YSI for glucose concentrations 5 55 mmol L Within 5 Within 10 Within 15 38 77 49 66 77 86 76 77 99 Fingertip Samples for...

Страница 46: ...mples for glucose concentrations between 1 1 33 3 mmol L Within 0 83 mmol L or 15 100 100 100 Parkes Error Grid 100 of individual forearm glucose measured values performed by the users fell within Zon...

Страница 47: ...tely 2146 tests or 1 5 years Automatic shut off After two minutes of non use Weight 47 grams Size 89 x 55 x 17 mm Memory Size 500 glucose results Operating Range Meter Test Strips Relative Humidity 10...

Страница 48: ...o other electronically driven equipment is not anticipated The electromagnetic environment should be evaluated prior to operation of the device Do not use the meter in a very dry environment especiall...

Страница 49: ...any implied Warranty of merchantability or fitness for a particular purpose shall be limited to the lifetime in use with the original user in accordance with any state law to the contrary 5 Nipro Diag...

Страница 50: ...onsafety Fingerstick DevicesBGM html 4 Atkin S H et al Fingerstick Glucose Determination in Shock Annals of Internal Medicine 114 1020 1024 1991 5 Data on file 6 U S Food and Drug Administration Blood...

Отзывы: