59
C
o
p
y
in
g Net
w
or
k
P
rof
iles to th
e C
a
mera
Uploading Pictures to an ftp Server
12
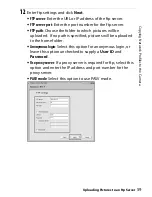
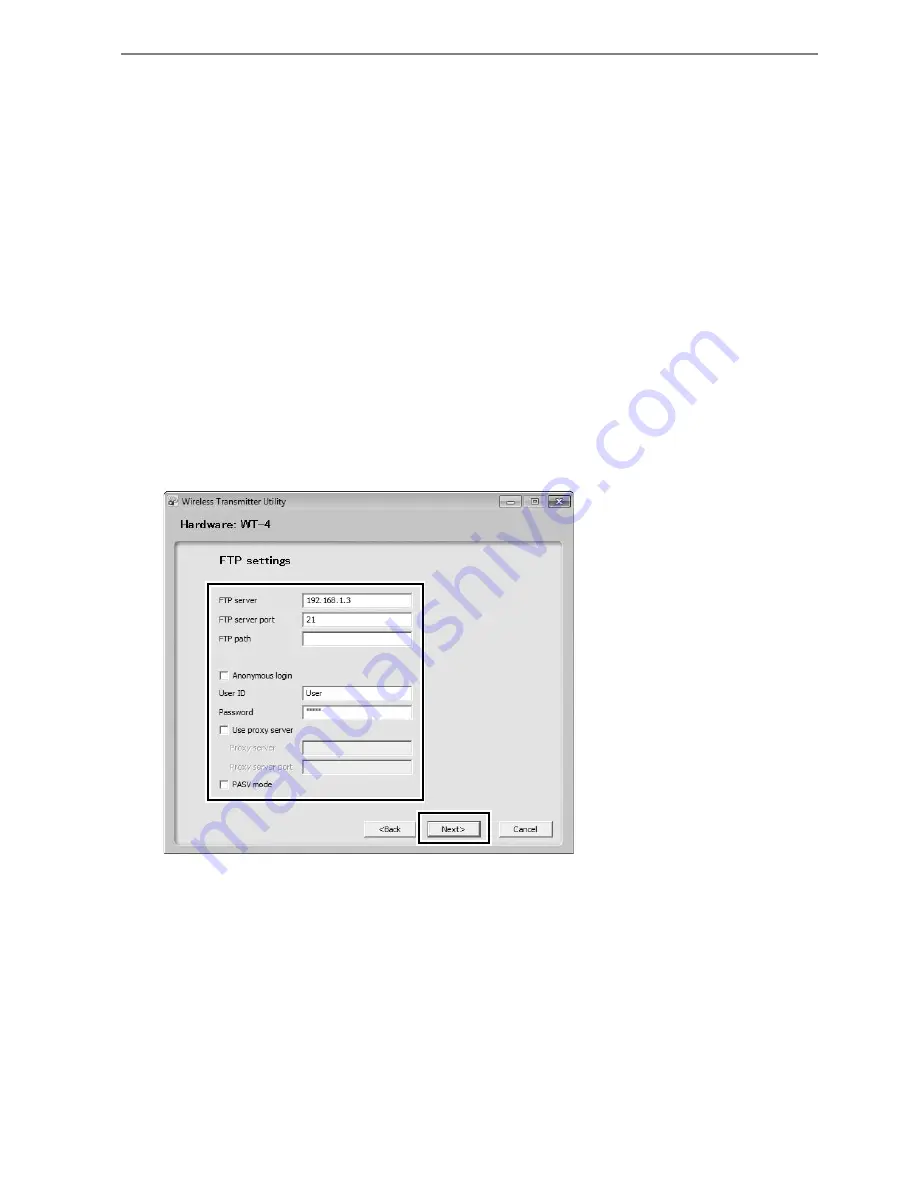
Enter ftp settings and click
Next
.
•
FTP server
: Enter the URL or IP address of the ftp server.
•
FTP server port
: Enter the port number for the ftp server.
•
FTP path
: Choose the folder to which pictures will be
uploaded. If no path is specified, pictures will be uploaded
to the home folder.
•
Anonymous login
: Select this option for anonymous login, or
leave this option unchecked to supply a
User ID
and
Password
.
•
Use proxy server
: If a proxy server is required for ftp, select this
option and enter the IP address and port number for the
proxy server.
•
PASV mode
: Select this option to use PASV mode.
Содержание UT-1
Страница 1: ...Communication Unit User s Manual En ...
Страница 30: ...18 Installing the Wireless Transmitter Utility Introduction ...
Страница 38: ...Copying Network Profiles to the Camera Using the UT 1 with a Computer 26 9 Select Manual setup and click Next ...
Страница 41: ...Copying Network Profiles to the Camera Using the UT 1 with a Computer 29 ...
Страница 60: ...PC Mode Using the UT 1 with a Computer 48 ...
Страница 69: ...57 Copying Network Profiles to the Camera Uploading Pictures to an ftp Server ...
Страница 82: ...70 Uploading Images Uploading Pictures to an ftp Server ...
Страница 103: ...Print Menu Guide 91 Print PrintModeOnly The UT 1 does not support this option ...
Страница 106: ...Device Settings Menu Guide 94 ...
Страница 119: ...107 Creating an FTP Server Appendices 9 Display ftp site properties Right click Default FTP Site and select Properties ...
Страница 138: ...126 ...
Страница 139: ......


