


III
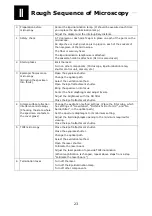
Detailed Sequence of Microscopy
2 Startup tasks
25
2
Startup tasks
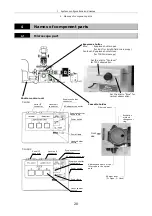
2.1
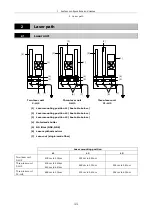
Emitting the laser
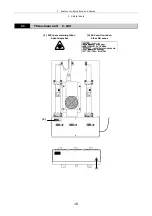
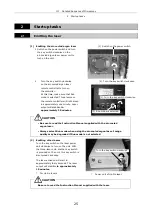
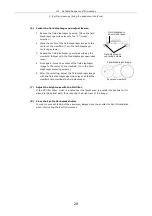
(1) Emitting the air-cooled argon laser
1 Switch on the power switch and turn
the key switch clockwise on the
air-cooled argon laser power unit to
turn on the unit.
2
Turn the key switch clockwise
on the air-cooled argon laser
remote controller to turn on
the controller.
At this time, make sure that Run
mode is selected. Three lamps on
the remote controller will light green
in approximately one minute. Laser
output will stabilize
in
approximately 15 minutes.
•
•
Be sure to read the Instruction Manual supplied with the air-cooled
argon laser.
•
Always select Run mode when using the air-cooled argon laser. Image
quality may be degraded if Run mode is not selected.
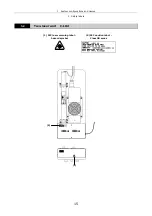
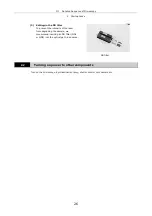
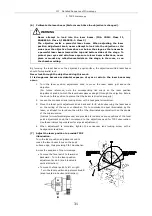
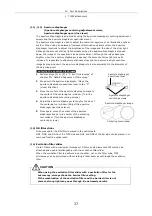
(2) Emitting other lasers
Turn the key switch on the laser power
unit clockwise to turn on the unit. With
the three-laser unit, another key switch
is provided on the unit; this key switch is
also turned clockwise.
The laser emission will start in
approximately thirty seconds. The laser
output will stabilize
in approximately
15 minutes.
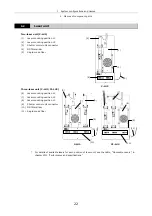
* For He-Ne lasers
*
Power unit of He-Ne laser
•
Be sure to read the Instruction Manual supplied with the laser.
Turn the key switch clockwise
(1) Turn the key switch clockwise.
(2) Run mode is selected.
(1) Switch on the power switch.
(2) Turn the key switch clockwise.
CAUTION
CAUTION
Содержание TIRF2
Страница 1: ...TIRF2 SYSTEM FOR TE2000 INSTRUCTIONS M339E 04 12 NF 2 ...
Страница 2: ......


