3
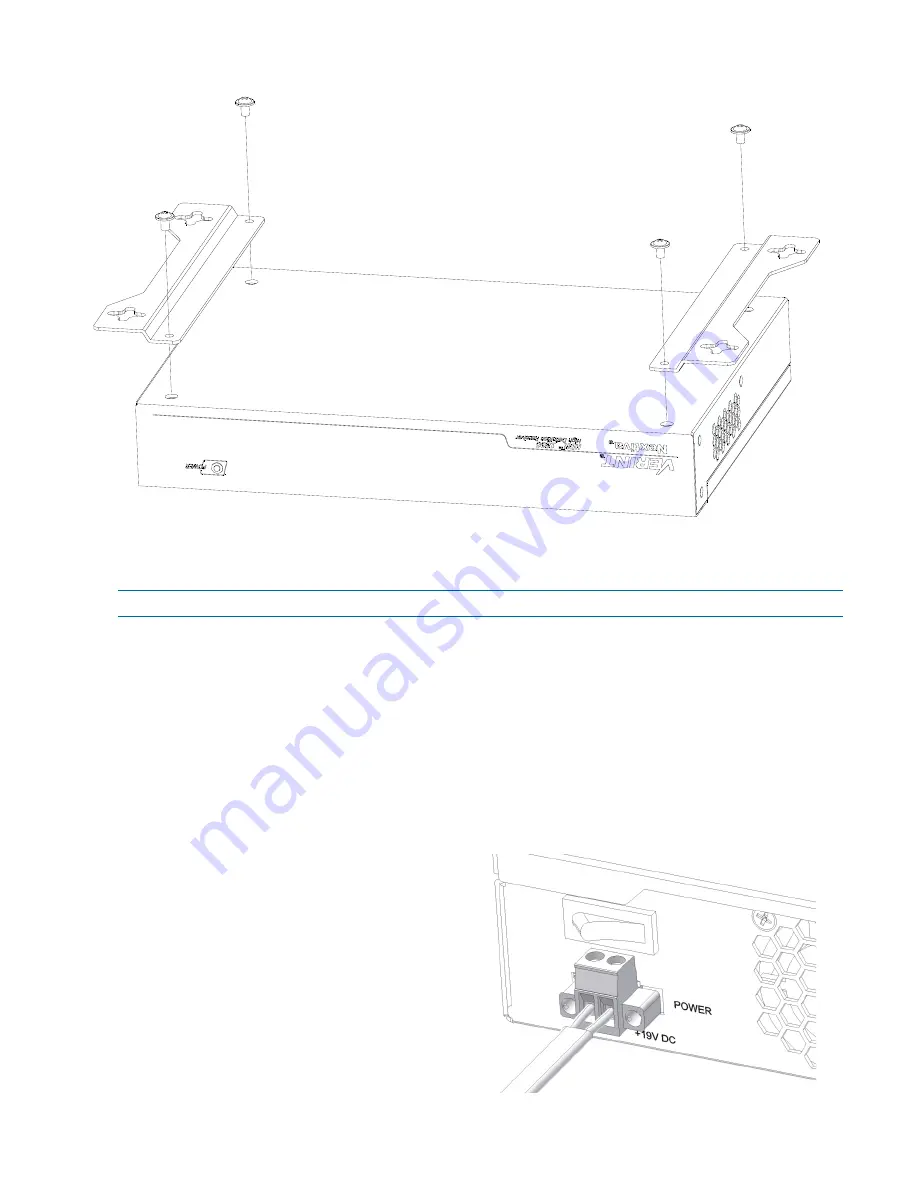
To mount the HDR 1800 on a wall:
1. Align the wall-mount brackets with the holes on the bottom of the HDR 1800.
2. Screw the wall-mount brackets to the HDR 1800 using 12 in-lb (1.35 N-m) force with 4 screws (provided).
3. Place the HDR 1800 on the wall and ensure that there is enough space on the sides of the unit for
ventilation.
NOTE:
Ensure the wall is strong enough to support the weight of the HDR 1800: 5.7lb (2.6Kg).
4. Secure the HDR 1800 to the wall using four wall screws (not provided) on each side of the HDR 1800.
Connecting the HDR 1800
This section provides the procedures for connecting the network and power cables, video monitors, and CCTV
keyboards to the HDR 1800.
Connecting the Network and Power Cables
To connect the cable for network:
Plug an ethernet cable into the LAN1 network (RJ-45) connector on the back of the HDR 1800. (LAN2 is
inactive.)
To connect the cable for power:
1. Connect the Terminal Block power connector to
the power input receptacle on the back of the HDR
1800.
2. Secure the power connector to the receptacle by
tightening the screws on each side of the
connector.
3. Plug the power adaptor into an outlet or surge-
protection device.
Connecting Power


