background image

Copyright © 2014 NEXCOM International Co., Ltd. All rights reserved

35

VMC 1100 User Manual

Chapter 5: Touchscreen Driver Installation 

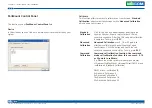
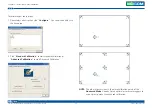
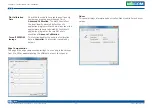
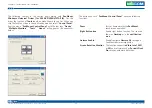
To calibrate your touchscreen:

1. Please select a device then click “

Configure

”. You can also double click 

the device too.

2. Click “

Standard


Calibration

” to start standard calibration or  

Advanced


Calibration

” to start Advanced Calibration.

NOTE:

  The older a touchscreen is, the more calibration points of the        


Advanced


Mode

 it needs. For an optimal accuracy we suggest to  

            use a stylus to make the advanced calibration. 

Содержание VMC 1100

Страница 1: ...NEXCOM International Co Ltd NEXCOM International Co Ltd Published March 2017 www nexcom com Mobile Computing Solutions Vehicle Mount Computer VMC 1100 User Manual ...

Страница 2: ...er 1 Product Introduction Overview 1 VMC 1100 Key Features 1 Hardware Specifications 3 VMC 1100 3 Mechanical Dimensions 5 Getting to Know VMC 1100 6 VMC 1100 Front Side View 6 VMC 1100 Rear View 7 Chapter 2 Using the GPS Feature Setup and Using GPS Information 12 Setup Window Screenshot 14 GPS Info Window Screenshot 14 GPS Information Instructions 15 Chapter 3 Jumpers and Connectors Before You Beg...

Страница 3: ...PenMount Monitor Menu Icon 38 PenMount Rotating Function 38 Touchscreen Configuration of PenMount 39 Digitizer Driver 39 PenMount Control Panel 40 Uninstalling PenMount Windows Universal Driver 43 Installing PenMount Linux X Window USB Driver 44 Installing PenMount Linux X Window USB Driver 44 Calibration Utilities 44 Installing PenMount WinCE Driver 44 Installing PenMount WinCE Driver 44 Touchscr...

Страница 4: ... Sata Dom Module 58 Chapter 10 Installing the OBD Module 61 Appendix A I O Address Function 64 Appendix B Vehicle Power Management Setup 81 Appendix C SMS and Dial Wake up Setting 88 Appendix D RTC Wake up Setting 89 Appendix E Auto Backlight Setting 91 Appendix F BIOS Update 92 Appendix G Changing Com Mode RS232 RS485 95 ...

Страница 5: ...s if it has a CE marking For computer systems to remain CE compliant only CE compliant parts may be used Maintaining CE compliance also requires proper cable and cabling techniques Copyright This publication including all photographs illustrations and software is protected under international copyright laws with all rights reserved No part of this manual may be reproduced copied translated or tran...

Страница 6: ...w RoHS components and new manufacturing processes maintain the highest industry quality levels for which NEXCOM are renowned The model selection criteria will be based on market demand Vendors and suppliers will ensure that all designed components will be RoHS compliant How to recognize NEXCOM RoHS Products For existing products where there are non RoHS and RoHS versions the suffix LF will be adde...

Страница 7: ...M If the components were suspected as part of the problems please note clearly which components are included Otherwise NEXCOM is not responsible for the devices parts Customers are responsible for the safe packaging of defective products making sure it is durable enough to be resistant against further damage and deterioration during transportation In case of damages occurred during transportation ...

Страница 8: ...ble surface cart or stand Follow all warnings and cautions in this manual When replacing parts ensure that your service technician uses parts specified by the manufacturer Avoid using the system near water in direct sunlight or near a heating device The load of the system unit does not solely rely for support from the rackmounts located on the sides Firm support from the bottom is highly necessary...

Страница 9: ...greater than the volt age and current rating marked on the product 11 All cautions and warnings on the equipment should be noted 12 If the equipment is not used for a long time disconnect it from the power source to avoid damage by transient overvoltage 13 Never pour any liquid into an opening This may cause fire or electrical shock 14 Never open the equipment For safety reasons the equipment shou...

Страница 10: ...o keep the unit clean use only approved cleaning prod ucts or clean with a dry cloth 3 CompactFlash Turn off the unit s power before inserting or removing a CompactFlash storage card Conventions Used in this Manual Battery Safety Measures Caution Risk of explosion if battery is replaced by an incorrect type Dispose of used batteries according to the instructions Safety Warning This equipment is in...

Страница 11: ...920 Chung Cheng Rd ZhongHe District New Taipei City 23586 Taiwan R O C Tel 886 2 8226 7796 Fax 886 2 8226 7792 Email sales nexcom com tw www nexcom com tw NEXCOM Intelligent Systems Taichung Office 16F No 250 Sec 2 Chongde Rd Beitun Dist Taichung City 406 R O C Tel 886 4 2249 1179 Fax 886 4 2249 1172 Email sales nexcom com tw www nexcom com tw Japan NEXCOM Japan 9F Tamachi Hara Bldg 4 11 5 Shiba M...

Страница 12: ... nexcomitalia it NEXCOM Shanghai Room 603 604 Huiyinmingzun Plaza Bldg 1 No 609 Yunlin East Rd Shanghai 200333 China Tel 86 21 5278 5868 Fax 86 21 3251 6358 Email sales nexcom cn www nexcom cn NEXCOM Surveillance Technology Corp Room202 Building B the GuangMing Industrial Zone Zhonghua Rd Minzhi Street Longhua District Shenzhen 518131 China Tel 86 755 8364 7768 Fax 86 755 8364 7738 Email steveyang...

Страница 13: ...y 1 6030000071X00 RJ45 to DB9 ST MD 5103123 RJ45 8P8C to DB 9P F L 1800mm 1 2 50311F0495X00 P Head Screw w Spring Flat Washer P5x14 ISO SW10x1 NI 6 3 603POW0087X00 Waterproof Power Cable Waterproof M10 5 5PIN OPEN L 130mm 1 4 603ANT0055X00 GPS GLONASS Antenna SMA Male L 5000mm 1 5 5060200193X00 Thermal Pad 40x20x3 5t mm S3S K 2 0w mk 1 6 5061100057X00 VMC 1100 SATA DOM Sponge 30x7mm 3 65T EVA Blac...

Страница 14: ...rnational Co Ltd All rights reserved xiv VMC 1100 User Manual Preface Ordering Information The following provides ordering information VMC 1100 P N 10VC0110000X0 VMC 1100 7 vehicle mount computer w Intel AtomTM E3825 2GB 4w T S ...

Страница 15: ...5 1 33GHz Compact and fanless design On screen F1 F5 function key Support GPS GPRS GSM tracker function Built in GPS Optional Dead Reckoning Support Variety of wireless communication options Support LTE Dual CAN bus support and optional OBDII SAE J1939 Wide range DC input from 9 36V SAE J1113 ISO7637 2 and SAE J1455 compliance for power design VMC 1100 Front View VMC 1100 Rear View Chapter 1 Produ...

Страница 16: ...ption processor and integrating a WVGA LCD with a brightness of 400nits and a 4 wire resistive touch sensor VMC 1100 does not compromise with its space to sacrifice its functional features It provides dual CANbus RS 232 RS 485 USB 3 0 GPIO analog input PWM and LAN signal For security VMC 1100 supports real time vehicle tracking through GPS and SMS GSM GPRS VMC 1100 can also be upgraded to a differ...

Страница 17: ...wire resistant touch Anti glare coating surface Transmission rate 78 3 CPU Chipset Intel Atom Dual Core E3825 1 33GHz Memory 2GB 204 pin DDR3L 1600MHz SO DIMM slot up to 4GB Expandable Storage 1x SATAIII SATA DOM Slot available option 16GB 32GB 64GB and 128GB Expansion 1x Half Mini PCIe socket PCIe USB for WLAN option 1x Mini PCIe socket USB UART for WWAN option 1x External module for OBD SAE J193...

Страница 18: ...WWAN module for optional Power Management Selectable boot up shut down voltage for low power protection HW design ready for 8 level delay time on off at user s self configuration Power on off ignition software detectable Support S3 and S4 suspend mode wake on RTC and SMS Operating System Windows 8 Professional WES8 Windows 7 WES7 Linux Fedora kernel V3 2 0 Environment Operating temperatures Ambien...

Страница 19: ...XCOM International Co Ltd All rights reserved 5 VMC 1100 User Manual Chapter 1 Product Introduction LAN RS 232 GPIO ADC PWM DC IN 9 36V RS 232 RS 485 CAN 212 97 144 97 75 00 75 00 40 00 49 30 50 00 Mechanical Dimensions ...

Страница 20: ...Copyright 2014 NEXCOM International Co Ltd All rights reserved 6 VMC 1100 User Manual Chapter 1 Product Introduction Getting to Know VMC 1100 VMC 1100 Front Side View 1 2 2 5 6 7 8 9 3 4 10 11 ...

Страница 21: ...Copyright 2014 NEXCOM International Co Ltd All rights reserved 7 VMC 1100 User Manual Chapter 1 Product Introduction VMC 1100 Rear View 20 19 12 12 18 17 16 15 14 13 ...

Страница 22: ...ready for customer use Green indicator stays lit Storage Green data is being read from or written to the storage driver WWAN Green the wireless WAN is on and the radio link is ready for use Blinking green data is being transmitted 6 Power Key When the ignition is from low to high VMC will turn on automatically When the ignition is high press the power button 5 seconds to turn on off VMC When the i...

Страница 23: ...Bluetooth 13 GPS Antenna Connector The external SMA type antenna mounting connector is used to connect the antenna to a GPS module 14 WWAN Antenna Connector The external SMA type antenna mounting connector is used to connect the antenna to a WWAN module 15 Multi I O Port DB15 female connector with GPIO ADC PWM Pin Description 1 Speed 1 2 Speed 2 3 ADC 0 4 ADC 1 5 A_GND 6 GPI 1 7 GPI 2 8 MDI 1 for ...

Страница 24: ... RS 485 and CAN bus Pin Description 1 GND 2 RX RS 485 3 RS 485 4 TX 5 GND 6 CAN1 H 7 CAN1 L 8 CAN2 H 9 CAN2 L 17 COM1 RJ 45 connector with RS 232 interface of either 0 5 or 12V on pin 9 for external devices Pin Description 1 0 5 12V 2 RX 3 TX 4 DTR 5 GND 6 DSR 7 RTS 8 CTS 18 LAN Port The LAN port is an RJ45 interface with integrated LEDs and supports 10 100 1000Mbps Ethernet data transfer rates ...

Страница 25: ...ed 11 VMC 1100 User Manual Chapter 1 Product Introduction Item Function Description 19 Power Input Connector 9 36VDC power input Pin Description 1 GND Black line color 2 GND Black line color 3 IGNITION Yellow line color 4 VIN Red line color 5 VIN Red line color ...

Страница 26: ...d and working properly Also users can use the GPSinfo exe pro gram to enable WAAS EGNOS and power saving mode 1 Go to Device Manager to ensure the device is installed correctly Module VIOB GPS 02T Chip Receiver Type O M8N 72 channel u blox M8 engine GPS QZSS L1 C A GLONASS L10F BeiDou B1 SBAS L1 C A WAAS EGNOS MSAS Navigation Update Rate Up to 18 Hz Accuracy Position 2 m CEP Acquisition Cold start...

Страница 27: ...ion Disc into CD Rom drive and execute the Gpsinfo exe file the file also saved in C Utility GPS_Utility 3 Follow the given instructions to complete the installation 4 When the setup complete press Finish 5 Once the installation is completed installation of GPS Information onto PDA device will be launched automatically Select Yes to continue ...

Страница 28: ...quires to receive VTG data output for during operation Check the box to activate the VTG data output Com Port Selection Baud Rate Selection Start GPS button Cold Start Scan Com Port Main GPS data Window VTG check box WAAS EGNOS Power Save Tab Menu WAAS EGNOS Check the box to activate WAAS EGNOS in order to increase the accuracy of positioning Main GPS data Window Display data received by GPS devic...

Страница 29: ...ay the current moving speed in km hour Positioning Status Three Modes 1 No Fix 2 2D Positioning 3 3D Positioning Horizontal Accuracy Range from 0 5 to 99 9 the smaller the better Position Accuracy Range from 0 5 to 99 9 the smaller the better Longitude Display current longitude in E W East West Hemisphere Time hhmmss GPS Information Instructions 1 Make sure that the GPS device is properly inserted...

Страница 30: ...touching any internal components by touching a metal object Static electricity can damage many of the electronic com ponents Humid environment tend to have less static electricity than dry environments A grounding strap is warranted whenever danger of static electricity exists Precautions Computer components and electronic circuit boards can be damaged by discharges of static electricity Working o...

Страница 31: ...pers ensure that the jumper caps are placed on the correct pins When the jumper cap is placed on both pins the jumper is short If you remove the jumper cap or place the jumper cap on just one pin the jumper is open Refer to the illustrations below for examples of what the 2 pin and 3 pin jumpers look like when they are short on and open off Two Pin Jumpers Open Left and Short Right Three Pin Jumpe...

Страница 32: ...ed 18 VMC 1100 User Manual Chapter 3 Jumpers and Connectors Locations of the Jumpers and Connectors The figure below is the mainboard used in the VMC system It shows the locations of the jumpers and connectors J2 J1 JP1 SW1 SW3 JP2 CN3 SW6 SW7 J9 J8 J6 Mainboard ...

Страница 33: ...GA_GREEN 9 VGA_RED 10 GND VGA Connector Connector size 1x10 10 pin header 1 0mm pitch Connector location J2 10 1 24 1 Flash Debug Connector Connector size 1x24 24 pin wafer 1 0mm pitch Connector location J1 Pin Definition Pin Definition 1 GND 2 GND 3 EC_KSI5 4 EC_KSI4 5 EC_KSI3 6 EC_KSI2 7 EC_KSI1 8 EC_KSI0 9 GND 10 GND 11 GND 12 GND 13 GND 14 EC_KSO10 15 EC_KSO9 16 EC_KSO8 17 EC_KSO7 18 EC_KSO6 1...

Страница 34: ...CU Debug COM Header Connector size 1x3 3 pin header 1 0mm pitch Connector location JP1 Pin Definition 1 TX 2 RX 3 GND MCU Flash Connector Connector size 2x4 8 pin header 1 0mm pitch Connector location JP2 1 7 2 8 Pin Definition Pin Definition 1 V3 3ALW 2 MCU_RST 3 MCU_TRST 4 MCU_TDI 5 MCU_TCK 6 MCU_TMS 7 MCU_TDO 8 GND 1 3 ...

Страница 35: ...OM Connector Connector size 1x3 3 pin header 1 0mm pitch Connector location J6 Pin Definition 1 RX 2 GND 3 TX 1 3 Pin Definition Pin Definition 1 GND 2 PCIRST 3 33M_CLK 4 LPC_FRAME 5 LPC_AD3 6 LPC_AD2 7 LPC_AD1 8 LPC_AD0 9 VCC3 10 VCC3 Port 80 Debug Connector Connector size 1x10 10 pin header 1 0mm pitch Connector location J8 10 1 ...

Страница 36: ...ors Serial ATA Connector size Standard Serial ATA 7P 1 27mm SATA M 180 Connector location CN3 SATA DOM Power Connector Connector size 1x2 2 pin header 1 25mm pitch Connector location J9 Pin Definition Pin Definition 1 GND 2 SATA0_TXP 3 SATA0_TXN 4 GND 5 SATA0_RXN 6 SATA0_RXP 7 GND Pin Definition 1 GND 2 VCC5 1 7 1 2 ...

Страница 37: ...nd Connectors ME RTC Clear Switch Connector size 2 pin DIP switch Connector location SW1 Input Voltage Control Switch Connector size 2 pin DIP switch Connector location SW3 Pin Status Function 1 2 ON Clear CMOS ME 1 2 OFF Normal Pin Status Function 1 2 OFF 12V 1 2 1 OFF 2 ON 24V 1 2 On 9 36V 1 O N 2 1 O N 2 ...

Страница 38: ...IP switch Connector location SW7 Pin Status Function 1 6 ON GPIO Output Pull High 1 6 OFF GPIO Output NC 1 O N 2 3 4 5 6 LED Indicators Power HDD WWAN LED Description Power Initial power on Green LED for 2 3 seconds Boot loader or BIOS status Blinking orange System login in status Blinking green Power On Solid green HDD HDD activity Green WWAN WWAN activity Green ...

Страница 39: ...r 3 Jumpers and Connectors VMC 1100 RS232 COM1 Power Jumper Connector size 2x5 10 pin header 2 0mm pitch Connector location JP4 1 9 2 10 Pin Function 1 3 2 4 12V 7 9 8 10 5V 3 5 4 6 or 5 7 6 8 GND Pin Definition Pin Definition 1 12V 2 12V 3 COM1 PWR 4 COM1 PWR 5 GND 6 GND 7 GND 8 GND 9 5V 10 5V ...

Страница 40: ...ze RJ45 port Connector location CON1 Pin Definition Pin Definition 1 COM1 PWR 2 RS232_RXD 3 RS232_TXD 4 RS232_DTR 5 GND 6 RS232_DSR 7 RS232_RTS 8 RS232_CTS VMC 1100 RS485 CAN Connector Connector size DB 9 port 9 pin D Sub Connector location CN1 Pin Definition Pin Definition 1 GND 2 COM_RX_485TX 3 RS 485TX 4 COM_TX 5 GND 6 CAN1 H 7 CAN1 L 8 CAN2 H 9 CAN2 L 8 1 1 5 9 6 ...

Страница 41: ... Connector Connector size DB 15 port 15 pin D Sub Connector location CN3 Pin Definition Pin Definition 1 SPEED_1 2 SPEED_2 3 A VIN0 4 A VIN1 5 IO_AGND 6 G_IN 1 7 G_IN 2 8 G_IN 8 9 G_OUT 1 10 G_OUT 2 11 G_OUT 3 12 DR_GPS 1PPS 13 DR_GPS ODOMETER 14 DR_GPS DIRECTION 15 IO_GND1 Pin 12 Pin 13 Pin 14 are workable when Dead Reckoning GPS module is used ...

Страница 42: ...vbKeyF2 113 F2 key vbKeyF3 114 F3 key vbKeyF4 115 F4 key vbKeyF5 116 F5 key Note Source by Microsoft website http msdn microsoft com en us library aa243025 v VS 60 aspx How to capture a pressed function keys please refer to the Microsoft technical support website http support microsoft com kb 822492 en us Key code value for ActionScript 2 0 in Adobe Flash http help adobe com en_US AS2LCR Flash_10 ...

Страница 43: ...served 29 VMC 1100 User Manual Chapter 4 Function Key Code Constants Extended ASCII Keyboard Codes Char Meaning Hex Octal Binary F1 key 59 3B 073 00111011 F2 key 60 3C 074 00111100 F3 key 61 3D 075 00111101 F4 key 62 3E 076 00111110 F5 key 63 3F 077 0011111 ...

Страница 44: ...ol boards from 6200x 6202B 6300x or 6500x must have been installed Before installing PenMount Windows Universal driver V2 4 0 306 you may modify the default options from PenMount Universal Driver V2 4 0 306 Driver Install ini Install USB 1 Install PenMount USB driver 0 Uninstall PenMount USB driver COM 1 Install PenMount RS232 driver 0 Uninstall PenMount RS232 driver MMonitor 1 Install PenMount dr...

Страница 45: ...o correct it to be correspondent with the actual COM PORT xxxx the supporting item number 9000 6000 or PCI yyyy the baud rate 19200 or 9600 of item 6000 or item 9000 baud rate 38400 is only for PCI items Please note that the information above must be correct so that the device can just work normally and ENUM must be set as 1 Example COM1 PCI 38400 Permanently install PCI RS232 38400bps at COM1 COM...

Страница 46: ... 2 A License Agreement window appears Click I Agree and Next 3 When ready to install the program click Install 4 Installation takes some time 5 When the warning message screen appears please click Continue Anyway to continue 6 When the window below shows up please select yes for installing PenMount as mouse mode select no for digitizer mode If your operating system doesn t support Windows tablet i...

Страница 47: ...vice can t be used therefore you have to select yes here otherwise after the installation the touch doesn t work after re booting After the installation you will see the difference that a PenMount Control Panel icon shows up on the desktop without a icon in the notification area See the screenshot below Configuring Touchscreen in PenMount Mouse Driver Click on the PenMount Monitor icon in the noti...

Страница 48: ...nger or stylus to touch the red squares in sequence After the fifth red point calibration is complete To skip press ESC Advanced Calibration Advanced Calibration uses 9 16 or 25 points to effectively calibrate touch panel linearity of aged touchscreens Click this button and touch the red squares in sequence with a stylus To skip press ESC Command Calibration Command call calibration function Use c...

Страница 49: ...se select a device then click Configure You can also double click the device too 2 Click Standard Calibration to start standard calibration or Advanced Calibration to start Advanced Calibration NOTE The older a touchscreen is the more calibration points of the Advanced Mode it needs For an optimal accuracy we suggest to use a stylus to make the advanced calibration ...

Страница 50: ...isables mouse s ability of dragging on screen icons useful for configuring POS terminals Pen Input Emulation Select this mode and mouse will emulate Windows Vista pen input device operation by which no mouse event will be sent until the touch is dragged out of range or released from the screen Mouse Emulation Select this mode and mouse functions as normal and allows dragging of icons Click on Touc...

Страница 51: ...the edge compensation settings You can adjust the settings from 0 to 30 for accommodating the difference of each touch panel About This panel displays information about the PenMount controller and driver version Cursor Stabilizer Enable the function support to prevent cursor shake Use press and hold as right click You can set the time out and area for you need ...

Страница 52: ...k this icon to switch between Right and Left Button functions Exit Exits the PenMount Monitor function PenMount Rotating Function PenMount Windows Universal Driver supports several display rotating software packages and auto detects rotate function 0 90 180 270 The display rotating software package supported in Windows 2000 XP 32bit Vista 32 64bit are 1 Intel Display Driver Rotate Function 2 ATI D...

Страница 53: ...al V2 2 0 283 and the later versions since the touchscreen is automatically installed as a digitizer device in Windows Vista 7 the functions built in Windows Vista 7 such as rotation multi monitor flicks and context menu function which launches a context menu by user s long pressing on touchscreen rather than clicking the right mouse button or pressing the application key on the keyboard will be s...

Страница 54: ...nger or stylus to touch the red squares in sequence After the fifth red point calibration is complete To skip press ESC Advanced Calibration Advanced Calibration uses 9 16 or 25 points to effectively calibrate touch panel linearity of aged touchscreens Click this button and touch the red squares in sequence with a stylus To skip press ESC Command Calibration Command call calibration function Use c...

Страница 55: ...se select a device then click Configure You can also double click the device too 2 Click Standard Calibration to start standard calibration or Advanced Calibration to start Advanced Calibration NOTE The older a touchscreen is the more calibration points of the Advanced Mode it needs For an optimal accuracy we suggest to use a stylus to make the advanced calibration ...

Страница 56: ...ion program while the blue lines show the approximate linearity calculated by PenMount s application program as the result of user s execution of Advance Calibration Turn off EEPROM storage This function disables the write in of calibration data in Controller This function is enabled by default Edge Compensation This page is the edge compensation settings You can adjust the settings from 0 to 30 f...

Страница 57: ...00 User Manual Chapter 5 Touchscreen Driver Installation Uninstalling PenMount Windows Universal Driver 1 Go to Control Panel Click Add Remove program Select PenMount Universal Driver Click Change Remove button 2 Select Uninstall to remove PenMount Windows Universal Driver ...

Страница 58: ...7 32_64bit Fedora Core4_64bit Fedora Core3 Fedora Core2 Slackware12 0 12 1 Slackware10 0 Red Hat 9 0 Red Hat 7 3 8 0 OpenSuse 10 1 10 2 10 3 11 11 1 11 2 11 3 11 4 12 1 32_64bit Suse 10 0 Suse 9 2 9 3 Suse 8 0 9 0 9 1 Cent OS 5 2 5 3 5 4 5 5 6 0 6 2 32_64bit Linux XFree86 4 x x Linux XFree86 3 3 6 Linux For GPM QNX 6 4 1 6 5 QNX 6 3 2 QNX 6 2 Android Installing PenMount Linux X Window USB Driver S...

Страница 59: ...E Linux Standard Calibration Advanced Calibration Multiple Monitors Multi Device Rotation Operation Mode Drawing mode Beep Sound Beep sound adjustable Wake up function Showing linearity Right button Hide cursor Double click area and speed adjustable About Edge Compensation Refresh Remark With PenMount Windows Universal V2 2 0 283 and later versions since the touchscreen is automatically installed ...

Страница 60: ... Panel from the menu PenMount Control Panel with the four tags Device Multiple Monitors Tools About will appear as the screenshot below The buttons on such PenMount Control Panel have the following functions Draw Tests or demonstrates the PenMount touchscreen operation Right Button Icon Enable right button function The icon can show on Desktop or in the notification area Gesture Enable Enable conf...

Страница 61: ...to viewing angle or individual skill and there may be little difference in using 16 or 25 points Note that a stylus is recommended for the most accurate results Rotation There are currently a number of software packages on the market that support rotating monitors 0 90 180 and 270 However you will not be able to use a touchscreen unless it is matched to the appropriate rotation Our rotation config...

Страница 62: ...ylus and the drawing screen registers touch activity such left right up down pen up and pen down Click Menu button for more functions Show Pen Location is to show the locations where pen comes down and lifted up on the monitor Show Grid is to show grid on the entire monitor This is for linearity test Select Clear Screen to clear drawing Select Exit to quit draw function ...

Страница 63: ...he user adjust the frequency and length of the beep sound The drivers let the user adjust the desired touch screen sound as well as turn the sound off Wake Up Function Wake Up function lets the user touch the screen and wake the system up from suspend mode Plot Calibration Data Plot Calibration Data function displays the touchscreen linearity map which is available if the PenMount driver provides ...

Страница 64: ...l preference About This option shows the exact version of the drivers and controller firmware Updated drivers are available for downloading on the PenMount website at http www penmount com Edge Compensation In PenMount Control Panel when any of the detected PenMount device is selected and the Configure button is pressed you will be able to see the Edge Compensation tag which is for Advanced Calibr...

Страница 65: ...chscreen Driver Installation Refresh If you installed PenMount driver package 2 1 0 187 and after you can click the Refresh button on PenMount Control Panel to detect the newly attached PenMount devices Note Refresh is only supported by PenMount Windows Universal Driver for Windows 2000 XP 2003 VISTA ...

Страница 66: ...nMount Gesture AP 1 To run PenMount Gesture AP In the notification right click on the PenMount icon and select Gesture Enable from the menu A PenMount Gesture AP icon will show up in the notification area See the illustration below PenMount Gesture AP is running PenMount Gesture AP Enabled Disabled In PenMount Control Panel select Tools tab and press Gesture Enable button PenMount Gesture AP icon ...

Страница 67: ...nfigure PenMount Gesture AP 1 Right click on the PenMount Gesture AP icon in the notification area select Gesture Setting from the menu that appears See the illustration below or Select Tools tab and click Gesture Setting button in PenMount Control Panel 2 Gesture Setting window displays 3 15 PenMount Gestures are provided in total PenMount Gestures for Windows XP ...

Страница 68: ...ights reserved 54 VMC 1100 User Manual Chapter 6 PenMount Gesture AP for Windows PenMount Gestures for Windows Vista 7 8 In the Gesture Setting window you can proceed to configure PenMount Gesture AP See picture below a b b 1 b 2 c d d 1 d 2 d 3 d 4 ...

Страница 69: ...p to 5 keystrokes When that gesture is sensed the configured keystrokes will be reported d 3 Application Invoke Button Configure to invoke a specific application with particular gesture So that when the gesture is sensed the specific applica tion will run d 4 For Disable touch function after touch function is disabled the mouse pointer won t move following your finger sliding on the touchscreen an...

Страница 70: ... Environment by Using EWF Please note that EWF is only available for VMC 1100 series The following instructions help you easily enable the EWF function Please refer to the following link https msdn microsoft com en US library ff794943 v winembedded 60 aspx Here is all the syntax for EWF Manager Standard 7 SP1 https msdn microsoft com en US library ff794092 v winembedded 60 aspx ...

Страница 71: ...screws on the heatsink to remove it 2 The Mini PCI express slot shown below is used to install a WWAN or Wi Fi communication module For WWAN module For Wi Fi module 3 Insert the module into the Mini PCI Express slot at a 45 degrees angle until the gold plated connector on the edge of the module completely disappears inside the slot And then attach the RF cable to the module 4 Install the rear cove...

Страница 72: ...e Chapter 9 How to Install a Sata Dom Module 1 Remove the heatsink 2 When installing the Wi Fi module please install the module before installing the SATA DOM 3 Before installing the SATA DOM please make sure you have the following parts SATA DOM Thermal Pad Sponge SATA Power Cable 4 Paste the sponge on the Mini PCI express slot ...

Страница 73: ...COM International Co Ltd All rights reserved 59 VMC 1100 User Manual Chapter 9 How to Install a SATA DOM Module 5 Plug the SATA power cable 6 Plug the SATA DOM to the SATA connector and then connect the SATA power cable ...

Страница 74: ...ight 2014 NEXCOM International Co Ltd All rights reserved 60 VMC 1100 User Manual Chapter 9 How to Install a SATA DOM Module 7 Paste the thermal pad on the SATA DOM board and then replace the heatsink cover ...

Страница 75: ...hapter 10 Installing the OBD Module 1 Remove the heatsink 2 Remove the hole cover 3 Put the OBD module into the bracket and secure it with screws 4 Place the adapter board onto the OBD module please note the pins on the adapter board have to be inserted into the OBD module Once fully inserted secure the OBD module with screws ...

Страница 76: ... NEXCOM International Co Ltd All rights reserved 62 VMC 1100 User Manual Chapter 10 Installing the OBD Module 5 Connect the cable to the module 6 The cable passes through the hole and plugs to the connector Top View ...

Страница 77: ...ional Co Ltd All rights reserved 63 VMC 1100 User Manual Chapter 10 Installing the OBD Module 7 Secure the four screws to fix the module to the rear cover 8 Place the heatsink back to its original location and secure it with screws ...

Страница 78: ...atus Battery_status 12V_status I O port 0EE0H Bit 0 Reseversion Bit 1 Reseversion Bit 2 Ignition read only 0 OFF 1 ON Bit 3 Status of Car Battery 0 Car Battery is OK 1 Car Battery is Low voltage Bit 4 Status of 12V output 0 circuit normal under 4A 1 over circuit over 4A Bit 5 Status of Car Battery bypass output 0 circuit normal under 4A 1 over circuit over 4A Bit 4 and Bit 5 The action will delay ...

Страница 79: ... Function 2 Capacity of NEXCOM battery 8 bits I O port 0EE1H Bit 7 Bit 6 Bit 5 Bit 4 Bit 3 Bit 2 Bit1 Bit 0 Description 8 bits data Bit 7 is highest bit of data 3 Voltage of NEXCOM battery 8 bits I O port 0EE2H Bit 7 Bit 6 Bit 5 Bit 4 Bit 3 Bit 2 Bit1 Bit 0 Description 8 bits data Bit 7 is highest bit of data ...

Страница 80: ...Normal 1 Abnormal X axis or Y axis degree is about 90 or 90 Bit 1 POWER mode 0 24V system 1 12V system Bit 2 Fan mode 0 auto 1 always on Bit 3 status of smart battery 0 no discharging 1 discharging Bit 4 status of FAN R 0 well 1 failed Bit 5 status of FAN R 0 action 1 inaction Bit 6 status of FAN L 0 well 1 failed Bit 7 status of FAN L 0 action 1 inaction 5 GPIO I O port 0EE4H Bit0 3 GPO0 3 Bit4 7...

Страница 81: ...0 time setting BIT2 0 Time sec 000 1 001 2 010 4 011 8 100 16 101 32 110 64 111 128 Auto clear WDT timer when read write I O port 0EE5H 7 Onboard Module Disable Enable 1 I O port 0EE6H Bit0 3 5G MODULE 0 DISABLE 1 ENABLE Bit1 WLAN MODULE 0 DISABLE 1 ENABLE Bit2 EXTERNAL 12V power 0 DISABLE 1 ENABLE Bit3 By Pass Car battery power 0 DISABLE 1 ENABLE Bit4 Wake on 3 5G MODULE 0 DISABLE 1 ENABLE ...

Страница 82: ...N Bit7 Status of COM PORT 0 CAN BUS 1 MCU Download 8 Delay Time Setting I O port 0EE7H Bit7 Power On Delay 0 DISABLE 1 ENABLE Bit6 Power Off Delay 0 DISABLE 1 ENABLE Delay On Time Setting BIT5 3 Time 000 10 sec 001 30 sec 010 1 min 011 5 min 100 10 min 101 15 min 110 30 min 111 1 hour BIT5 3 Time 000 10 sec 001 30 sec 010 1 min 011 5 min 100 10 min 101 15 min 110 30 min 111 1 hour Delay Off Time S...

Страница 83: ...erboard read only BIT3 2 Input Voltage 11 12V 10 24V 01 6 36V 00 6 36V When input voltage 12V BIT1 0 Input Voltage 12V 00 Startup Shutdown 11 5V 10 5V 01 Startup Shutdown 12V 11V 10 Startup Shutdown 12 5V 11V 11 Startup Shutdown 12 5V 11 5V BIT1 0 Input Voltage 24V 00 Startup Shutdown 23V 21V 01 Startup Shutdown 24V 22V 10 Startup Shutdown 25V 22V 11 Startup Shutdown 25V 23V When input voltage 24V...

Страница 84: ...t 0EEAH Bit1 Restart or Reset CANBUS Module 0 Don t care 1 RESET CAN Module Bit4 CANBUS Data link detect 0 No data transfer 1 Data link auto detect 12 GAL Download control I O port 0EEBH Data End byte GAL CODE Download AA Note Don t initialize this address 13 Startup Time Setting I O port 0EECH Clock timer Bit0 7 the hour value hexadecimal I O port 0EEDH Clock timer Bit0 7 the minute value hexadec...

Страница 85: ...EDFH I O port 0ED0H addresses uses delivery internal data 1 MCU version byte 8 bits I O port 0EDEH Bit 7 Bit 6 Bit 5 Bit 4 Bit 3 Bit 2 Bit1 Bit 0 Description 8 bits data Bit 7 is highest bit of data 2 GAL version byte 8 bits I O port 0EDFH Bit 7 Bit 6 Bit 5 Bit 4 Bit 3 Bit 2 Bit1 Bit 0 Description 8 bits data Bit 7 is highest bit of data ...

Страница 86: ...O ADDRESS 0EE0H 0EEFH I O port 0EE0H for default setting 2 Ignition_status Battery_status 12V_status I O port 0EE0H Bit 0 Reseversion Bit 1 Reseversion Bit 2 Ignition read only 0 OFF 1 ON Bit 3 Status of Car Battery 0 Car Battery is OK 1 Car Battery is Low voltage Bit 4 Status of 12V output 0 circuit normal under 4A 1 over circuit over 4A Bit 5 Status of Car Battery bypass output 0 circuit normal ...

Страница 87: ...Function 2 Capacity of NEXCOM battery 8 bits I O port 0EE1H Bit 7 Bit 6 Bit 5 Bit 4 Bit 3 Bit 2 Bit 1 Bit 0 Description 8 bits data Bit 7 is highest bit of data 3 Voltage of NEXCOM battery 8 bits I O port 0EE2H Bit 7 Bit 6 Bit 5 Bit 4 Bit 3 Bit 2 Bit 1 Bit 0 Description 8 bits data Bit 7 is highest bit of data ...

Страница 88: ...l 12V 24V Bit 2 Car Volt 0 Vin Volt_Threshold_L 9V 20 5V 1 Vin Volt_Threshold_L 9V 20 5V Bit 3 Backup CAP 0 Battery capacity 10 1 Battery capacity 10 Bit 4 Output Type 0 Use Car Battery 1 Use Backup Battery Bit 5 Bat Charge 0 Battery no charging 1 Battery is charging Bit 6 Bat Discharge 0 Battery no discharging 1 Battery discharging Bit 7 Temp Alarm 0 Battery no over temperature and 4 C 1 Battery ...

Страница 89: ...etting BIT3 0 Time sec 0000 1 0001 2 0010 4 0011 8 0100 16 0101 32 0110 64 0111 128 1000 256 Auto clear WDT timer when read write I O port 0EE5H 7 Onboard Module Disable Enable 1 I O port 0EE6H Bit0 3 5G MODULE 0 DISABLE 1 ENABLE Bit1 WLAN MODULE 0 DISABLE 1 ENABLE Bit2 EXTERNAL 12V power 0 DISABLE 1 ENABLE Bit3 By Pass Car battery power 0 DISABLE 1 ENABLE Bit4 Wake on 3 5G MODULE 0 DISABLE 1 ENAB...

Страница 90: ...t7 Status of COM PORT for COM4 switch 0 GPS 1 MCU Download 8 Delay Time Setting I O port 0EE7H Bit7 Power On Delay 0 DISABLE 1 ENABLE Bit6 Power Off Delay 0 DISABLE 1 ENABLE Delay On Time Setting BIT5 3 Time 000 10 sec 001 30 sec 010 1 min 011 5 min 100 10 min 101 15 min 110 30 min 111 1 hour BIT2 0 Time 000 20 sec 001 1 min 010 5 min 011 10 min 100 30 min 101 1 hour 110 6 hour 111 18 hour Delay O...

Страница 91: ...erboard read only BIT3 2 Input Voltage 11 12V 10 24V 01 6 36V 00 6 36V When input voltage 12V BIT1 0 Input Voltage 12V 00 Startup Shutdown 11 5V 10 5V 01 Startup Shutdown 12V 11V 10 Startup Shutdown 12 5V 11V 11 Startup Shutdown 12 5V 11 5V BIT1 0 Input Voltage 24V 00 Startup Shutdown 23V 21V 01 Startup Shutdown 24V 22V 10 Startup Shutdown 25V 22V 11 Startup Shutdown 25V 23V When input voltage 24V...

Страница 92: ...le Bit2 CAN2_DI Data link detect 0 No data transfer 1 Data link auto detect Bit4 CANBUS Data link detect 0 No data transfer 1 Data link auto detect 12 GAL Download control I O port 0EEBH Data End byte GAL CODE Download AA Note Don t initialize this address 13 Startup Time Setting I O port 0EECH Clock timer Bit0 7 the hour value hexadecimal I O port 0EEDH Clock timer Bit0 7 the minute value hexadec...

Страница 93: ...DFH I O port 0ED0H addresses uses delivery internal data 1 MCU version byte 8 bits I O port 0EDEH Bit 7 Bit 6 Bit 5 Bit 4 Bit 3 Bit 2 Bit 1 Bit 0 Description 8 bits data Bit 7 is highest bit of data 2 GAL version byte 8 bits I O port 0EDFH Bit 7 Bit 6 Bit 5 Bit 4 Bit 3 Bit 2 Bit 1 Bit 0 Description 8 bits data Bit 7 is highest bit of data ...

Страница 94: ...0ED1H Bit0 WLAN2_DIS 0 Disable 1 Enable Bit1 GPS_PWR_EN 0 Disable 1 Enable Bit2 Modem_PWR_EN 0 ON 1 OFF Bit3 Modem_SEL 0 ON 1 OFF Bit4 COM2 RS485 RS422 0 COM2 RS485 1 COM2 RS422 Bit5 COM2 RS232 RS485_RS422 0 COM2 RS232 1 COM2 RS485 RS422 IO ADDRESS I O port 0EDCH Bit 5 7 Type 000 VTC 001 VMC 010 nROK Bit 0 4 Model Bit 0 4 00001 Bit 5 7 001 ...

Страница 95: ...V Power Setting External Power Startup Shutdown Voltage Setting Input Voltage Startup Shutdown Delay Time Setting Power On Delay Power Off Delay Turn Off Both 12 V 11 5 10 5 23 21 External Power Turn Off Both Turn On Both Turn On 5V Turn On 12V Advanced Version 2 10 1208 Copyright C 2010 American Megatrends Inc Aptio Setup Utility Copyright C 2010 American Megatrends Inc Select Screen Select Item ...

Страница 96: ...l Power Startup Shutdown Voltage Setting Input Voltage Startup Shutdown Delay Time Setting Power On Delay Power Off Delay Turn Off Both 12 V 11 5 10 5 23 21 External Power Turn Off Both Turn On Both Turn On 5V Turn On 12V Advanced Version 2 10 1208 Copyright C 2010 American Megatrends Inc Aptio Setup Utility Copyright C 2010 American Megatrends Inc Select Screen Select Item Enter Select Change Opt...

Страница 97: ...o 11 5V If the input voltage setting is 12V set the startup voltage to 12 5V and the shutdown voltage to 11V Advanced Version 2 10 1208 Copyright C 2010 American Megatrends Inc Aptio Setup Utility Copyright C 2010 American Megatrends Inc Select Screen Select Item Enter Select Change Opt F1 General Help F2 Previous Values F3 Optimized Defaults F4 Save Exit ESC Exit Startup Shutdown Setting Power Ma...

Страница 98: ... 22V If the input voltage setting is 24V set the startup voltage to 25V and the shutdown voltage to 23V Advanced Version 2 10 1208 Copyright C 2010 American Megatrends Inc Aptio Setup Utility Copyright C 2010 American Megatrends Inc Select Screen Select Item Enter Select Change Opt F1 General Help F2 Previous Values F3 Optimized Defaults F4 Save Exit ESC Exit Startup Shutdown Setting Power Managem...

Страница 99: ...08 Copyright C 2010 American Megatrends Inc Aptio Setup Utility Copyright C 2010 American Megatrends Inc Select Screen Select Item Enter Select Change Opt F1 General Help F2 Previous Values F3 Optimized Defaults F4 Save Exit ESC Exit Startup Shutdown Setting Power Management Configuration External 5V 12V Power Setting External Power Startup Shutdown Voltage Setting Input Voltage Startup Shutdown D...

Страница 100: ...ment Configuration External 5V 12V Power Setting External Power Startup Shutdown Voltage Setting Input Voltage Startup Shutdown Delay Time Setting Power On Delay Power Off Delay Turn On Both 12V 11 5V 10 5V Disabled Disabled Options Select Screen Select Item Enter Select Change Opt F1 General Help 10 min 15 min 30 min 1 hour Input Voltage Startup Shutdown Delay Time Setting Power On Delay Delay On...

Страница 101: ...ment Configuration External 5V 12V Power Setting External Power Startup Shutdown Voltage Setting Input Voltage Startup Shutdown Delay Time Setting Power On Delay Power Off Delay Turn On Both 12V 11 5V 10 5V Disabled Disabled Options Select Screen Select Item Enter Select Change Opt F1 General Help 6 hour 18 hour Delay Time Setting Power On Delay Delay On Time selection Power Off Delay Delay Off Ti...

Страница 102: ...r Select Change Opt F1 General Help F2 Previous Values F3 Optimized Defaults F4 Save Exit ESC Exit Onboard Module Support ACPI Settings CPU Configuration Power Management Configuration Module Management Intel IGD Configuration SATA Configuration USB Configuration W83792D H W Monitor Super IO Configuration Advanced Version 2 14 1219 Copyright C 2011 American Megatrends Inc Aptio Setup Utility Copyr...

Страница 103: ...ed Defaults F4 Save Exit ESC Exit Onboard Module Support ACPI Settings CPU Configuration Power Management Configuration Module Management Intel IGD Configuration SATA Configuration USB Configuration W83792D H W Monitor Super IO Configuration Advanced Version 2 14 1219 Copyright C 2011 American Megatrends Inc Aptio Setup Utility Copyright C 2011 American Megatrends Inc Select Screen Select Item Ent...

Страница 104: ...nu and then press Enter on Save Changes and Reset Advanced Version 2 14 1219 Copyright C 2011 American Megatrends Inc Aptio Setup Utility Copyright C 2011 American Megatrends Inc Select Screen Select Item Enter Select Change Opt F1 General Help F2 Previous Values F3 Optimized Defaults F4 Save Exit ESC Exit User Setting Hour Module Management WLAN Module 3 5G Module Wake On 3 5G Module RTC Alarm Ti...

Страница 105: ...ings ACPI Settings CPU Configuration Power Management Configuration Module Management Intel IGD Configuration SATA Configuration USB Configuration W83792D H W Monitor Super IO Configuration Advanced Version 2 14 1219 Copyright C 2011 American Megatrends Inc Aptio Setup Utility Copyright C 2011 American Megatrends Inc Select Screen Select Item Enter Select Change Opt F1 General Help F2 Previous Val...

Страница 106: ...td All rights reserved 92 VMC 1100 User Manual Appendix F BIOS Update Appendix F BIOS Update 1 Locate the afuwin32 setup file in the afuwin32 folder 2 Start the afuwingui setup program 3 Press the OK button when prompted with a pop up window ...

Страница 107: ...Copyright 2014 NEXCOM International Co Ltd All rights reserved 93 VMC 1100 User Manual Appendix F BIOS Update 4 Press the Open button 5 Select the BIOS file ...

Страница 108: ...o Ltd All rights reserved 94 VMC 1100 User Manual Appendix F BIOS Update 6 Check all the options in Block Options and then press the Flash button 7 The BIOS will be updated automatically when the update is completed please restart the VMC ...

Страница 109: ...low Advanced Boot Security Save Exit Main Version 2 17 1249 Copyright C 2015 American Megatrends Inc Aptio Setup Utility Copyright C 2015 American Megatrends Inc Select Screen Select Item Enter Select Change Opt F1 General Help F2 Previous Values F3 Optimized Defaults F4 Save Exit ESC Exit COM Mode RS232 RS485 switch WWAN Module Wake On WWAN Module WWAN Digital Voice RTC Alarm Time Brightness Mode...

Отзывы: