


4081 User Manual
Issue 3
Standalone Control Setup – PC version
The software is launched from Windows Start Menu / Programs / 4081
Remote Mic Pre-Amp Controller.
Also at this location is the User Manual plus the option to uninstall.
As the software opens, it will automatically detect how many racks are
connected, and display this information at the bottom of the screen.
•
Under each of the numbered racks, a small 4081 graphic will be
displayed for each unit detected.
•
The word OFFLINE will be displayed where no unit has been
detected.
A red highlight bar will also indicate the rack whose controls are currently
being displayed on the upper half of the screen.
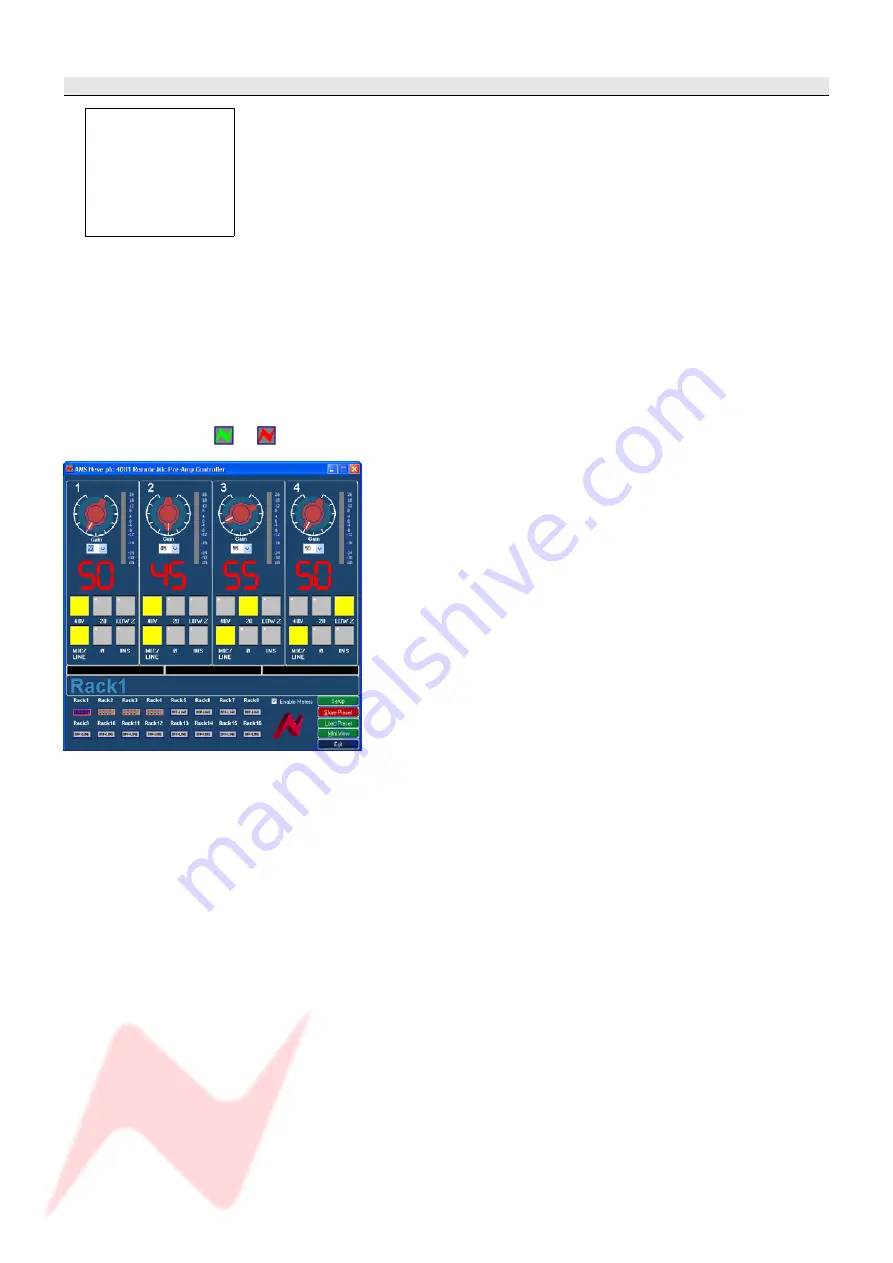
Once the control software is running, a small Neve icon will appear in the
Windows taskbar.
This will either be displayed in green if the MIDI is running, or in red if it is
not.
As shown left, four racks have been detected, yet it is the
settings for the first rack that are currently displayed (there is
a red highlight bar round Rack 1).
Select the rack you wish to display the settings for by clicking
on the icon underneath Rack 2, Rack 3 etc.
The red highlight bar will confirm your selection.
The screen will be updated with any changes made through
the modules’ front panels, and likewise, the units front panels
will be updated with any changes made on screen.
If you wish to enable the metering on the Main Screen,
ensure the Enable Meters tickbox is checked.
If this is left unticked, the only indication of signal level will be
the SIG and OL leds on the front of the unit.
The Gain can be set by selecting the Gain value from the pulldown
menu (if this value is out of range, the selection will remain unchanged).
The Gain value for Mic and the Gain value for Line will be remembered for
each, so that swapping between Mic and Line will show the previously set
gain value.
The Phantom, Pad, Phase, Impedance, Mic/Line selection and
Insert can all be set by clicking on the appropriate button on-screen
(Phantom, Pad and Impedance can only be selected if Mic is selected
first).
The icons at the bottom of the screen indicate how many remote racks are
connected.
The rack indicated by the red outline is the one currently controlled from
(and displayed on) the upper part of the screen.
To select another rack, click on it's icon and the red outline will move to
indicate that the screen is now displaying parameters for that rack.
You cannot select any unit that is currently displayed as Offline.
The settings can be saved and recalled independently using the Store
Preset and Load Preset buttons that launch conventional Windows Save
and Load dialogues (see below).
- 16 -
Before starting
the software or
powering the
unit on, please
make sure it is
connected via
USB first.


