


12
Notice: 1. When the netsurfer® is connected with the USB cable, and you open the USB storage configuration, you will not be able to view the MICRO SD/TF
card through the netsurfer®. Only after you detach the USB cable, you can view the TF/MICRO SD card in the netsurfer®.
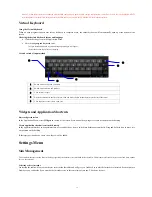
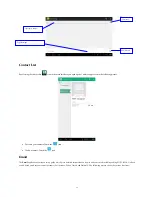
Virtual Keyboard
Using the Virtual Keyboard
When an open program requests user info or feedback to complete a task, the virtual keyboard will automatically open up at the bottom of the
screen
Choosing the desired Keyboard layout and language
Click the Settings icon in the Application Menu
Select the
Language and Keyboard
option.
o
All pre-installed keyboard layouts and language packages will appear.
o
Select the desired layout of your choosing.
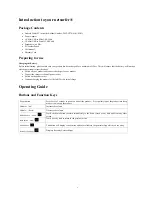
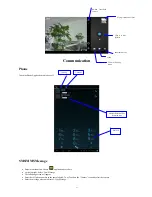
Use and switch of input method
1
Switch between Caps and Lowercase
2
Switch between letters and symbols
3
Click to insert a space
4
Delete the character in the left of cursor, click and hold to delete all the characters in the left of the cursor.
5
Click input to execute / create a new line
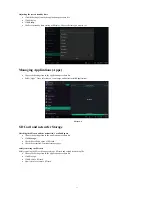
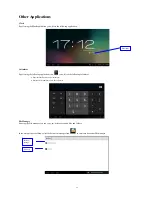
Widgets and Application Shortcuts
Enter widgets interface
In the Application Menu, select
Widgets
on the top of the screen. Press and hold any widget to create its shortcut on the desktop.
Create application shortcut icons in the desktop
In the application interface or widgets interface, press and hold any icon to switch into desktop automatically. Drag and hold the icon to move it to
any position on the desktop.
If the target position has no space, the widget won’t be added.
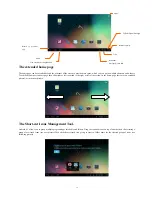
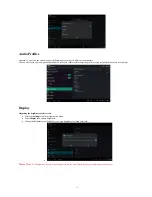
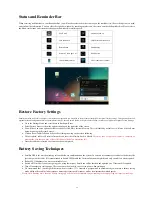
Settings Menu
Sim Management
The netsurfer®
incorporates the latest technology regarding the dual sim slots embedded inside the tablet. This means more freedom, more control and more options
for you, the customer.
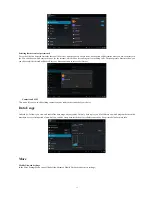
Selecting active sim cards
On startup the tablet will auto-scan the sim cards inside the tablet and will give you feedback as to which sim cards are inserted. See next picture.
From here you can decide if you want both sim cards active at the same time or just one. The choice is yours.
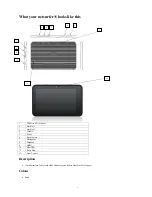
①
②
③
⑤
④