background image

CHAPTER  4   OPERATION  USING  GUI  SOFTWARE 

User’s Manual  U17307EJ2V0UM 

41

<1> Parameter 

file 

This file holds parameters and timing data required to rewrite the flash memory of the target device.  

Do not modify the data in the parameter file because the data is related to the guarantee of rewrite 

data. 

The parameter file is protected by the checksum function.  If the checksum result indicates an error, 

the FPL2 does not accept the parameter file. 


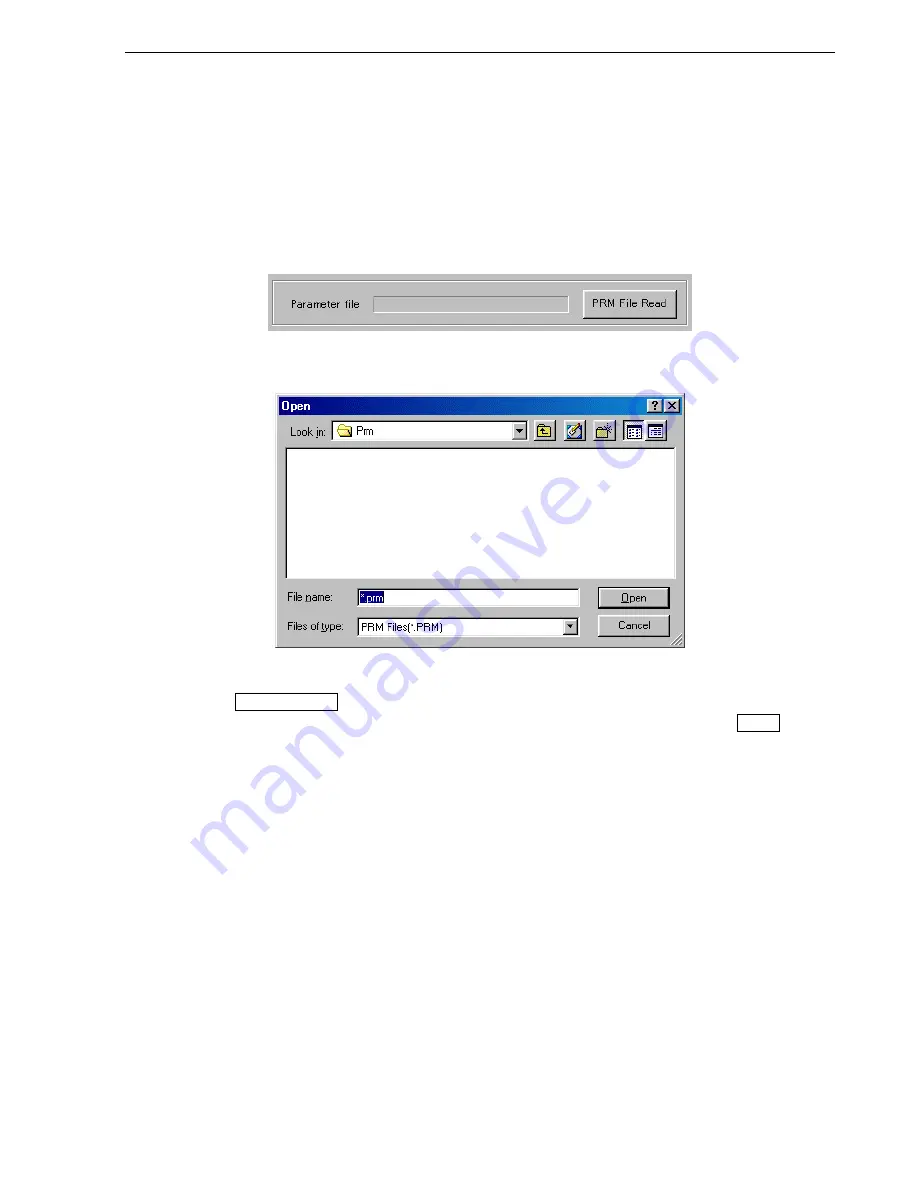
Figure 4-6.  Device Setup Window – Parameter File Selection 


Figure 4-7.  Parameter File Selection Window 


[ PRM File Read  button] 

A window for specifying a parameter file is displayed.  Specify the target file and click  Open . 


Содержание PG-FPL2

Страница 1: ...Document No U17307EJ2V0UM00 2nd edition Date Published December 2004 NS CP K Printed in Japan 2004 User s Manual PG FPL2 Flash Memory Programmer...

Страница 2: ...User s Manual U17307EJ2V0UM 2 MEMO...

Страница 3: ...uality reliability and safety of NEC Electronics products customers agree and acknowledge that the possibility of defects thereof cannot be eliminated entirely To minimize risks of damage to property...

Страница 4: ...the like was bent or pulled excessively If the product got wet If the product and target system were connected while a potential difference existed between the GND of the product and the GND of the ta...

Страница 5: ...nch Seoul Korea Tel 02 558 3737 NEC Electronics Shanghai Ltd Shanghai P R China Tel 021 5888 5400 NEC Electronics Taiwan Ltd Taipei Taiwan Tel 02 2719 2377 NEC Electronics Singapore Pte Ltd Novena Squ...

Страница 6: ...tions Overview Hardware installation Software installation Operation using GUI software Usage examples Connectors and cables Notes on target system Circuit diagrams Troubleshooting How to Read This Ma...

Страница 7: ...tware Windows application to operate PG FPL2 using GUI software Target device NEC Electronics on chip flash memory microcontroller Target system User designed board on which NEC Electronics on chip fl...

Страница 8: ...3 1 GUI Software Installation 17 3 2 USB Driver Installation 23 3 2 1 Installation in Windows 98 Me 23 3 2 2 Installation in Windows 2000 26 3 2 3 Installation in Windows XP 29 3 3 Confirmation of USB...

Страница 9: ...ON TARGET SYSTEMS 60 CHAPTER 8 CIRCUIT DIAGRAMS 63 CHAPTER 9 TROUBLESHOOTING 65 9 1 Trouble During Setup 65 9 2 Trouble During Operation Main Unit 66 9 3 Trouble During Operation Communication 66 APPE...

Страница 10: ...L2 is a compact flash memory programmer for an on chip flash memory microcontroller and is designed for development The USB interface is available for connection with the host The PG FPL2 allows on bo...

Страница 11: ...hine IBM PC ATTM or compatible CPU PentiumTM 100 MHz or more RAM 32 MB or more Host interface USB interface that enables communication based on USB Ver 1 1 or later File formats Program files can be u...

Страница 12: ...FP4 connector Notes 1 Use the USB cable Mini B type included with the QB 78K0SKX1MINI 2 The FA adapter board is a product of Naito Densei Machida Mfg Co Ltd The FPL2 is connected to the host machine v...

Страница 13: ...he target device is in progress Do not disconnect the target cable and USB cable 2 3 2 FPL2 FA connector Figure 2 3 Layout Drawing of FPL2 Connectors Target connector Used to connect the tip of the ta...

Страница 14: ...in green Cautions 1 Be sure to perform this step before making a connection with the target system If connections are made in an incorrect order the FPL2 and target system may be damaged 2 When the M...

Страница 15: ...em 4 Be sure to turn on the power to the target system When the MODE switch is set to 3 V power is supplied from the FPL2 so this step is not required b When the FPL2 is connected with the target syst...

Страница 16: ...the FPL2 so this step is not required 2 Disconnect the FPL2 FA from the target system Caution When the MODE switch is set to 3 V the FPL2 outputs power at all times Be sure to disconnect the FP4 conn...

Страница 17: ...included with the QB 78K0SKX1MINI package Execute the following steps to install the GUI software 1 When using Windows XP log on as the computer administrator When using Windows 2000 log on as the Ad...

Страница 18: ...lect a language to be used for installation English in this example then click OK Figure 3 2 Setup Language Selection 5 After selecting the language the window shown below is displayed Click Next to c...

Страница 19: ...ment carefully then click Yes if you accept the agreement You need to accept the agreement before using the PG FPL2 If you do not accept the agreement click No to terminate the installation of the sof...

Страница 20: ...lder When Browse is clicked The directory selection window is displayed Specify the path for the installation folder and then click OK Figure 3 6 Changing Installation Folder When Custom is clicked Se...

Страница 21: ...Manual U17307EJ2V0UM 21 8 Specify or select the program folder and then click Next Figure 3 8 Program Folder Selection 9 Confirm the current setting and then click Next Program installation starts Fi...

Страница 22: ...0 Completion of Installation 11 The following folders are created upon completion of installation Figure 3 11 Folder Configuration After Installation C Program File NECTool32 bin PRM doc PG FPL2 FPL2...

Страница 23: ...ation in Windows 98 Me See 3 2 1 Installation in Windows 98 Me Installation in Windows 2000 See 3 2 2 Installation in Windows 2000 Installation in Windows XP See 3 2 3 Installation in Windows XP 3 2 1...

Страница 24: ...ocation check box only and enter C Program Files NECTools32 bin PG FPL2 DRIVER in the address bar then click Next Figure 3 14 Search Location Specification Windows 98 Remark If the installation destin...

Страница 25: ...elow is displayed Confirm the contents and click Next Figure 3 15 Checking Driver to Be Installed Windows 98 5 When installation of the USB driver is complete the screen shown below appears Click Fini...

Страница 26: ...ne the FPL2 is recognized by Plug and Play and the wizard for finding new hardware is started Click Next Figure 3 17 Found New Hardware Wizard Windows 2000 2 The window below is displayed Check that S...

Страница 27: ...s 2000 4 Enter C Program Files NECTools32 bin PG FPL2 DRIVER in the address bar then click Next Figure 3 20 Address Specification Windows 2000 Remark If the installation destination folder is changed...

Страница 28: ...is searched and the window below is displayed Click Next Figure 3 21 Driver File Search Windows 2000 6 When installation of the USB driver is complete the screen shown below appears Click Finish to c...

Страница 29: ...ew hardware is started Check that Install from a list or specific is selected then click Next Figure 3 23 Found New Hardware Wizard Windows XP 2 Check that Search for the best driver in these location...

Страница 30: ...e USB driver is complete the screen shown below appears Click Finish to complete installation Figure 3 25 USB Driver Installation Completion Windows XP 1 Check that Search for the best driver in these...

Страница 31: ...evice Manager tab and check that the drivers are installed normally Figure 3 26 Device Manager Cautions 1 When using the FPL2 in Windows 98 Me do not select Refresh or Remove when communicating with t...

Страница 32: ...uninstallation program is contained in the CD ROM ID78K0S QB Disk included with the QB 78K0SKX1MINI package this program is used commonly as the installer Use the procedure below for driver uninstall...

Страница 33: ...age to be used for installation English in this example then click OK Figure 3 28 Setup Language Selection 5 Select Remove then click Next Figure 3 29 Program Modification 6 Click OK to start uninstal...

Страница 34: ...TWARE INSTALLATION User s Manual U17307EJ2V0UM 34 7 When uninstallation of the GUI software is complete the screen shown below appears Click Finish to complete uninstallation Figure 3 31 Completion of...

Страница 35: ...website in English http www necel com micro ods jpn index html website in Japanese The PRM file downloaded from the NEC Electronics website must be copied into the sub directory FPL2 EXE installation...

Страница 36: ...to the right of the action log window Displays programming parameter settings Status bar Displays status 4 3 Toolbar The toolbar contains buttons to start the most important procedures of the FPL2 Ta...

Страница 37: ...ogram the checksum is calculated and the result is displayed in the programmer parameter window Open button Selects a user program as a program to be written to the target device Cancel button Closes...

Страница 38: ...h memory is in progress the progress is displayed in the action log window indicating the operation of the programmer The Blank Check command that is executed before the Erase command is executed in a...

Страница 39: ...of the user program while it is being transmitted specify automatic execution of the CheckSum command after execution of the Program command using the Command options on the Advance tab of the Device...

Страница 40: ...Standard Tab This window shows all basic options that can be set in accordance with the user environment and target device OK button Saves the settings in the Standard and Advance tabs and closes the...

Страница 41: ...er file because the data is related to the guarantee of rewrite data The parameter file is protected by the checksum function If the checksum result indicates an error the FPL2 does not accept the par...

Страница 42: ...the communication rate of the communication channel 115 200 bps Remark Since the target device of the FPL2 is the 78K0S Kx1 the communication rate is fixed to 115 200 bps 3 Supply oscillator Select th...

Страница 43: ...is selected The entire flash memory area of the target device is subject to rewrite processing When Block is selected Specify the Block number range subject to rewrite processing by using Start End T...

Страница 44: ...area Figure 4 12 Device Setup Window Command Options Blank check before Erase check box If this check box is checked a blank check is performed before execution of the Erase and Autoprocedure EPV com...

Страница 45: ...invalid in the entire flash memory area of the target device At this time the warning message shown below is displayed Figure 4 14 Device Setup Window Disable Chip Erase Warning Caution Be aware that...

Страница 46: ...m Valid Invalid Invalid Note Since the Erase command is invalid the data that differs from the data already written in the flash memory cannot be written 4 4 3 View menu Clicking the View menu display...

Страница 47: ...4 4 Help menu Clicking the Help menu displays the following pull down menu Figure 4 16 Help Menu 1 About FPL2 command The About FPL2 command opens the following program entry window and indicates the...

Страница 48: ...indow Parameter file Displays information about a parameter file updated and read after Setup command execution Load file Selects information about a program file updated and selected after Load comma...

Страница 49: ...e 78F9222 PRM Clock setting 8 MHz Port UART ch0 115 200 bps MODE switch 3 V Operation mode Chip Write HEX FPL2_TEST HEX Option setting Blank check before Erase Checksum after Program 1 Installing the...

Страница 50: ...the Power LED is turned on 4 Check that the power to the target system is not turned on then connect the FPL2 with the target system via the target cable 5 Start the GUI software Figure 5 1 GUI Softwa...

Страница 51: ...this case select the parameter file for the PD78F9222 then click Open Figure 5 3 Parameter File Selection 4 Set the items in the Operation Mode field so that the FPL2 is adjusted to the user programm...

Страница 52: ...User s Manual U17307EJ2V0UM 52 5 Switch to the Advance tab Figure 5 5 Device Setup Window Advance Tab Command options Blank check before Erase Checked Security flag after Program Not checked Checksum...

Страница 53: ...e following screen is displayed Figure 5 6 Completion of Parameter Setting 6 Selecting a user program 1 Select File Load 2 Select a program file to be written to the target device then click Open Figu...

Страница 54: ...Autoprocedure EPV command and checksum is performed after the execution of the Autoprocedure EPV command Figure 5 8 After EPV Execution 8 Terminating the system 1 If other devices need not be program...

Страница 55: ...Supply Connector 1 5 Table 6 1 Pin Assignment of USB Connector USB Connector FPL2 Signal Name 1 5 V 2 DM 3 DP 4 N C 5 GND Connector part number UX60A MB 5ST made by Hirose Electric Caution The recomm...

Страница 56: ...get Cable Connector FPL2 Figure 6 2 Pin Layout of Target Connector Table 6 2 Pin Assignment of Target Cable Connector Target Connector FPL2 Signal Name 1 GND 2 RESET 3 VDD 4 GND 5 DGCLK 6 GND 7 DGDATA...

Страница 57: ...used with the target cable is FFC 5AMEP1 made by Honda Tsushin Kogyo 6 4 Target Connector FPL2 FA Figure 6 4 External View of Target Connector Table 6 4 Pin Assignment of Target Connector Target Conne...

Страница 58: ...Connector FP4 Connector FPL2 FA Signal Name Inside Parentheses FP4 Signal Name 1 GND 2 RESET 3 DGDATA RXD 4 VDD 5 DGDATA TXD 9 DGCLK CLKOUT 14 DGCLK FLMD0 6 7 8 10 11 12 13 15 16 N C Connector part nu...

Страница 59: ...le 6 6 List of Interface Connections Signal Name 1 Target Cable Connector 2 Tip of Target Cable 3 Target Connector 4 FP4 Connector GND 1 4 6 8 0 GND 0 1 RESET 2 1 RESET 1 2 VDD 3 2 VDD 2 4 DGCLK 5 3 D...

Страница 60: ...ET signal of the FPL2 Do not generate RESET while the FPL2 is connected This must be especially noted in a system that uses an external watchdog timer RESET Connect the RESET signal of the FPL2 at a p...

Страница 61: ...When the CPU port used by the FPL2 is also connected to the input of an external device and if that device malfunctions disconnect the external device or make it output high impedance Example Adverse...

Страница 62: ...onnector Microcontroller IC GND RESET DGDATA VDD DGDATA N C N C N C DGCLK N C N C N C N C DGCLK N C N C X1 X2 VDD VSS RESET 7616 5002SC 1 2 3 4 5 6 7 8 9 10 11 12 13 14 15 16 R R Cautions 1 The FPL2 g...

Страница 63: ...User s Manual U17307EJ2V0UM 63 CHAPTER 8 CIRCUIT DIAGRAMS Figure 8 1 Circuit Diagram of FPL2 FA Main Unit...

Страница 64: ...CHAPTER 8 CIRCUIT DIAGRAMS User s Manual U17307EJ2V0UM 64 Figure 8 2 Target Interface Block...

Страница 65: ...or is prefixed Cause The USB connector may not be inserted normally into the USB port of the personal computer Action Check that the USB connector is inserted fully into the USB port of the personal c...

Страница 66: ...ay not be installed correctly Action Check if NEC Electronics IE PC Interface PG FPL2 is installed correctly by referring to 3 2 Driver Installation Cause There may be an incorrect connection between...

Страница 67: ...during erase operation In accordance with the specifications of the FPL2 the Status LED may not blink during erase operation To confirm the erasure status check the following message in the action lo...

Страница 68: ...VDD_USB 500 mA Current consumption of the main unit 175 mA 3 V output Note 2 9 V 3 1 V 3 4 V Target VDD voltage 2 7 V 5 5 V VDD output current 200 mA Note The 3 V output of the FPL2 depends on the US...

Страница 69: ...APPENDIX A PRODUCT SPECIFICATIONS User s Manual U17307EJ2V0UM 69 A 2 Dimensions 1 FPL2 Figure A 1 Dimensions of FPL2 Main Unit 55 30 12 R3 Unit mm...

Страница 70: ...APPENDIX A PRODUCT SPECIFICATIONS User s Manual U17307EJ2V0UM 70 2 FPL2 FA Figure A 2 Dimensions of FPL2 FA Main Unit 14 20 25 12 5 12 6 32 20 34 Unit mm...

Страница 71: ...3 Target cable Figure A 3 Dimensions of Target Cable Figure A 4 Dimensions of Tip of Target Cable 1 6 6 5 3 2 8 1 5 A A B 12 3 Max 0 2 1 65 0 5 Min 0 4 0 7 Pin Connection 2 8 Unit mm Connector part n...

Страница 72: ...nd software is replaced free of charge in the case of an initial failure only No warranty is provided for failures other than initial failures B 2 Support No support is provided for this product Visit...

Страница 73: ...X C REVISION HISTORY The revision history is shown below Applicable Chapter refers to the chapter in each version Version Revised Points Applicable Chapter Second Addition of APPENDIX B WARRANTY AND S...

Отзывы: